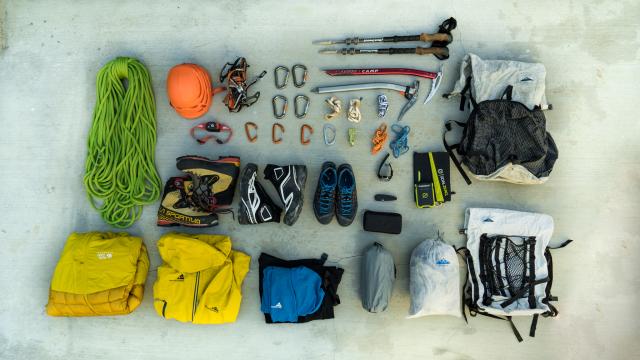
Ready to geek out on outdoors gear? Combining climbing, high altitudes, camping and extreme winter weather, mountaineering is probably the most gear-intensive sport there is. And here’s your ultimate guide to the best gear for it.
Over the last year or so, I’ve climbed mountains in the Sierra, Cascades, Canadian Rockies, Iceland, Norway and Nepal. Throughout that, I’ve learned what gear works for me and what doesn’t. Now, I’m travelling to Nepal again for two months, spending my time between rebuilding a village destroyed in the earthquake, but also accomplishing a few peaks while I’m there.
This is the gear that works for me and that I’m taking with me on the trip as a result; it’s the stuff I trust. One common theme you’ll notice throughout is a dedication to the lightest weights possible, while still retaining uncompromised function. Lighter gear is typically more expensive gear, and it can be hard to find justification for shedding a few grams on a single item. But, genuinely light loads are achieved systemically; through weight savings across every item. And, while costly, they also maximise my performance potential and endurance on the mountain.
Some of the gear mentioned below is more friendly to Australian buyers than others, but for the most part prices are converted and you should assume international shipping fees will be added.
This is what I do with my life. I don’t have a house or a car, I climb mountains.
Not sure what mountaineering is? Check out my account of the American Alpine Institute’s Alpine Mountaineering Technical Leadership course — where I trained to become a mountaineer.
Clothing
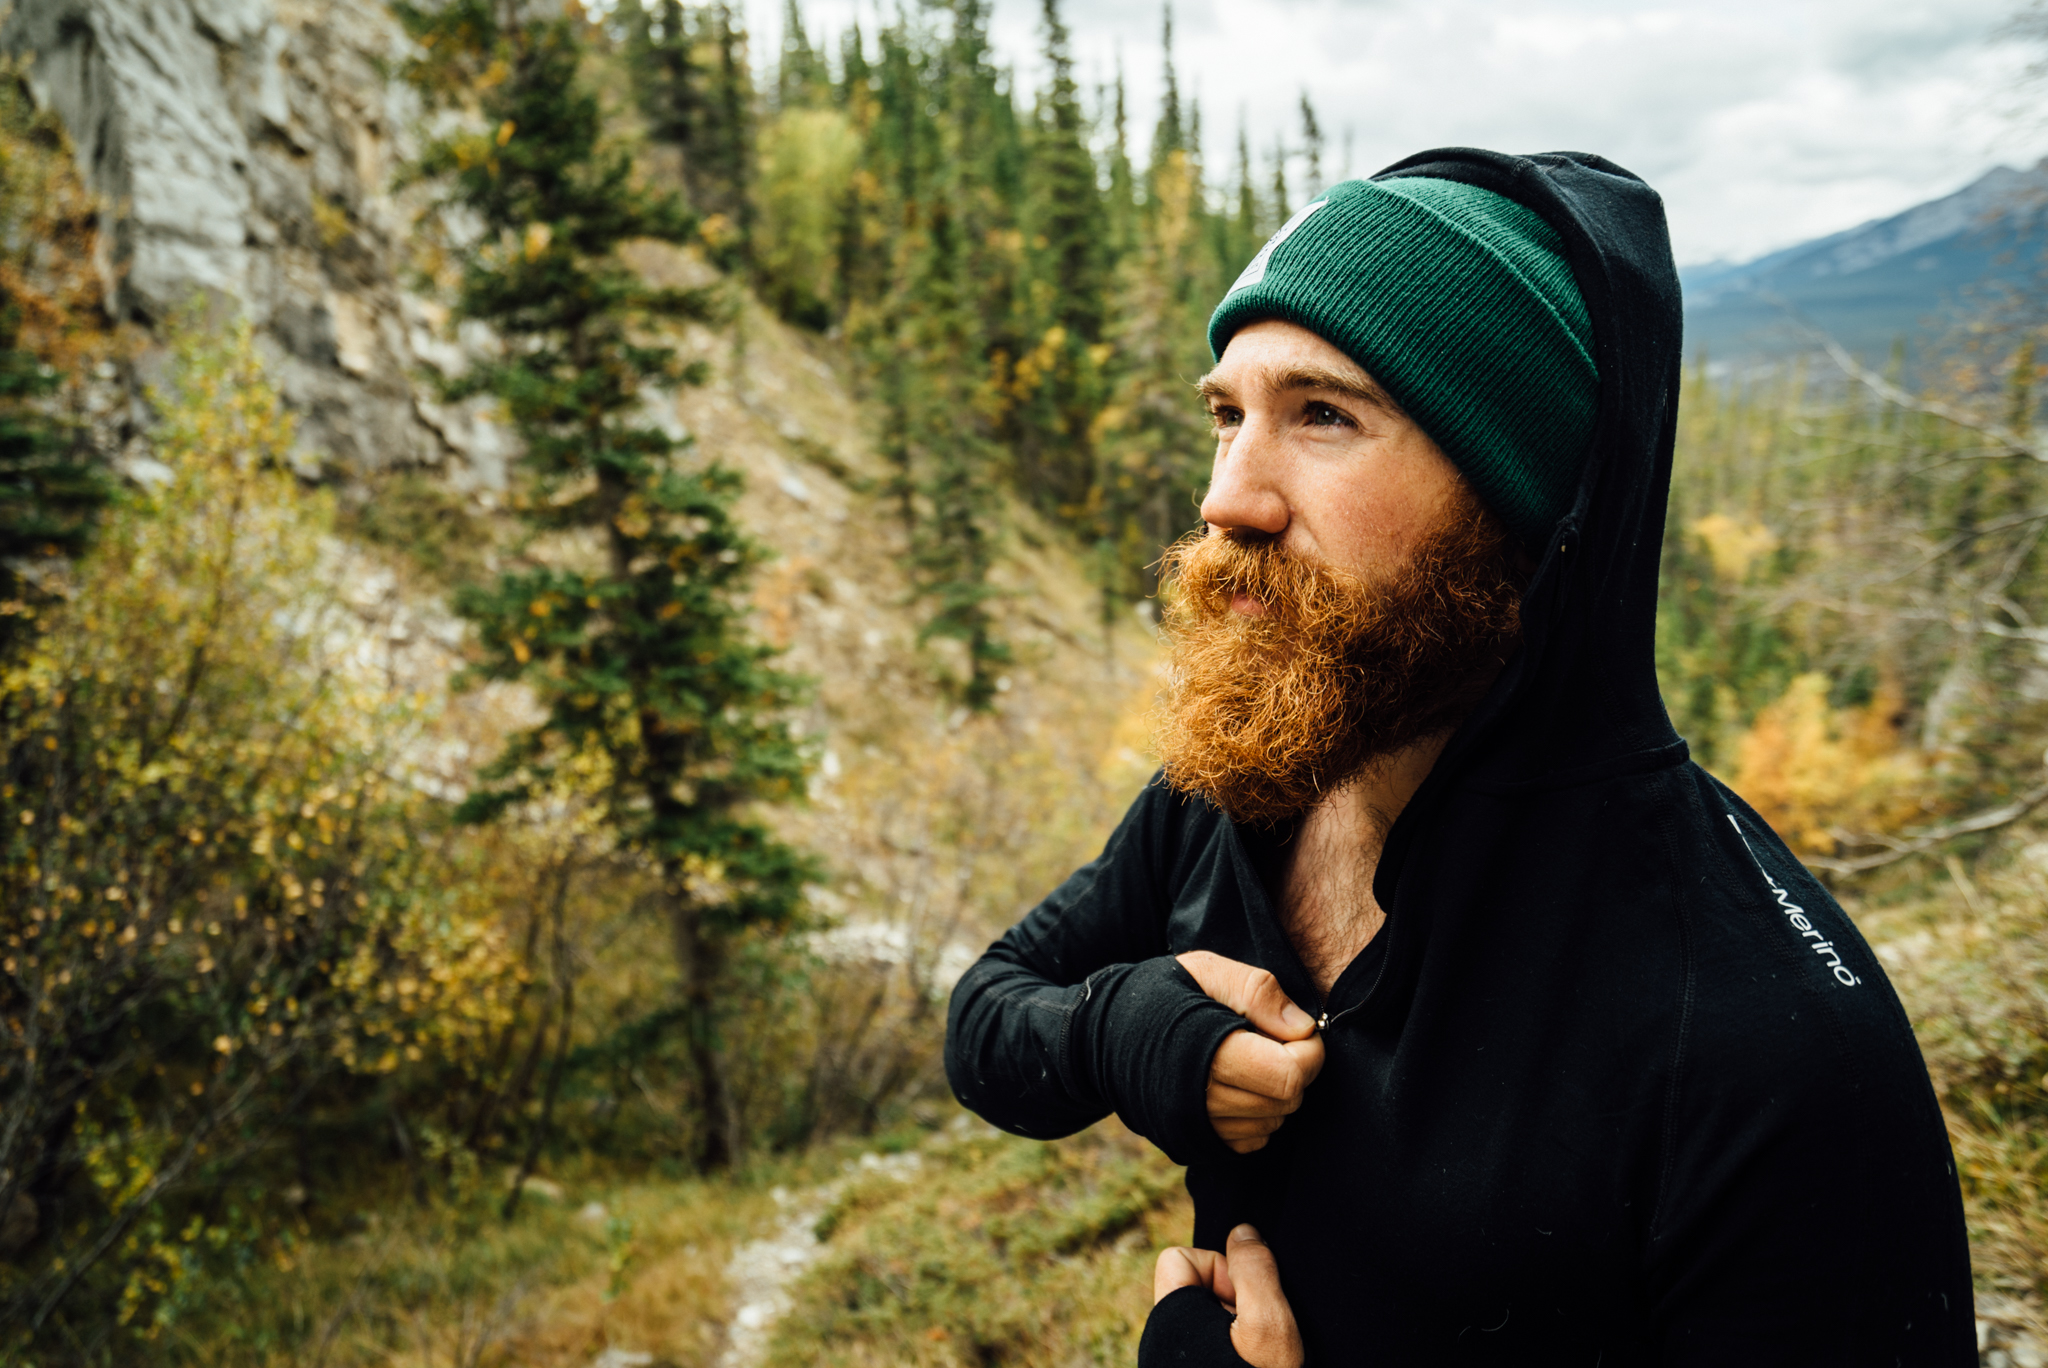
Photo: Gilberto Gil
Base Layers: I/O Merino Chaser Hoody ($125)
Every outdoor clothing system begins with base layers; if climbing in cold weather, Merino wool base layers will provide lightweight, high-performance warmth. Merino wool is an ideal material for base layers because it is warm and soft, wicks moisture, and is naturally odor-free.
The advantages of Merino Wool are embodied in the midweight (265gsm) I/O Merino Chaser Hoody. The Chaser’s middle weight is great for temperature regulation in colder conditions; its hood provides additional insulation for the neck and head. It features a 3/4 zip for easy on/off, while thumb holes keep the sleeves in place when adding other layers. For base layer bottoms, check out their Chaser Leggings ($94.50). Like what you see? The coupon code “CBJ” will save you 10% off of your order.
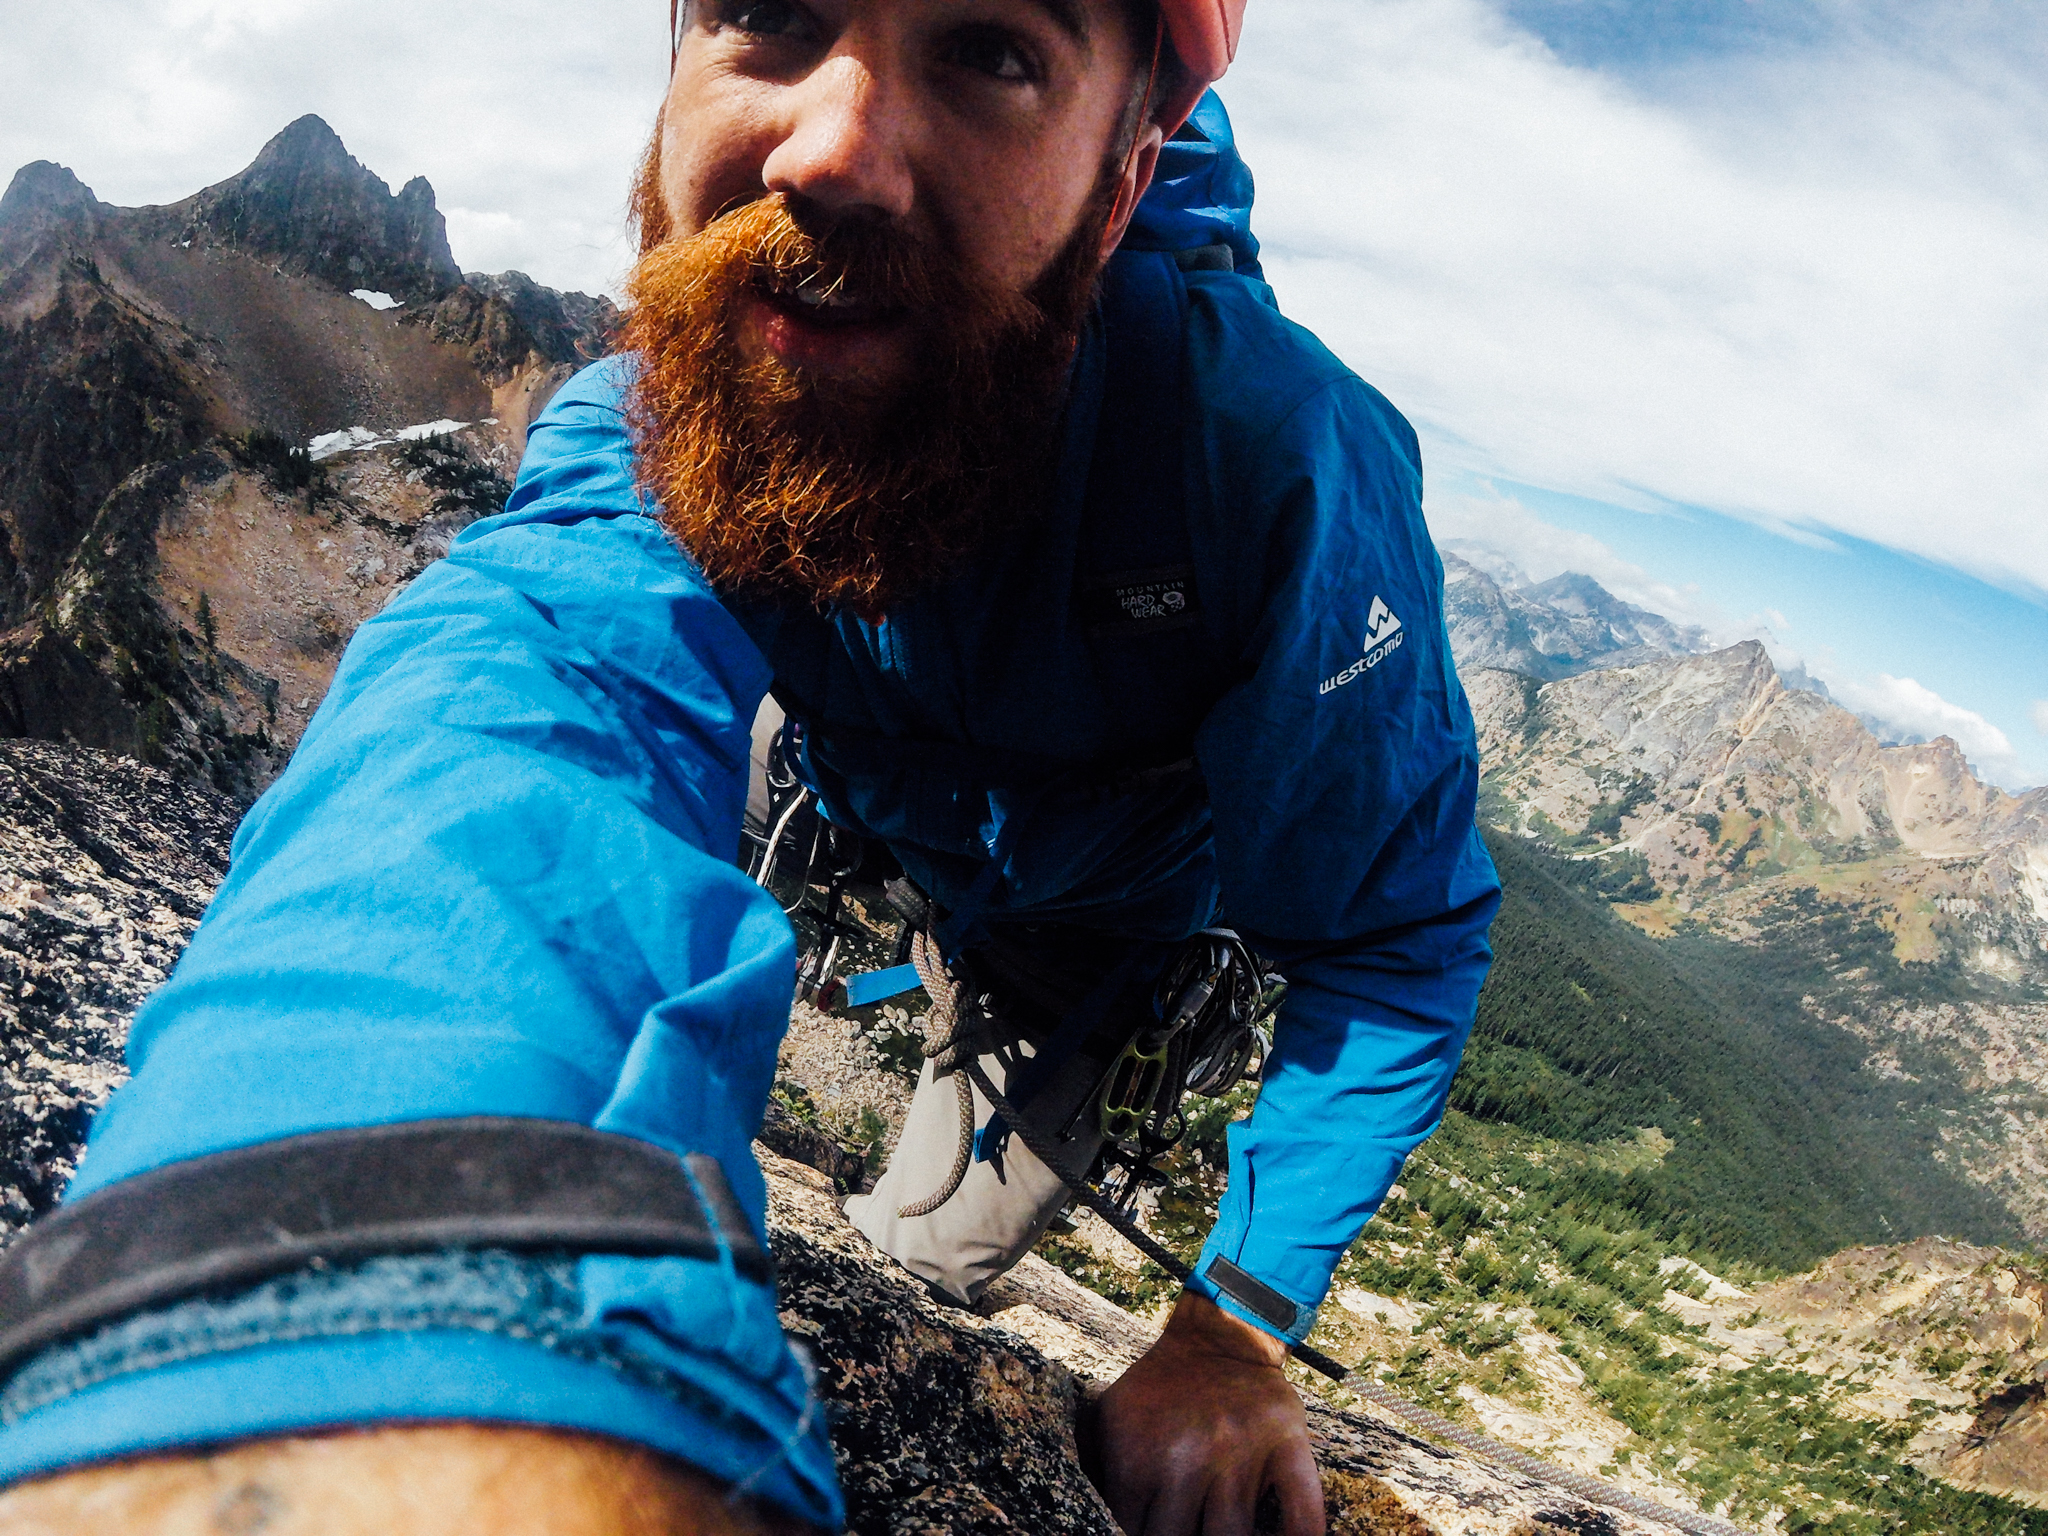
Softshell Jacket: Westcomb Nomad ($234)
A softshell jacket is a climber’s main “action layer.” It should be wind, water, and abrasion resistant — allowing it to be used in a variety of situations and climates, depending on what you wear underneath. Over a hardshell, a jacket like this one breathes far, far better, keeping you dryer in most weather conditions.
The Nomad Jacket from Westcomb (a Vancouver-based apparel brand that does all of its design and manufacturing in North America) is simple, durable and, at just 170 grams, is incredibly light for a softshell jacket. It features velcro cuffs for adjustability, two handwarmer pockets, and a chest pocket (which doubles as a stowable pouch that can be clipped to a harness). Thanks to its use of moisture-wicking Pertex Equilibrium fabric, it’s been keeping me warm and dry on all of my climbs for the last few months.
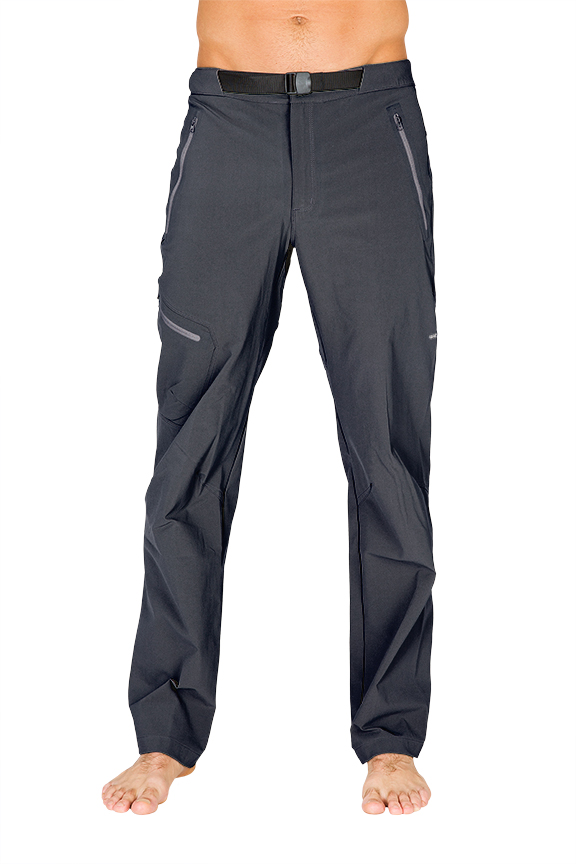
Softshell Pants: Westcomb Recon Cargo ($330)
Softshell pants should have the same properties as a softshell jacket because they fill the same role for a climber’s lower half. Chances are, you’ll never take ’em off during a climb (though you may layer insulative or rain shell pants over them).
The Westcomb Recon Cargo pants are made from Schoeller Dynamic which is lightweight, dexterous, and water-resistant but breathable, while remaining extremely durable and abrasion resistant. They feature a built-in belt, felt-lined handwarmer pockets, and a thigh pocket. Their stretchy fabric offers tons of mobility and at only 396 grams they won’t slow you down — yet they’re tough enough to tackle the most rugged alpine environments. Their cut is a little baggy through the thighs for my taste, most will appreciate their generous fit.

Photo: Gilberto Gil
Light Insulating Layer: Mountain Hardwear Thermostatic Hooded Jacket ($300)
Light insulating layers have a pretty self-explanatory function: they provide light insulation. My first climbing guide, Ian McEleney, taught me “Be bold, start cold,” and it’s a mantra I’ve lived by ever since — wearing only a base layer and soft shell jacket to start most of my climbs.
However, if your body runs inherently cold, you might want to kick off your alpine starts wearing a light insulating layer. These can take form in a variety of styles and materials — such as fleece or a down or synthetic puffy. The lighter this layer is, the better. Most jackets in this category can be found with or without a hood, though hoods provide extra insulation for the head and neck.
The Mountain Hardwear Thermostatic Hooded Jacket is a lightweight (283 grams) wind and water-resistant puffy that is stuffed with 60g of Thermal Q Elite — a synthetic insulation that mimics the lofting structure of down. Because of its unique structure, Thermal Q Elite provides an incredible warmth-to-weight ratio for synthetic insulation.
Why choose synthetic insulation over down? Synthetics do a great job of retaining their insulative properties while climbing in wet environments like the North Cascades — which is where I tested this piece out. Anticipate spending your time in dryer climates? You can’t go wrong with the Ghost Whisperer Hooded Down Jacket ($482).
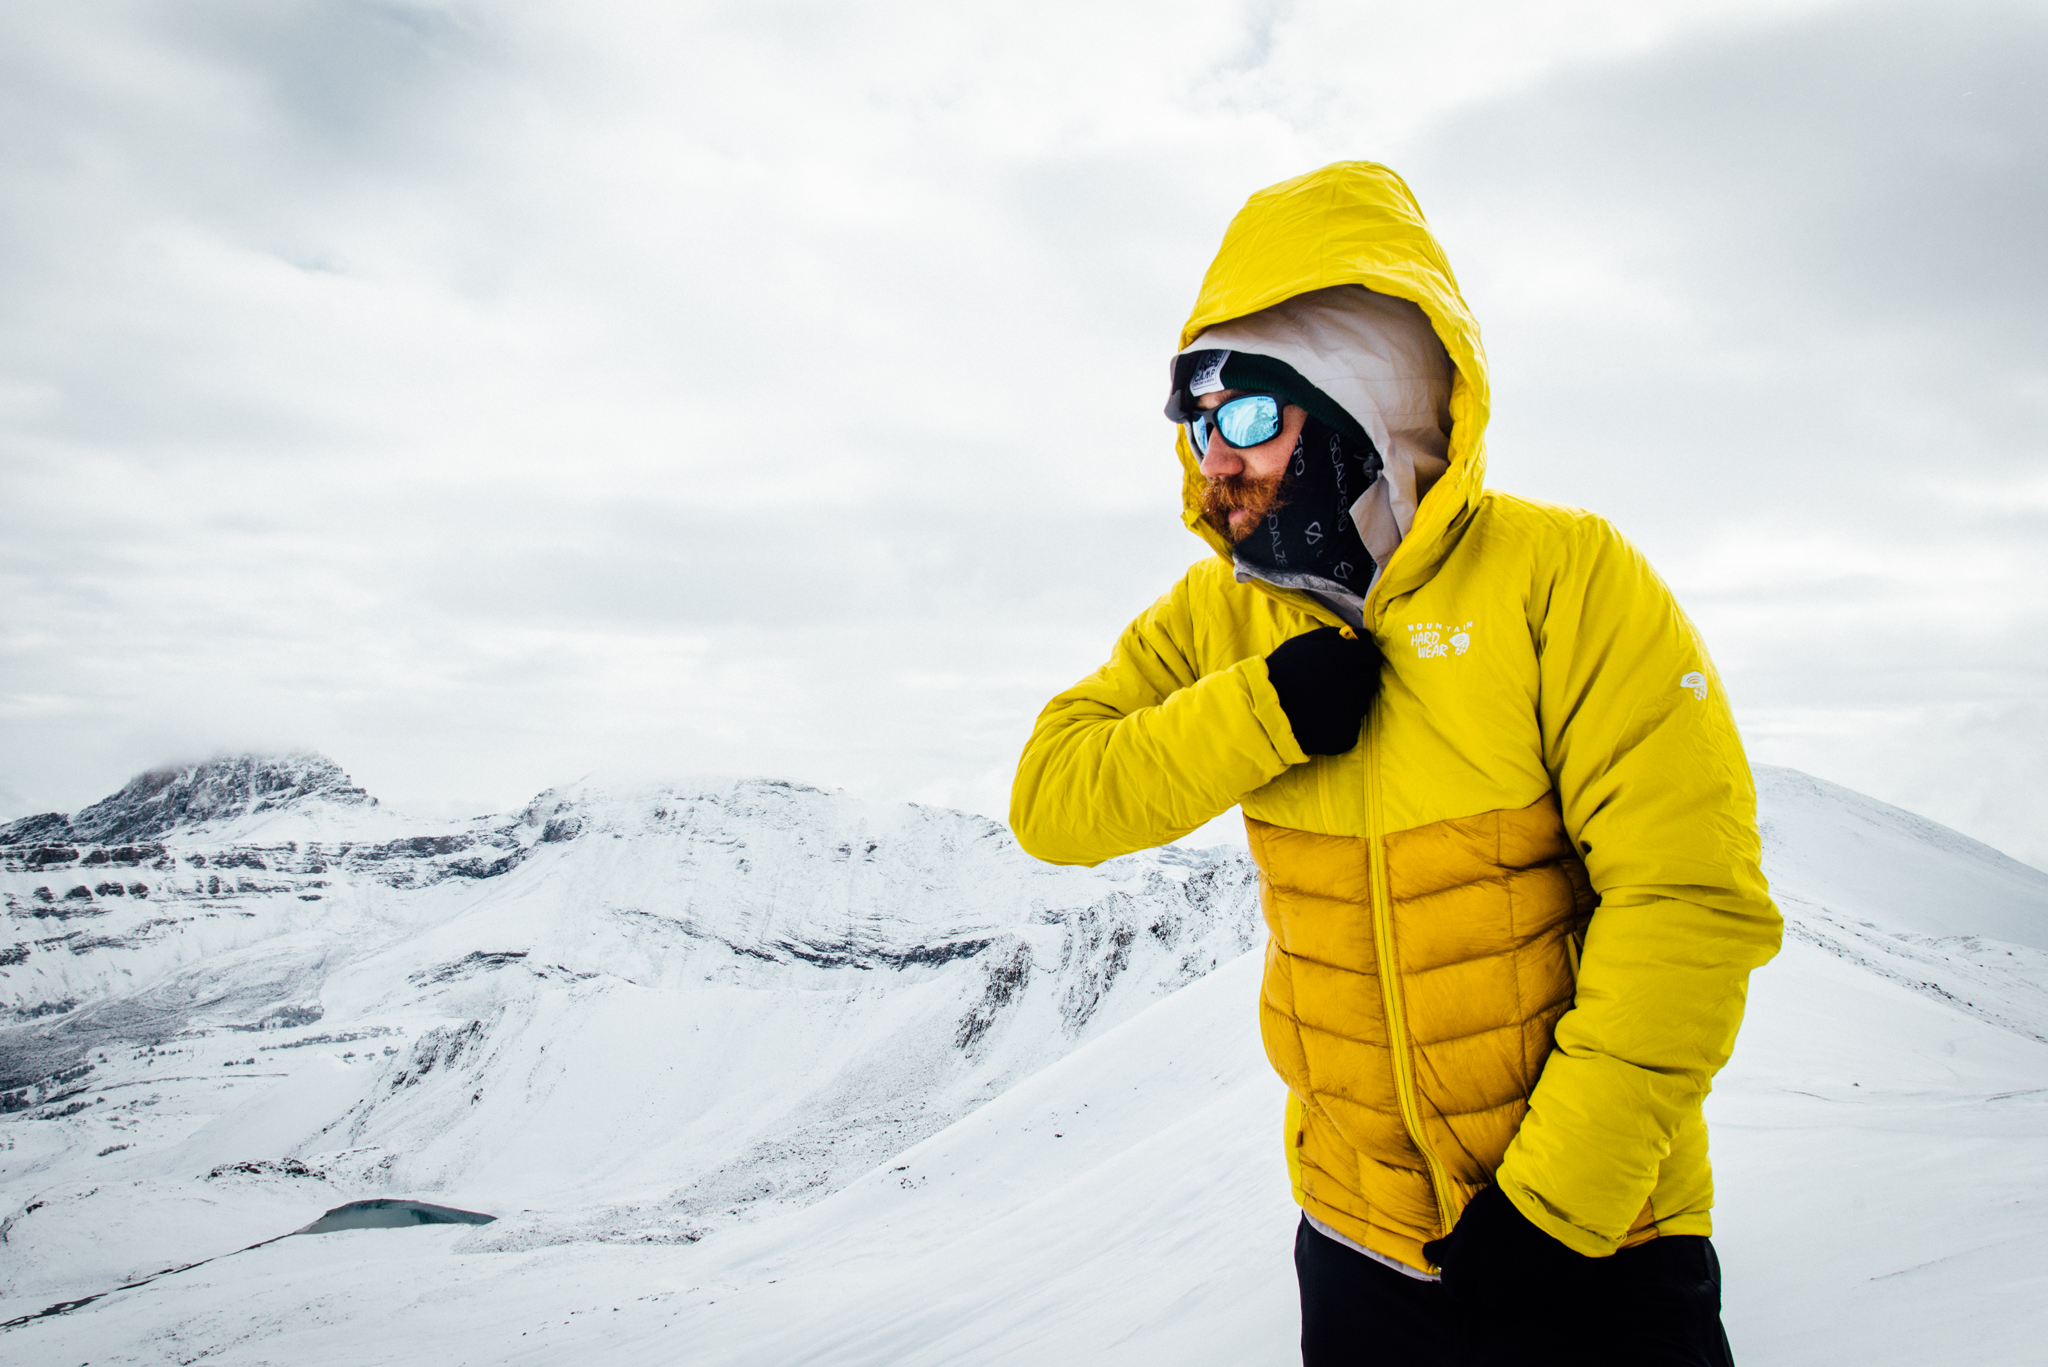
Photo: Gilberto Gil
Heavy Insulating Layer: Mountain Hardwear Supercharger Hooded Down Jacket ($413)
A heavy insulating layer should provide maximum insulation for the coldest parts of your climb. These instances will most likely occur while belaying, summiting — or any other time that the temperatures drop enough to make even the most aerobic sections unbearably cold.
The Mountain Hardwear Supercharger Hooded Down Jacket is a staple piece from the brand’s latest Ueli Steck collaboration (available Spring 2016.) A softshell material is used in the jacket’s sleeves and chest providing water and abrasion resistance, while the jacket’s lower shell is made from lightweight Ghost Whisperer fabric. The jacket is stuffed with 800-fill Q-Shield water-resistant down, and Thermal Q Elite in areas more prone to moisture. Internal mesh pockets keep batteries, bars, or water bottles warm while a helmet compatible hood provides extra protection. The result is a 453 grams jacket that provides expedition level warmth.
The Supercharger HDJ has quickly become my favourite insulating layer thanks to its warmth-to-weight ratio and innovative use of materials and styling.

Photo: Gilberto Gil
Hardshell Jacket: Westcomb Apoc ($689)
The role of a hardshell jacket is to provide bombproof protection in the worst conditions — like wind storms, rain storms, and snowstorms encountered in an alpine environment — while remaining active. A hardshell jacket should be fully waterproof/breathable, windproof, and abrasion-resistant.
Most hardshell jackets suitable for climbing will be constructed from Gore-Tex, Polartec NeoShell, or other brand-proprietary w/b fabrics. A helmet compatible hood (an adjustable hood that fits over a helmet) is a must, while other features like harness-compatible pockets (pockets that can still be accessed while wearing a climbing harness) and pit zips are good to have. For a more in-depth look at rain jackets, check out Wes’s explainer.
Our favourite w/b hardshell is the Westcomb Apoc. The Apoc is constructed from Polartec NeoShell — a fabric that offers far greater breathability than Gore-Tex, making it ideal for extremely aerobic mountain pursuits. With its velour-lined collar, adjustable hood, full-length pit zips, harness-compatible pockets, and laminated internal media pocket — the Apoc is fully-featured and ready to take on the toughest climbs. It’s been keeping me warm and dry in the North Cascades and Canadian Rockies; I’m excited to put it to the test this month in the Himalayas.

Gloves: Mountain Hardwear Hydra Pro OutDry ($180)
Alpine gloves should be insulated enough to keep your hands warm when the temperature drops, yet dexterous enough to work with ropes, knots, and hardware.
The Mountain Hardwear Hydra Pro do just that, with the added benefit of being waterproof, thanks to their use of OutDry — a waterproof-breathable membrane laminated to the outer shell. The Hydra Pro are insulated with Thermal Q Elite, which mimics the structure of down. Pre-curved, articulated fingers provide comfort, while goatskin palms provide durability. An accessory loop allows them to be clipped to your harness when not in use. They have kept my hands dry for hours in near-freezing rain, but they don’t have a ton of insulation in the palms and fingers, making them less than ideal for climbing in extremely cold conditions.
Approach Shoes: Adidas Outdoor Terrex Solo ($138)
Approach shoes can be best described as a hybrid of climbing and hiking shoes. They perform great on the trail thanks to styles and fit adopted from hiking shoes, while sticky soles, rubberised toes, and reinforced insoles allow them to be comfortably used for easy sections of climbing.
The Adidas Outdoor Terrex Solo features Five Ten’s super sticky, proprietary Stealth rubber — while a midsole plate provides impact protection and forefoot stability. Those soles are paired with a lightweight, breathable upper, making for the perfect hybrid shoe. Their shallow lug pattern lends itself better to traversing slabby granite than rugged trails — making them the perfect shoe for high-alpine endeavours like the Sierra High Route.
Camping
Photo: Gilberto Gil
Large Pack: Hyperlite Mountain Gear Southwest 4400 ($592)
The size of your pack will largely be dependent upon weather conditions for your climb. Colder weather requires larger sleeping bags, warmer, bulkier clothes, and heavier boots. If the forecast calls for bluebird skies and warmer temps, less capacity is needed.
For most multi-day climbs — even in winter — a 70L pack will suffice. Why not go with something larger? As the old adage goes: “the larger your space is, the more stuff you’ll fill it with.” That rings especially true when the load is being carried on your back.
My go-to pack for most multi-day adventures is the Hyperlite Mountain Gear Southwest 4400 (70L). It’s handmade in Maine from lightweight, durable, and waterproof cuben fibre (the white stuff used for the fabrication of high-performance sails). It’s sturdy enough to carry the heavy loads required for mountaineering, but thanks to its use of lightweight cuben fibre it doesn’t suffer the same weight penalty found in other equally large packs, making it a winner in my book.
Photo: Gilberto Gil
Climbing Pack: Hyperlite Mountain Gear Dyneema Summit Pack ($413)
A smaller climbing pack is useful for done-in-a-day trips. It should be large enough to hold climbing gear, extra layers, and snacks, but small enough to not get in the way when shimmying up a rock chimney.
The Dyneema Summit Pack (30L) is part of HMG’s newest line of packs. What makes it so special? And why is it so damned expensive? For starters, the pack is constructed from lightweight, waterproof cuben fibre. Then, HMG wrapped the entire pack in Dyneema. But what is Dyneema?
Dyneema is composed from lightweight thermoplastic strands that have a strength-to-weight ratio up to fifteen times greater than high-strength steels; up to 40% greater than Kevlar. The strands are highly resistant to abrasion and chemical corrosion — and they have the highest impact rating of any thermoplastic known to man. To put it simply, Dyneema is tough; the Summit Pack’s liberal use of the material means that it’s ready for anything. Bring on the rock.
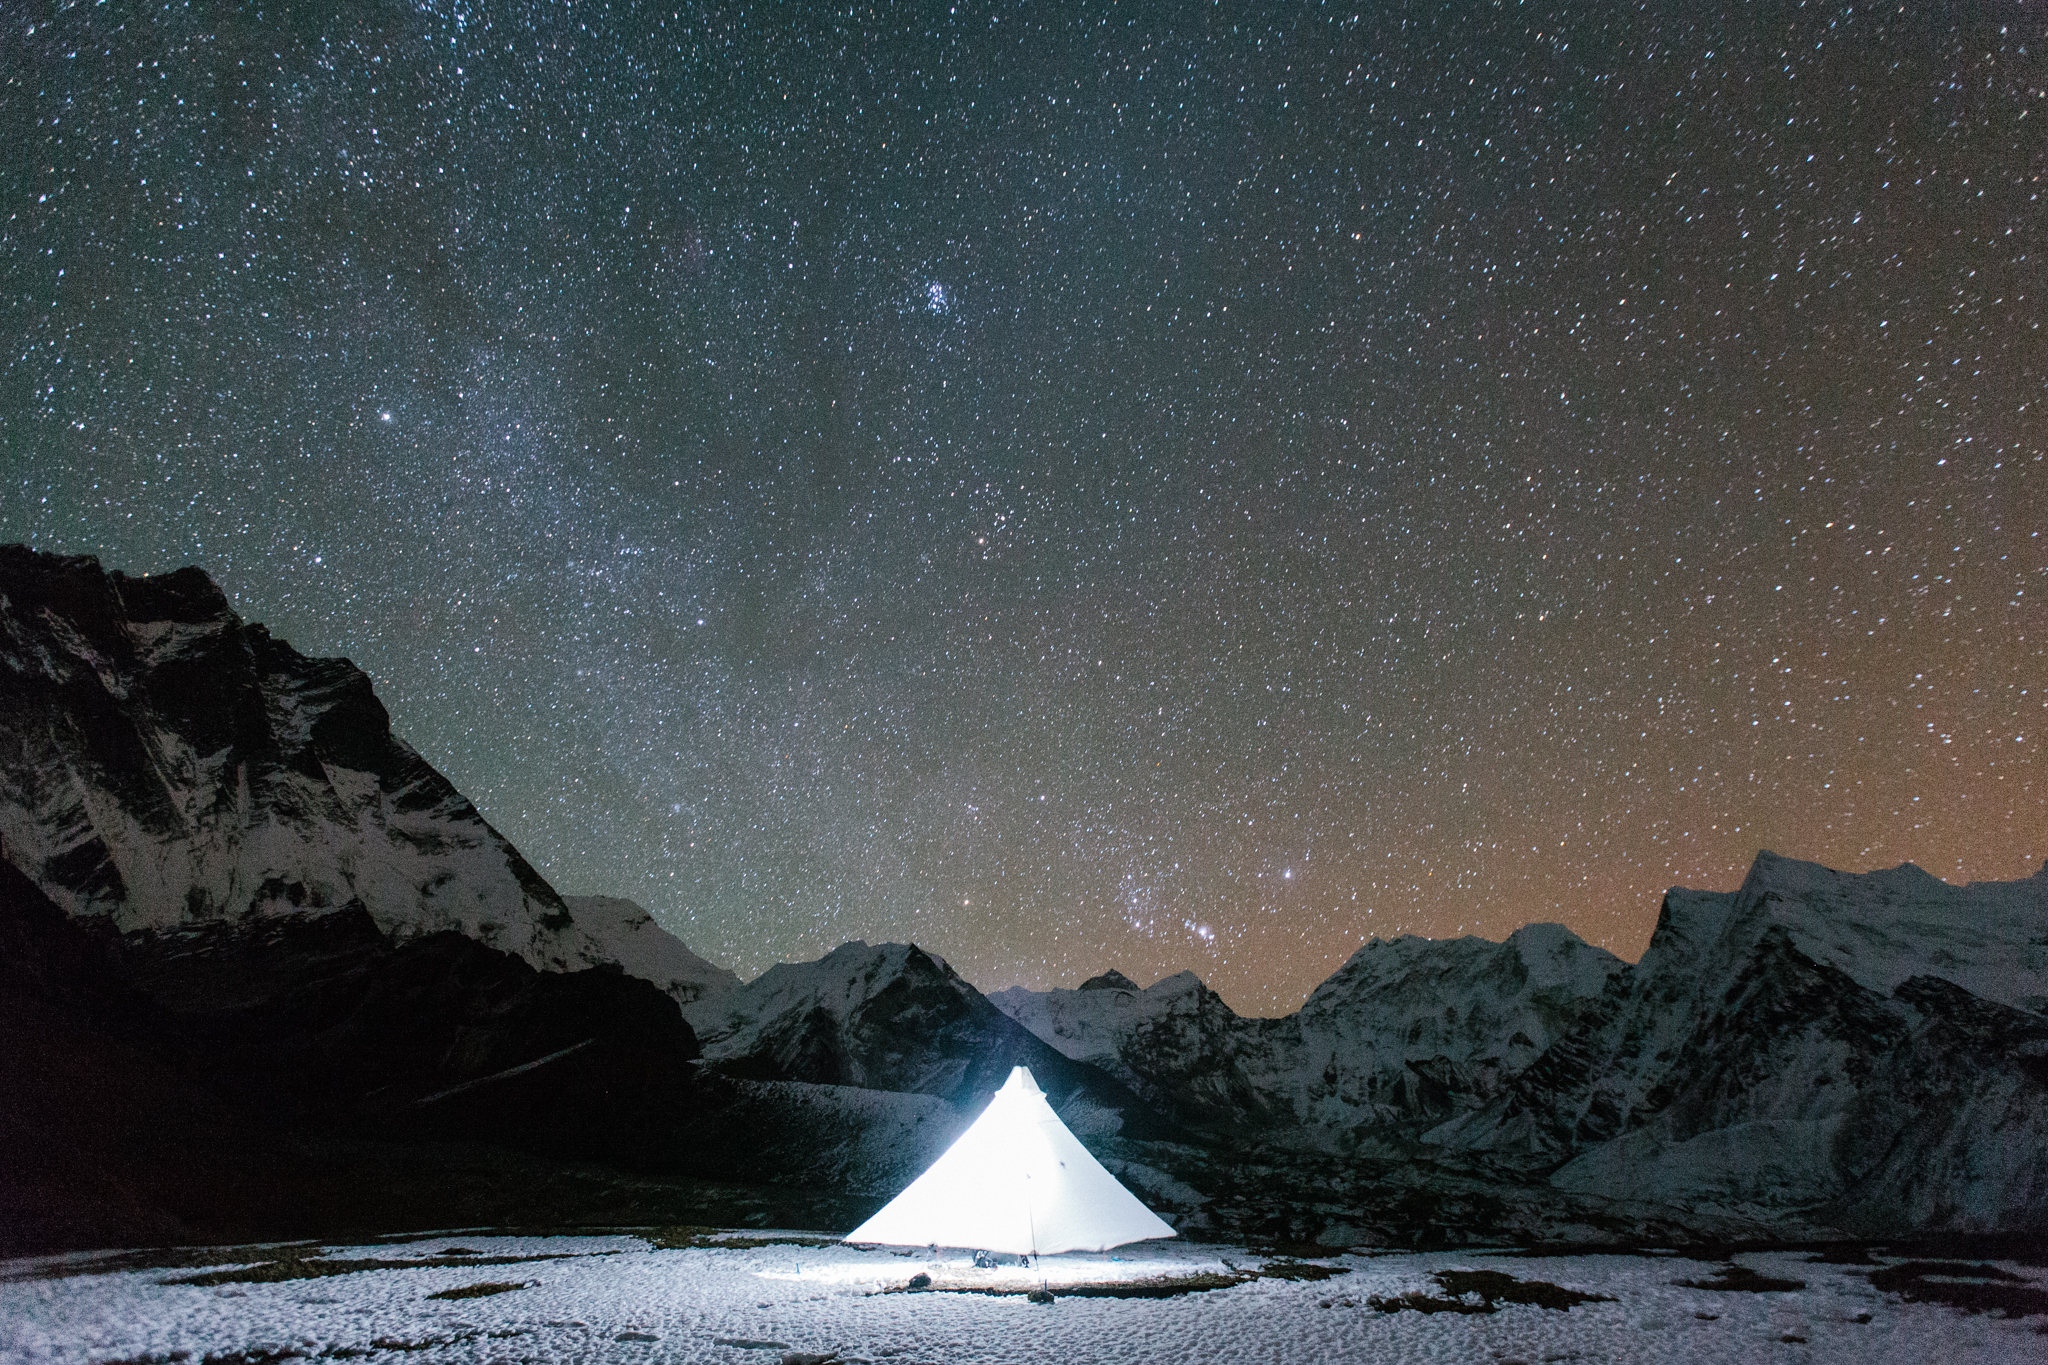
Shelter: Hyperlite Mountain Gear UltaMid 2 ($934)
A shelter used for climbing should be able to withstand high winds and snow loading (the downward force exerted on a structure by accumulated snow) — acting as safe haven for the climbers inside.
At just 510 grams, the non-freestanding cuben fibre Hyperlite Mountain Gear UltaMid 2 offers bomber weather protection while remaining lighter and more spacious than any ultralight tent available. How does it achieve such a great strength-to-weight ratio? To start, it doesn’t use tent poles — instead relying on a single center support (usually in the form of trekking poles or skis — which climbers already carry.) It’s pyramidal shape is inherently strong; its use of cuben fibre only compliments its strength and structure.
All of those elements work together to create a shelter that is equally at home in a blizzard or on a bluebird summer day — while remaining incredibly lightweight. I’ve used the UltaMid all over the world in every type of weather condition imaginable; it never disappoints.
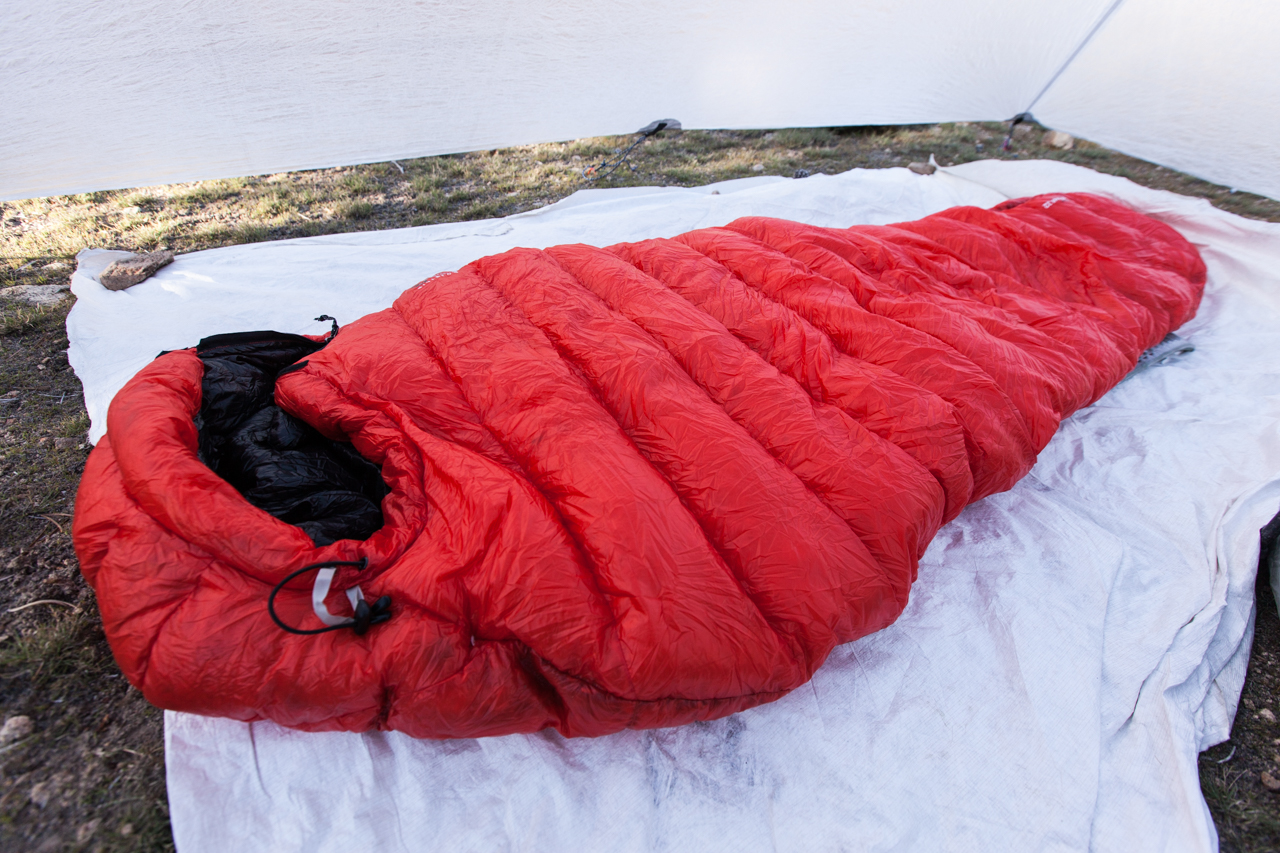
Sleeping Bag: Mountain Hardwear Mtn. Speed 32 ($660)
Wes has already written an in-depth guide to choosing a sleeping bag. It’s super informative and contains pretty much all the information about sleeping bags that you need to know, but here are a couple of key points: down is king. And temperature ratings aren’t that accurate.
The Mountain Hardwear Mtn. Speed 32 is my go-to bag for all but the most burly winter adventures. Thanks to its use of Ghost Whisperer fabric, a half-length zipper, and Q-Shield 800-fill hydrophobic down, it weighs barely a pound — offering an unbelievable warmth-to-weight ratio.
How do I get away with using a 32-degree bag almost year-round? During warm summer nights, simply lower the half-zip to vent. Camping in cold weather? Wear warm clothes and a down jacket to bed. By using that last technique, I’ve slept in temperatures well-below its comfort rating. The bag’s only downfalls are its crappy zipper (it frequently gets caught) and hefty pricetag.
Photo: Daniel Bruce Lee
Sleeping Pad: Therm-A-Rest NeoAir XTherm ($275)
Wes has already written a super comprehensive guide to sleeping pads. They key takeaways from it in regards to climbing relate to R-Value. Most summer sleeping pads provide a rating somewhere in the ballpark of 3, but a pad with a higher R-Value will provide more insulation from the cold, heat-sucking ground often found in the mountains.
Looking for the maximum R-Value, comfort, and warmth-to-weight ratio? Look no further than the Therm-A-Rest NeoAir XTherm. The 425 grams (regular length) cold weather king-of-pads offers an exceptional R-Value of 5.7 making it ideal for even the burliest winter conditions.
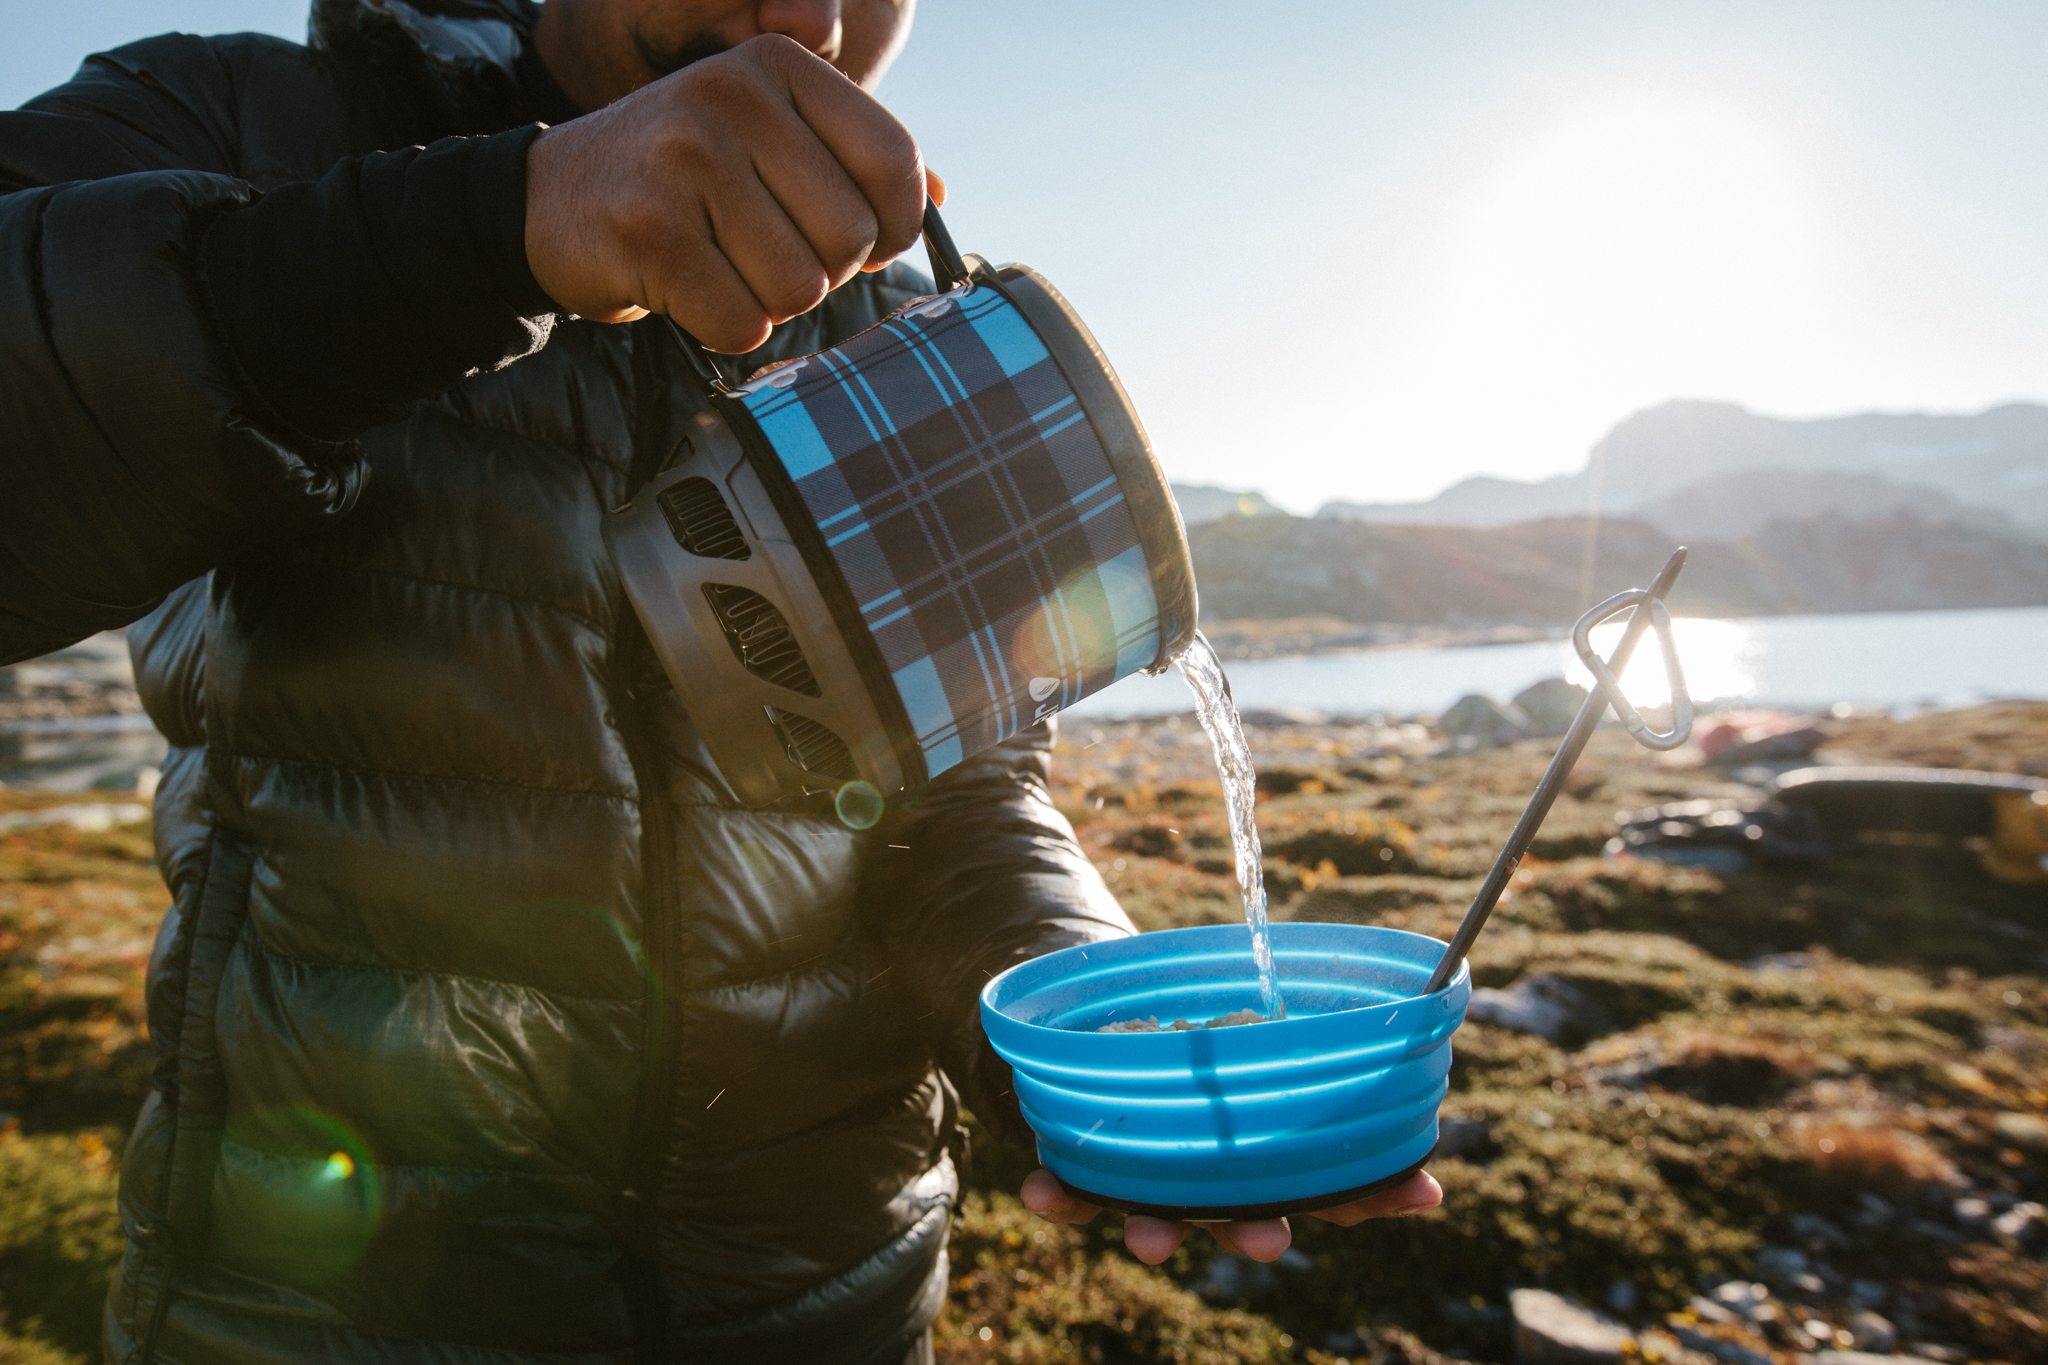
Stove: JetBoil MiniMo ($179)
A stove for climbing trips should be able to perform well even in adverse weather conditions — while remaining lightweight and easy to use. Small canister stoves are lightweight and easy to use, but don’t perform well in windy or cold conditions. Heavy-duty liquid fuel stoves are versatile and perform great in winter conditions, but they weigh a lot and are complicated to use. Personal Cooking Systems offer a happy medium.
The one pound JetBoil MiniMo uses canister fuel to boil two cups of water in just two minutes and fifteen seconds; it has a simmer control for when more regulated heat is needed. Its pot will hold more than a quart of water if cooking for two. When finished, the modular system (which includes a bowl/measuring cup, lid with pour spout, and pot stabilizer) packs down inside of itself. Just cooking for yourself? The JetBoil Flash Lite ($US99) ticks off the scale at just 311 grams.
Climbing
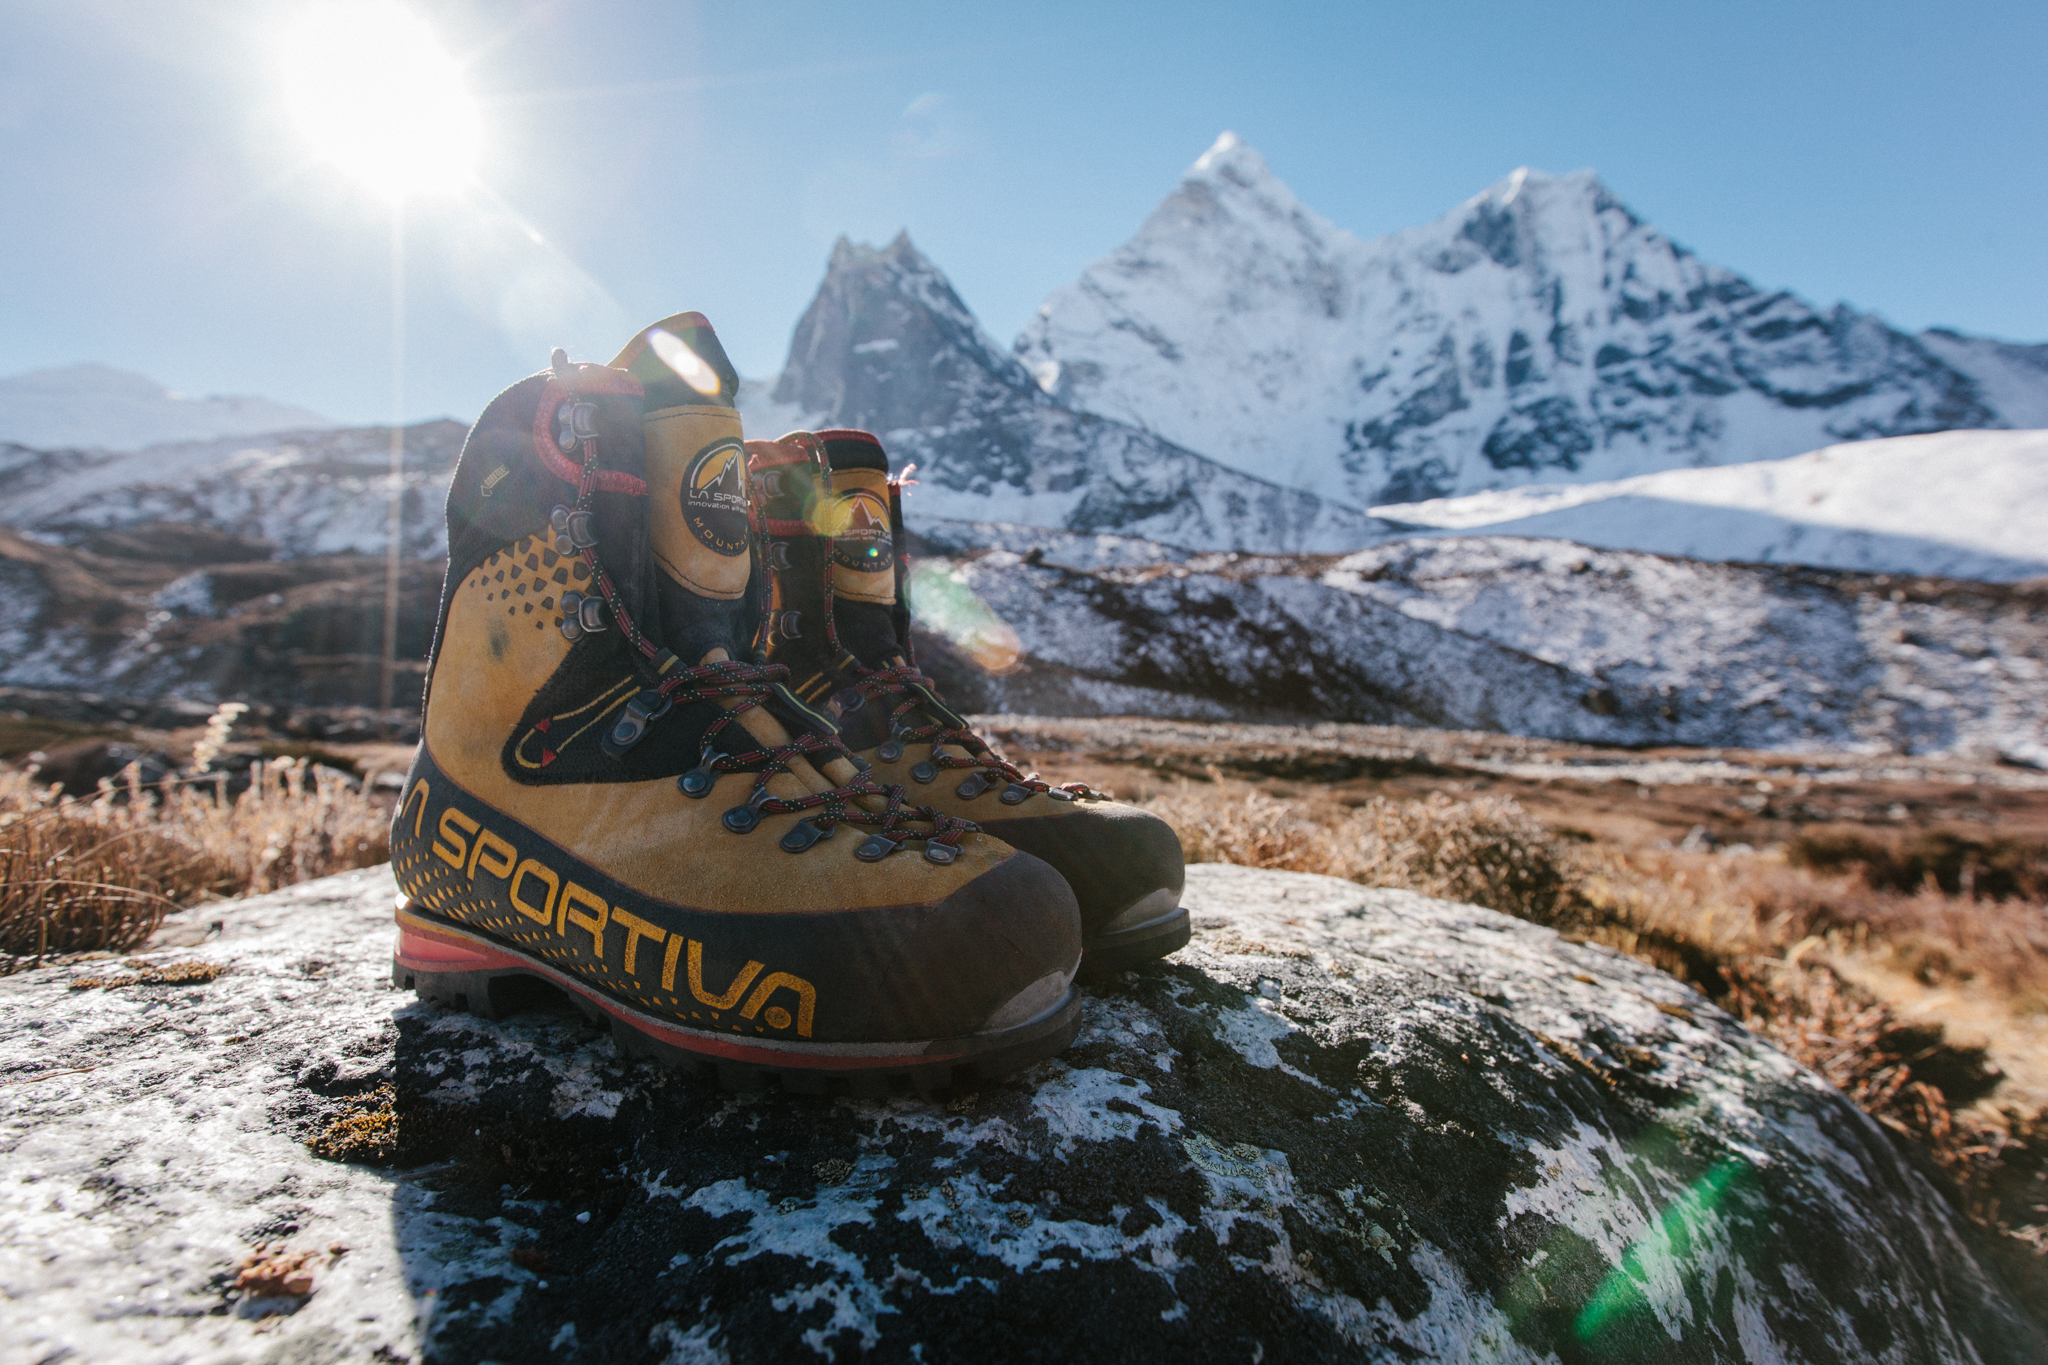
Boots: La Sportiva Nepal Cube GTX ($791)
Mountaineering boots serve several critical roles in an alpine environment. They protect a climber’s feet from the bitter elements. They support a climber’s body while moving over unforgiving terrain. And they provide a platform on which to mount crampons, snowshoes, and skis, enabling a climber to traverse icy or snowy slopes.
Mountaineering boots can be divided into a few different categories based on style and material. Double boots feature insulating liners that can be removed for drying, while single boots feature built-in insulation. Boots are either constructed from leather, synthetic, or plastic materials. Leather boots are comfortable, durable and have good weather resistance when treated, but are typically more expensive than synthetics. Synthetic boots provide a good balance of comfort, durability, weather resistance, and cost. Plastic boots are the heaviest and least comfortable, but they also provide the most durability and are the cheapest to buy. Most (if not all) plastic boot designs are outdated and have been replaced by modern synthetic double boots.
The La Sportiva Nepal Cube GTX are a single, leather mountaineering boot designed for cold weather climbing. La Sportiva utilised a Carbon Tech honeycomb shaft insert in the sole to increase the boots’ stiffness and insulation, decrease their weight, and lower their profile. The result is a warm, heavy-duty boot that performs much more nimbly than earlier iterations of the Nepal line. I climbed with them in their namesake of Nepal last November; I’ll be taking them back with me as I attempt another 6,000 meter peak this month.
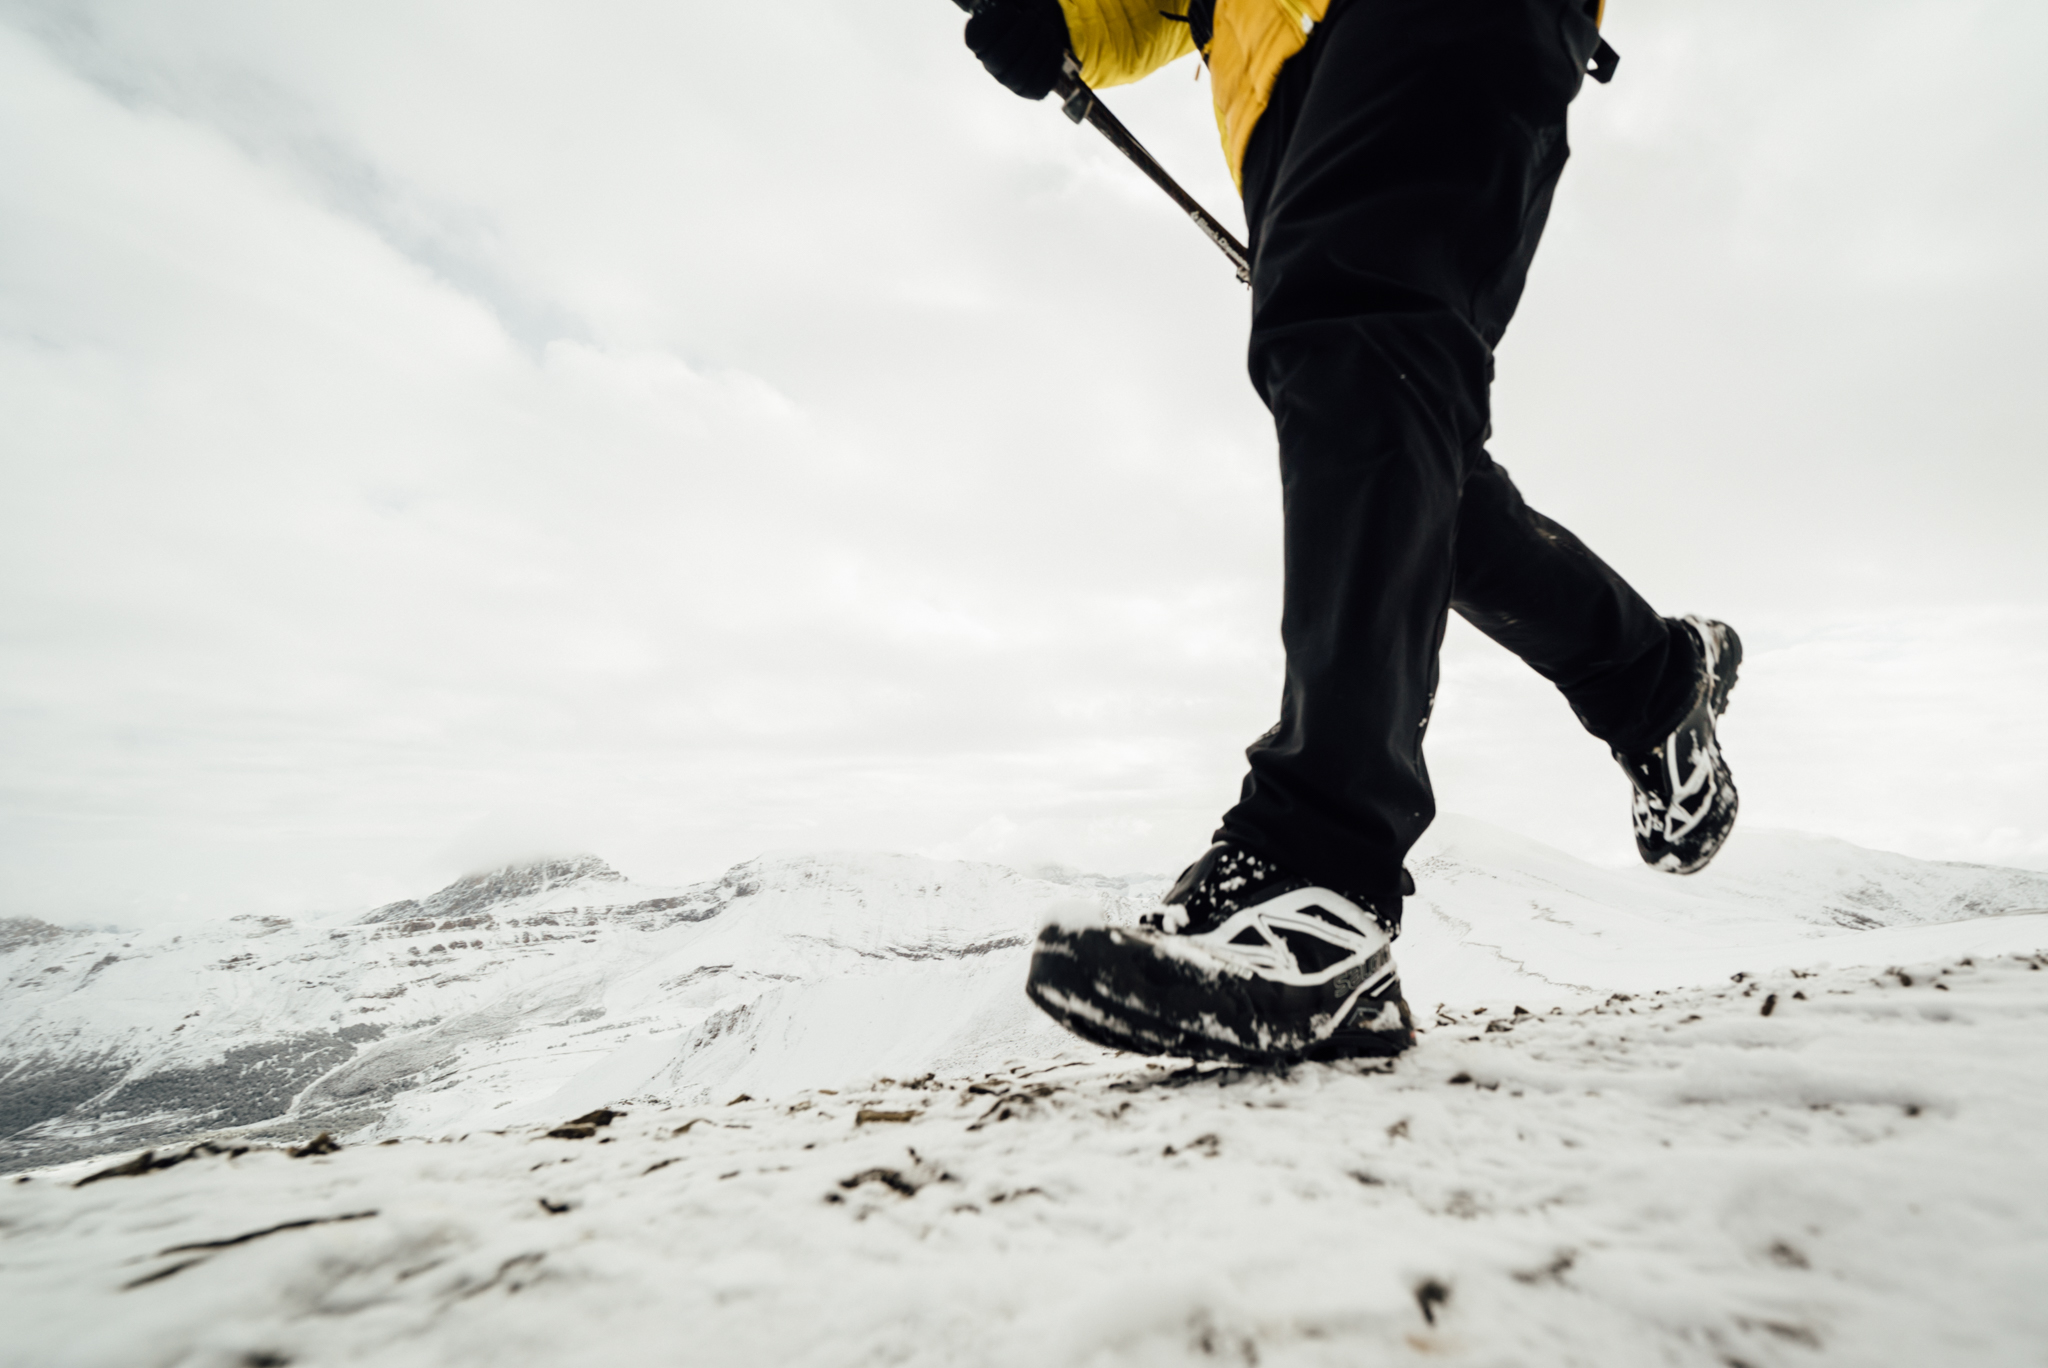
Photo: Gilberto Gil
Boots, Light: Salomon S-Lab X-Alp Carbon GTX ($413)
Do your climbs involve fast approaches and little technical terrain? As an alternative to the heavy-duty Nepals, check out the Salomon S-Lab X-Alp Carbon GTX mountain shoes. While saying their name does require a great deal of exertion — wearing them does not.
The X-Alps are basically a low-cut trail running shoe with a carbon fibre insert for stiffness and a built-in supergaiter. The result is a mountain shoe that’s light and comfortable enough to wear on approaches, yet stiff enough to accept a pair of strap-on crampons for glacier travel or easy climbing. Thanks to their Gore-Tex lining and supergaiters, they make a great shoe for winter backpacking and snowshoeing too; they kept my feet warm and dry when tons of fresh snow dumped on us all week in Alberta.
Rock Shoes: La Sportiva TC Pro ($248)
Many alpine objectives involve technical rock climbing. While it’s entirely possible to do low-grade rock climbs in approach shoes or mountaineering boots, dedicated rock shoes will make the experience much easier, safer, and much more enjoyable.
For rock routes that involve a lot of crack climbing and edging, there’s no better shoes than the La Sportiva TC Pro. TC stands for Tommy Caldwell, of Dawn Wall fame, who helped La Sportiva design them for his big wall needs. While not as technical as high-end downturned shoes like the Miura, the TC Pro are a near-perfect all-arounder thanks to their stiff, but sensitive soles (good for edging), flatter profile and ankle protection (good for crack climbing), and durability and comfort (good for tackling long routes). Leather uppers and thick soles provide longevity, ensuring good return on such a large investment.
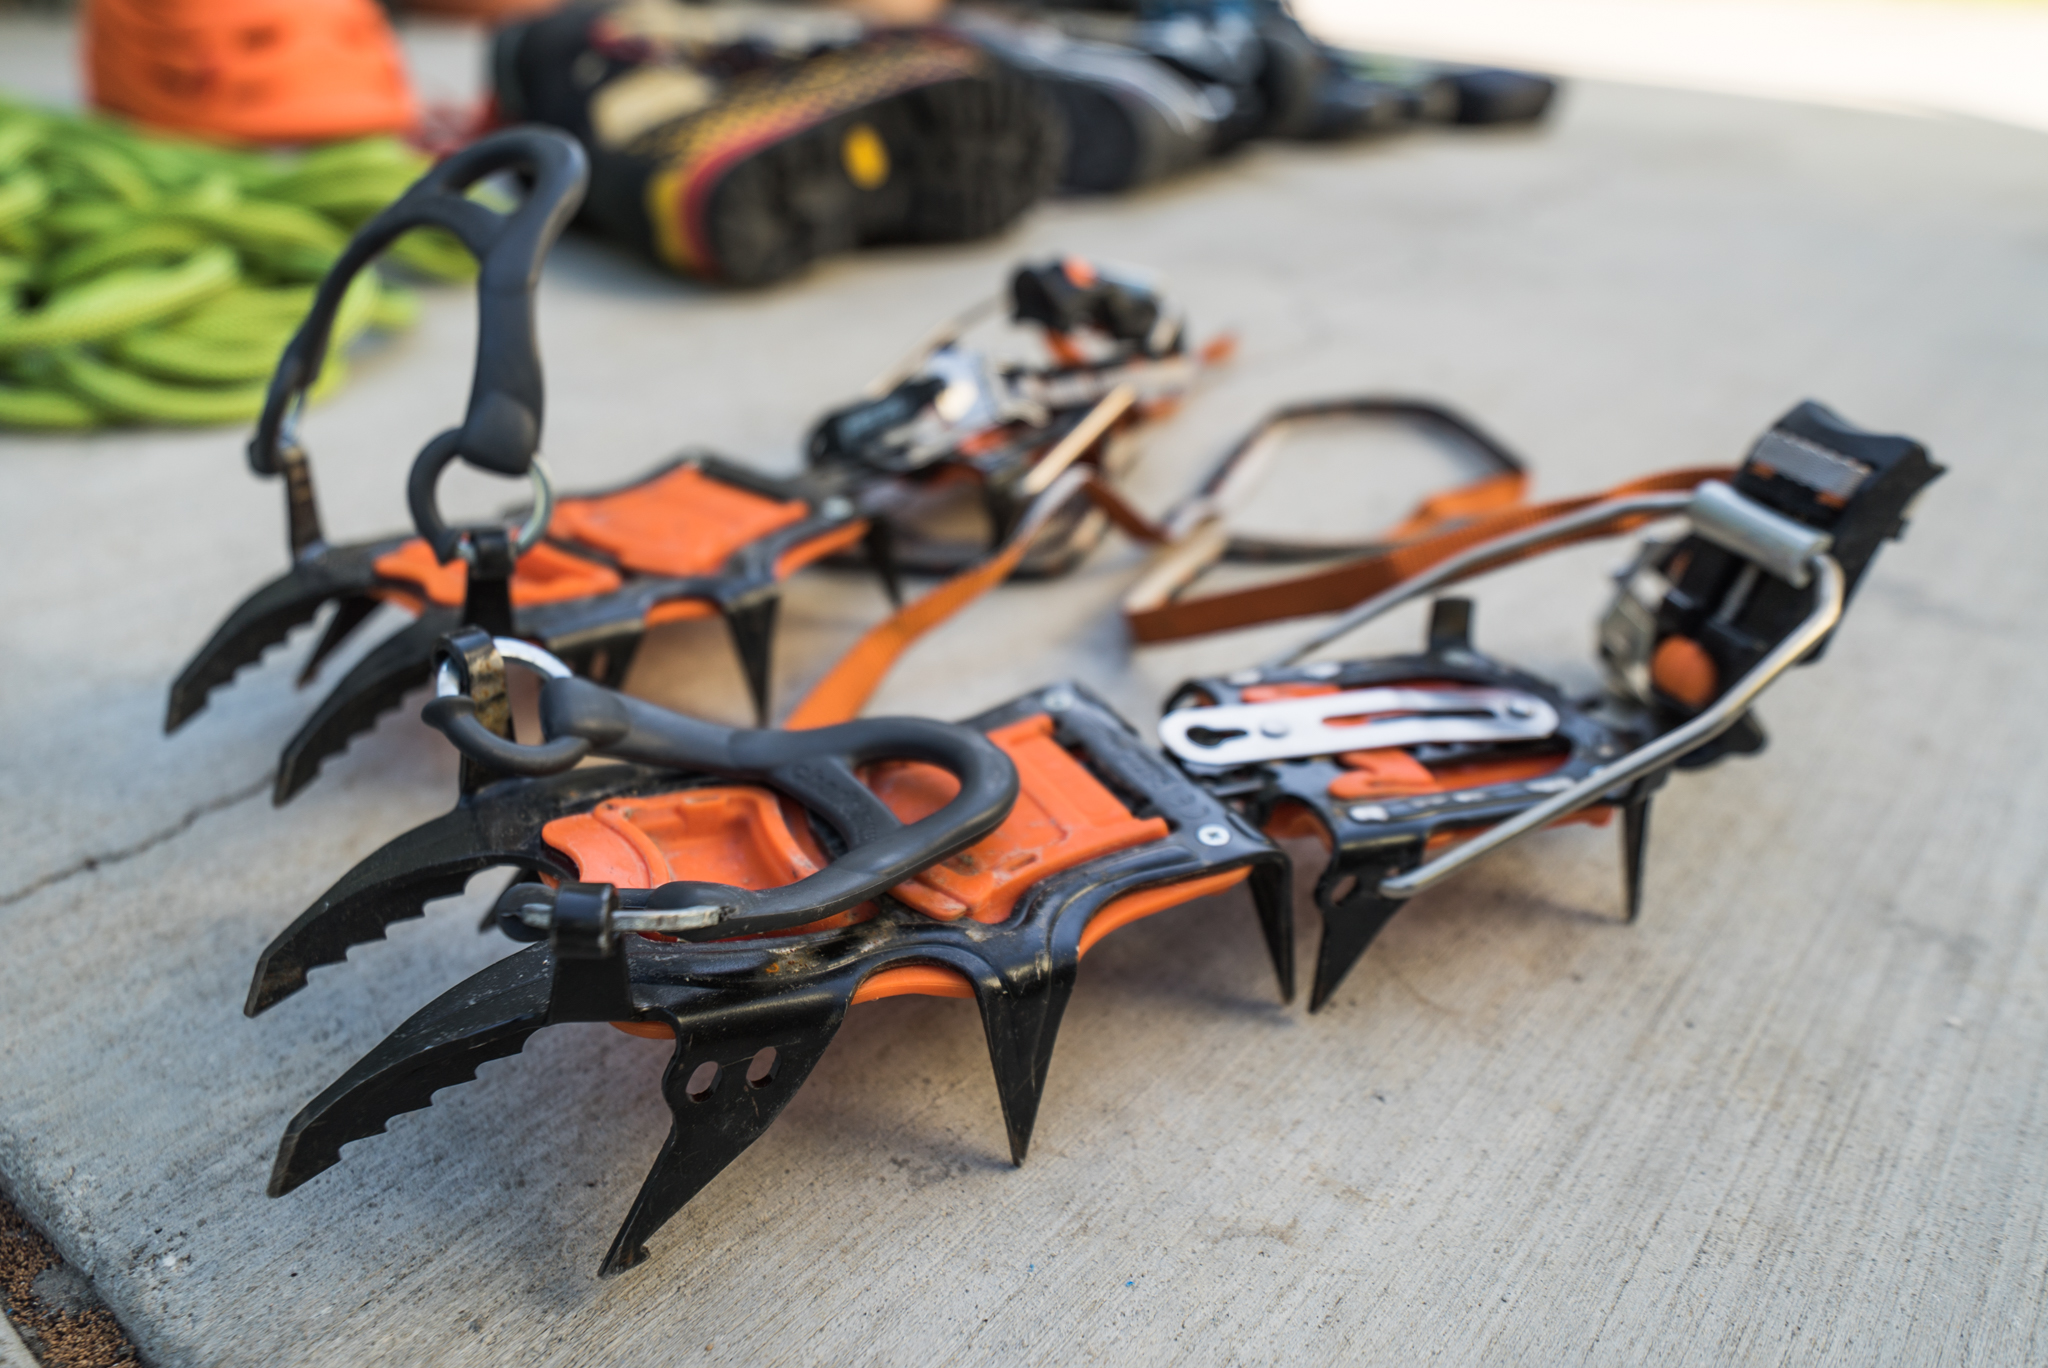
Crampons: Petzl Sarken ($275)
Crampons are those spiky metal things that go on the bottom of boots to provide traction in winter environments. They’re not YakTrax or microspikes — but instead are much sturdier, spikier, and more secure — providing that essential connection between a climber and the ice.
Crampons come in a variety of different styles and features, but the most important aspect to take note of is the binding system. Crampon binding systems are either automatic, strap-on, or semi-auto. Automatic bindings are designed for boots that have dedicated heel and toe welts (hard plastic notches built into boots’ outsoles.) Automatic bindings are the fastest to attach and are the most secure, but they work with a narrower scope of boots. Strap on bindings offer nearly universal attachment, but are the least secure; they also take the longest to attach. Semi-auto bindings offer a compromise — providing an automatic lock for the boot’s heel welt and a strap to secure the boot’s toe.
The Petzel Sarken are a 12-point “jack-of-all-trades” technical mountaineering crampon designed to provide excellent contact on all mixed terrain. Protruding front points provide strong penetration on ice, while also providing stable positioning on mixed terrain. The remaining points are all strategically placed to provide excellent contact from all different snow slope cramponing positions. The pair I’ve been testing utilise Petzl’s Leverlock Fil (semi-auto) binding system; they attach quickly and securely.
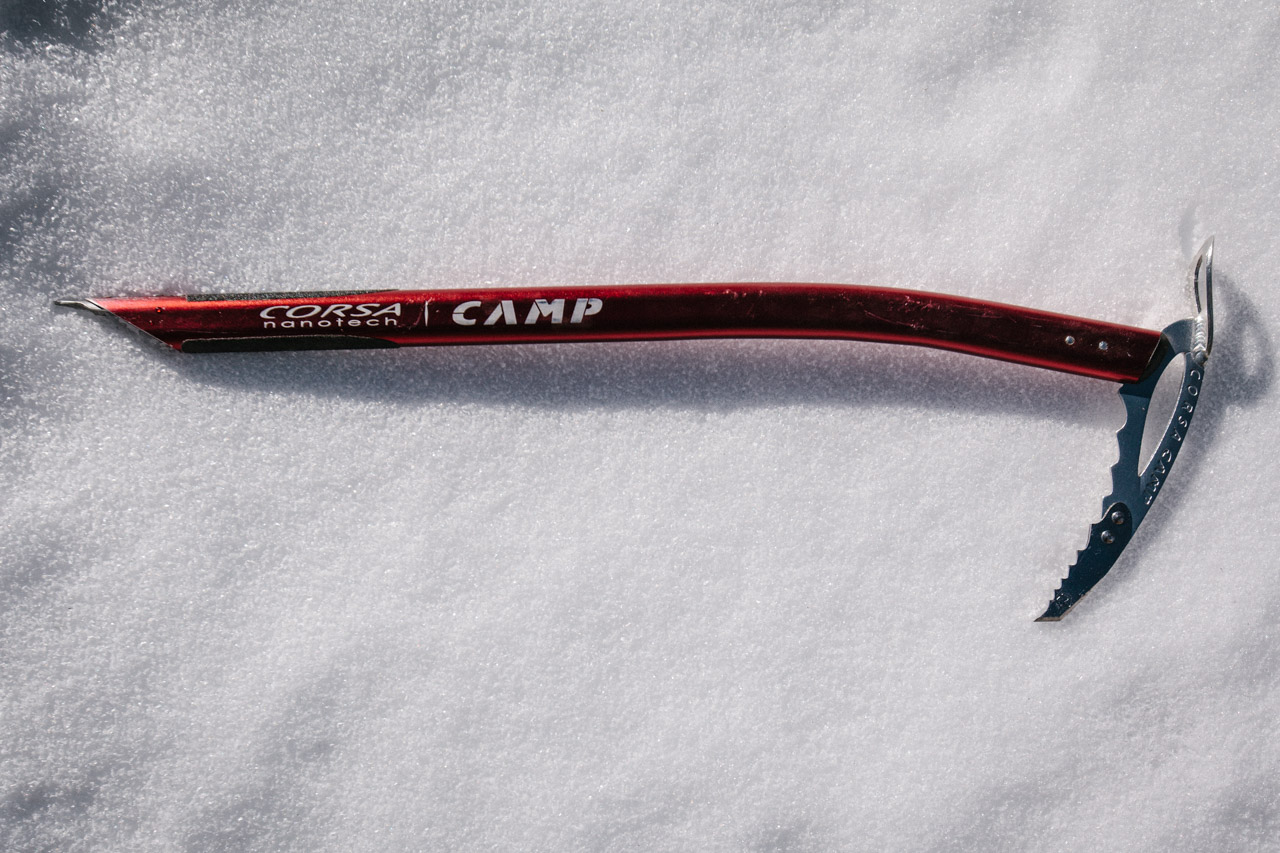
Ice Axe: CAMP Corsa Nanotech ($220)
An ice axe (often mistakenly called an “ice pick”) has a plethora of uses on the mountain. Primarily, it is used like a walking stick (held in the uphill hand) while ascending or descending steep snow slopes.
The ice axe has several parts: head, pick, adze, shaft, and spike. The pick (spiky point on the top of the head) and adze (the shovel-shaped end of the head) can be used to cut steps in ice or to dig holes in snow. The spike is useful for creating an additional point of contact with the ground while on a slope. The shaft can be plunged into the snow in order to provide stability for the climber, or to create a snow anchor or provide a snow belay. Finally, the ice axe can be used to self-arrest a fall.
Modern axes typically range from 50-60cm in size; it’s important to choose the size that best fits you. To do so, stand in an upright position, holding the axe in your hand while relaxed at your side. The spike should barely touch the ground. If it’s any longer, the axe will likely be unwieldy on the mountain.
My go-to axe for most snow climbs and glacier travel is the CAMP Corsa Nanotech. At less than 255 grams, it’s the second-lightest ice axe in the world thanks to its mostly aluminium construction (the lightest axe, the CAMP Corsa, is all aluminium). The Nanotech’s light weight makes it ideal for easy to moderate climbs with long approaches.
For comparison, most standard ice axes (which are fully constructed from steel) weigh nearly twice as much. The Nanotech is reinforced with steel parts in critical areas (the pick and the spike) to provide extra durability while remaining lightweight. A slightly contoured shaft provides extra clearance while swinging, without hindering its use as a cane. For more technical climbs, I’d definitely choose a sturdier axe, but oftentimes the Corsa Nanotech excels; it’s light weight is nearly impossible to beat.
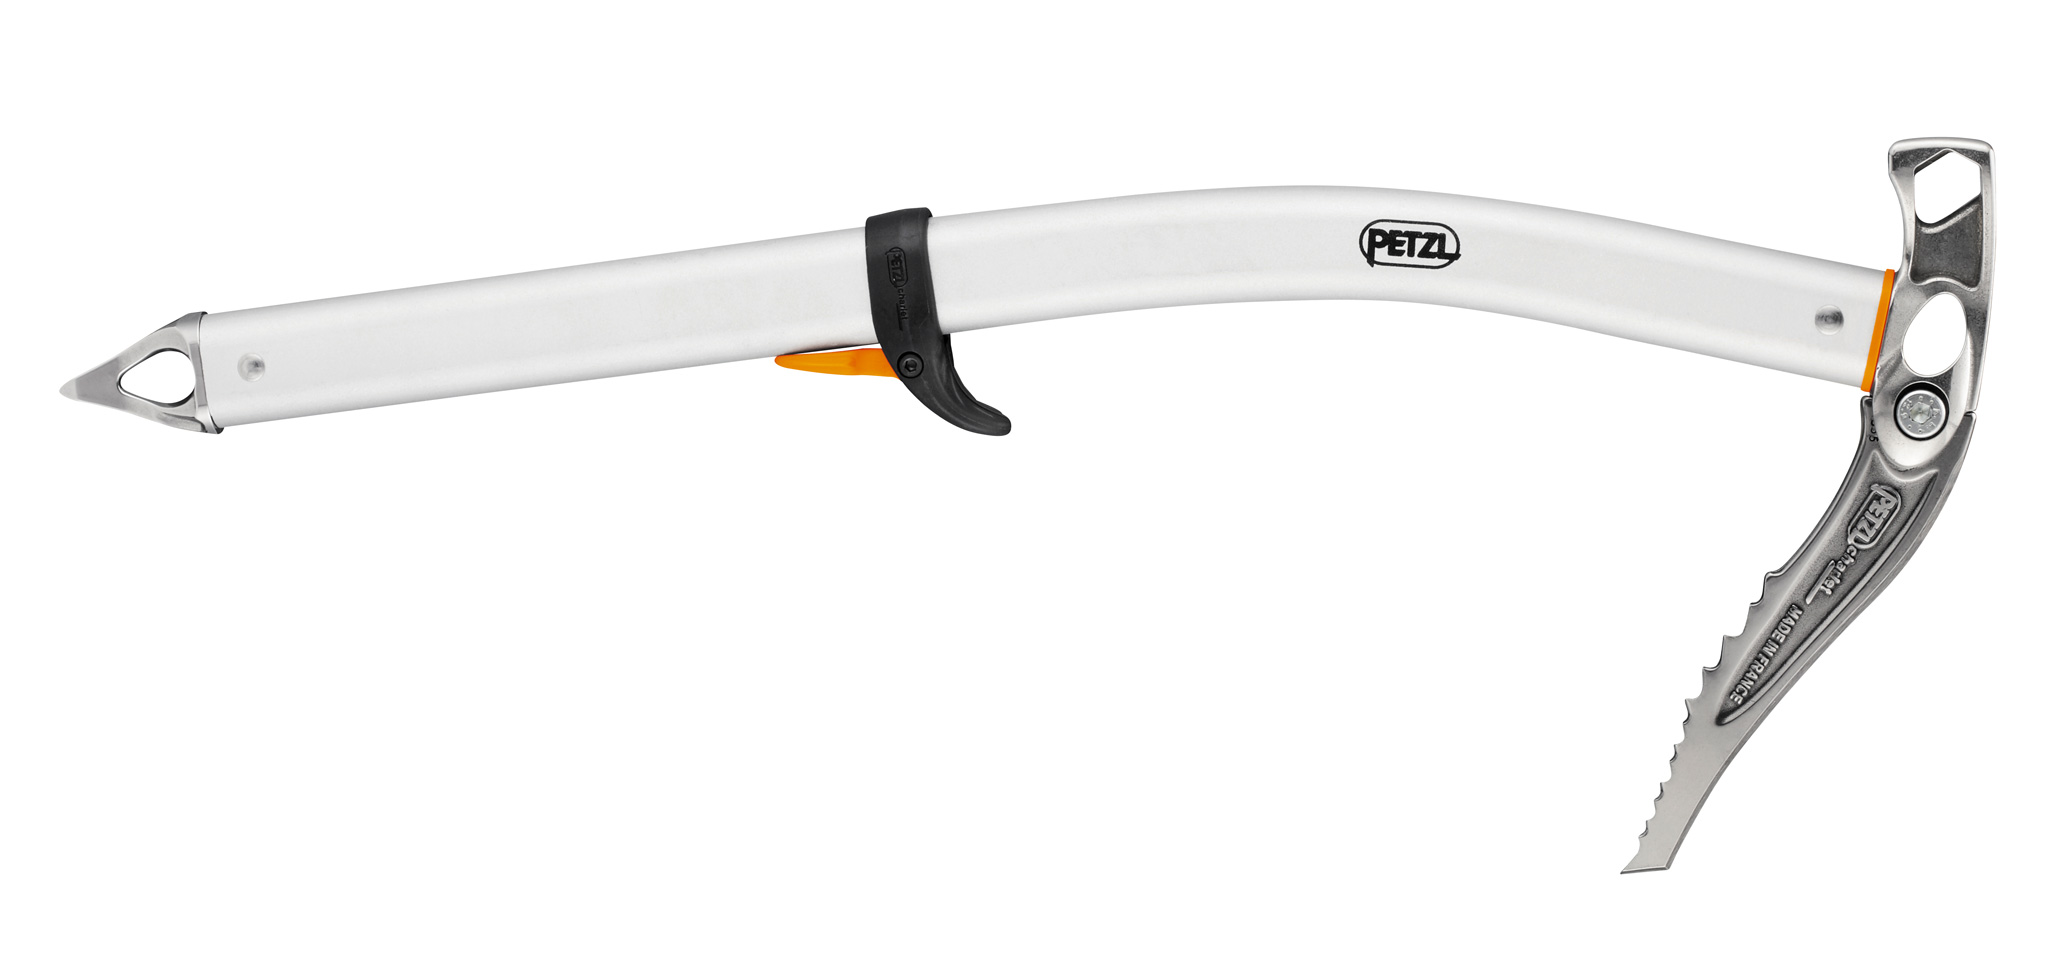
Photo: Petzl
Ice Axe: Petzl Sum’tec (Hammer) ($275)
For technical mountaineering, look no further than the Petzl SUM’TEC. The SUM’TEC offers a compromise between a classic mountaineering axe and an ice climbing axe — enabling it to be used while navigating snow slopes, or technical passages like bergschrunds (deep crevasses that form where flowing glaciers meet stagnant ice). The axe’s hammer (the axe is also available with an adze) is useful for hammering in pickets for protection; wide holes in the head facilitate carabiners for easy use while snow belaying.
Helmet: Petzl Sirocco ($US130)
A climbing helmet’s purpose is pretty obvious: it protects the head from impact. Whether it’s falling rock, falling gear, or falling climbers — objects will inevitably drop from the sky.
Most climbing helmets are constructed from lightweight foam or ABS hardshell. The former are lighter, more comfortable, and better ventilated — but more expensive and less durable. The latter are more durable and cheaper, but are heavy, bulky, and uncomfortable.
The Petzl Sirocco, however, pioneers a new category altogether. Instead of ABS hardshell or polystyrene (the type of foam found in most lightweight helmets), the Sirocco is constructed from a single layer of lightweight, impact resistant expanded polypropylene (EPP). It also uses a lightweight webbing adjustment system, resulting in the world’s lightest climbing helmet. What does wearing a 159 grams climbing helmet feel like? It feels like wearing nothing. Now, there’s no excuse to not wear a helmet.
Trekking Poles: Black Diamond Alpine Carbon Cork ($220)
Trekking poles help you hike easier, faster, and safer by providing stability, support, and extra propulsion — especially when travelling on uneven or loose terrain.
The Black Diamond Alpine Carbon Cork were one of the first “nice” pieces of gear that I bought; they have probably been my very best investment in outdoors equipment. They are lightweight and strong thanks to their carbon fibre shafts. Their cork handles are comfortable and mould to your hands. Carbide tips provide for an excellent point of contact between the poles and rock, dirt, ice — and anything else you’ll encounter. Finally, Black Diamond’s FlickLock closure system does an excellent job of locking in the poles’ length in; it’s never slipped, opened, or broken on me once, despite hundreds of miles of strenuous use.
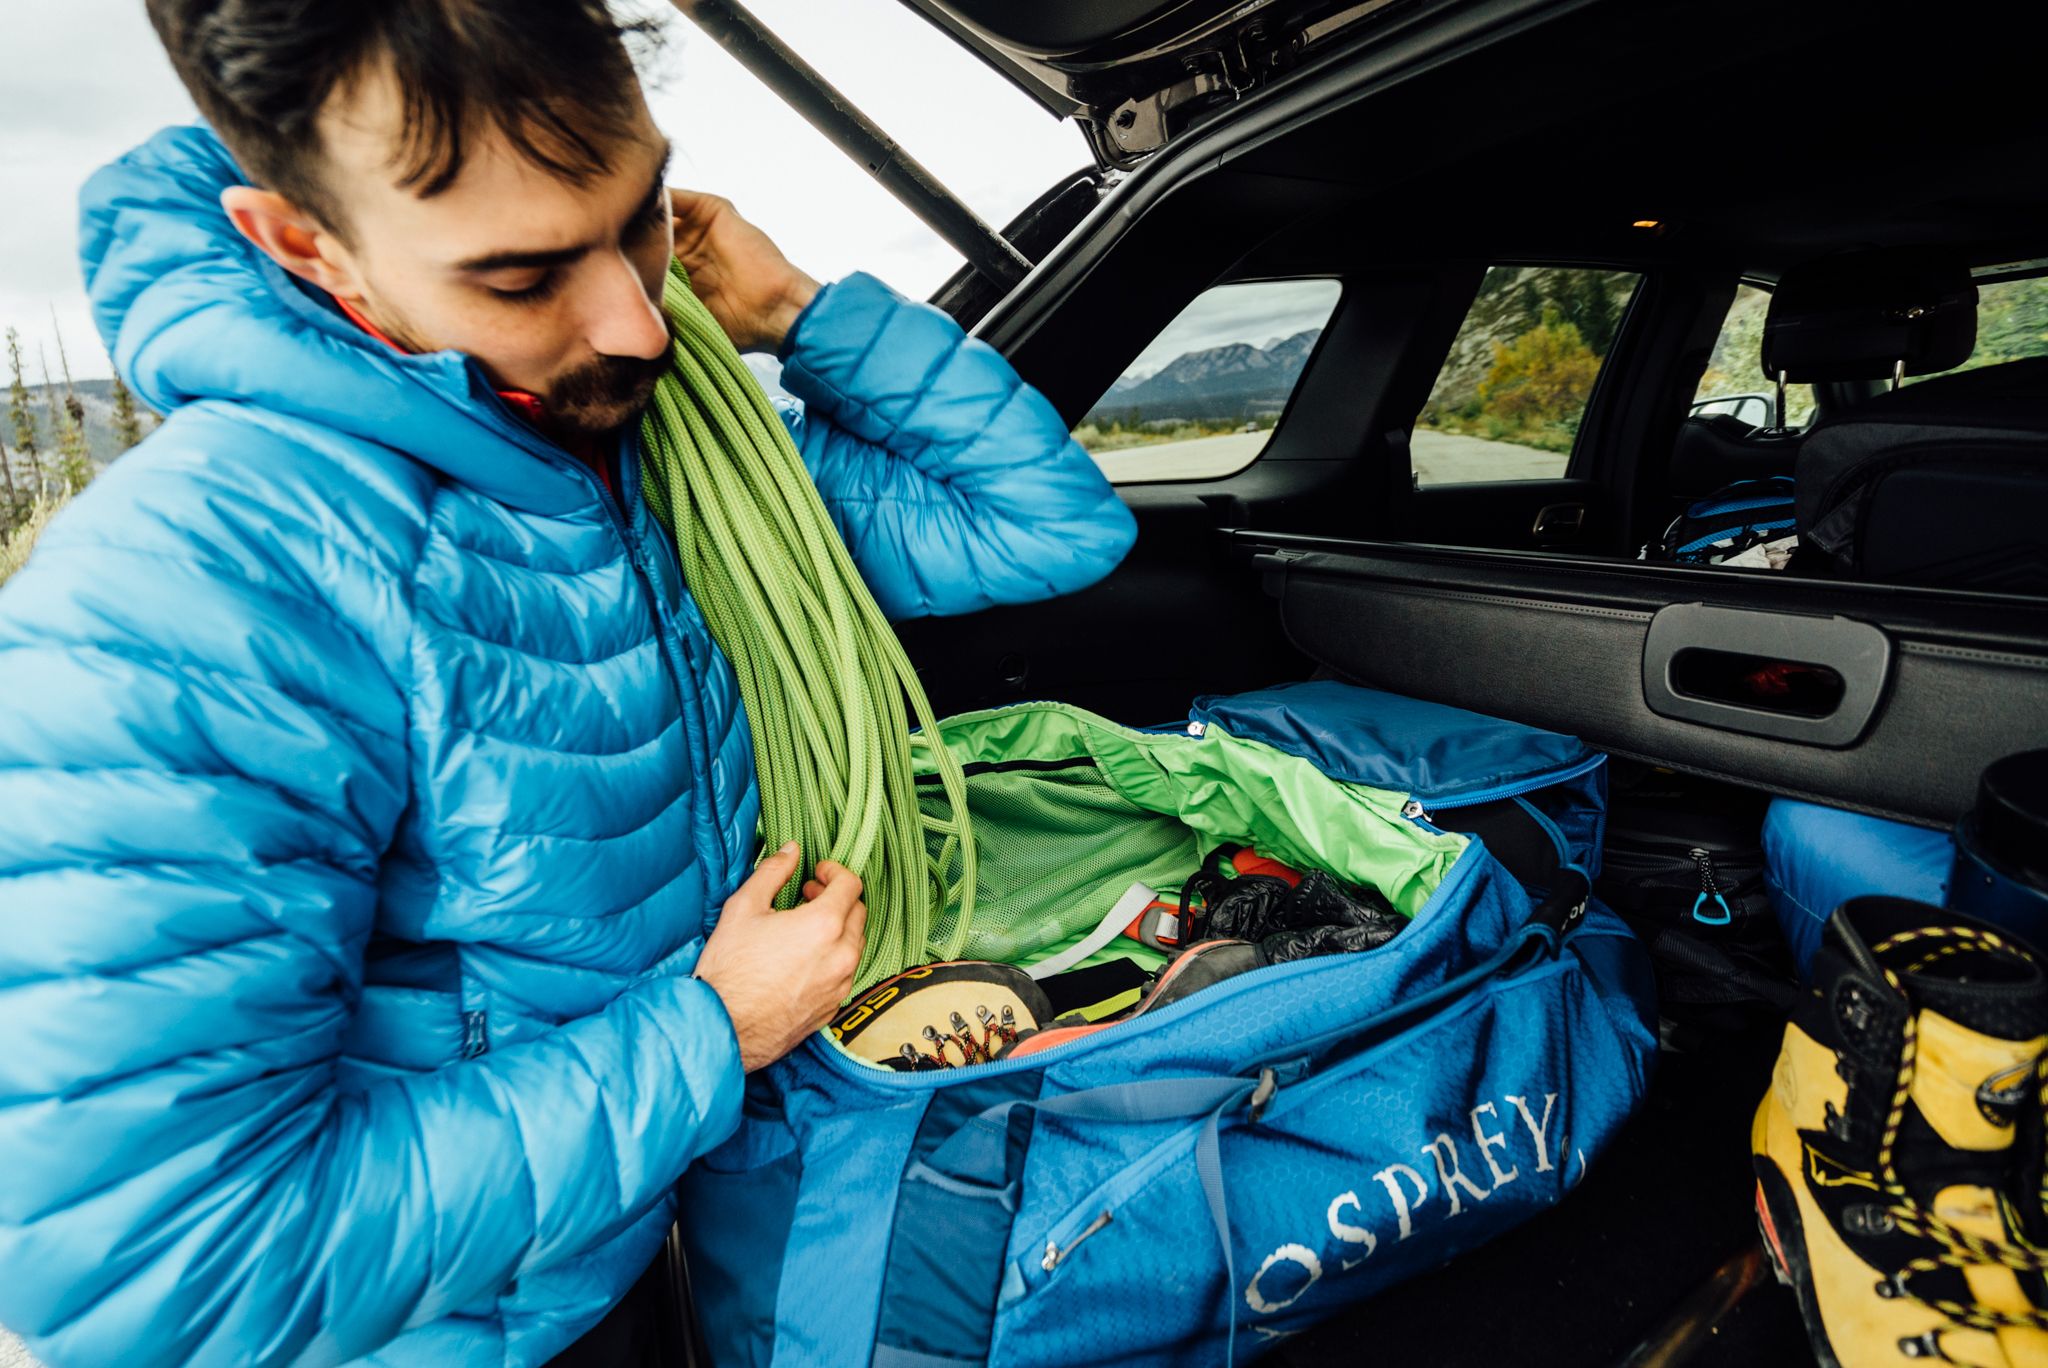
The gargantuan, 130L Osprey Transporter Duffel ($US115) works great as a mobile gear closet.
Rope: Mammut InfinityDry 9.5mm 60m
The rope is a climber’s most valuable asset. It protects the climber from falls, allows them to rappel, and can be used for rescue too. Ropes come in a variety of different sizes and types; each serves a purpose.
For alpine climbing that combines rock, snow, and ice — the Mammut InfinityDry 9.5mm 60m single rope is hard to beat. It’s low weight (58 grams per meter), small diameter, and high performance make it ideal for a variety of climbs — while its DRY treatment protects it from dirt and water, ensuring longevity. Notably, Mammut’s DRY-treated ropes are the only ones on the market that pass new UIAA (International Climbing and Mountaineering Federation) standards for water repellant ropes.
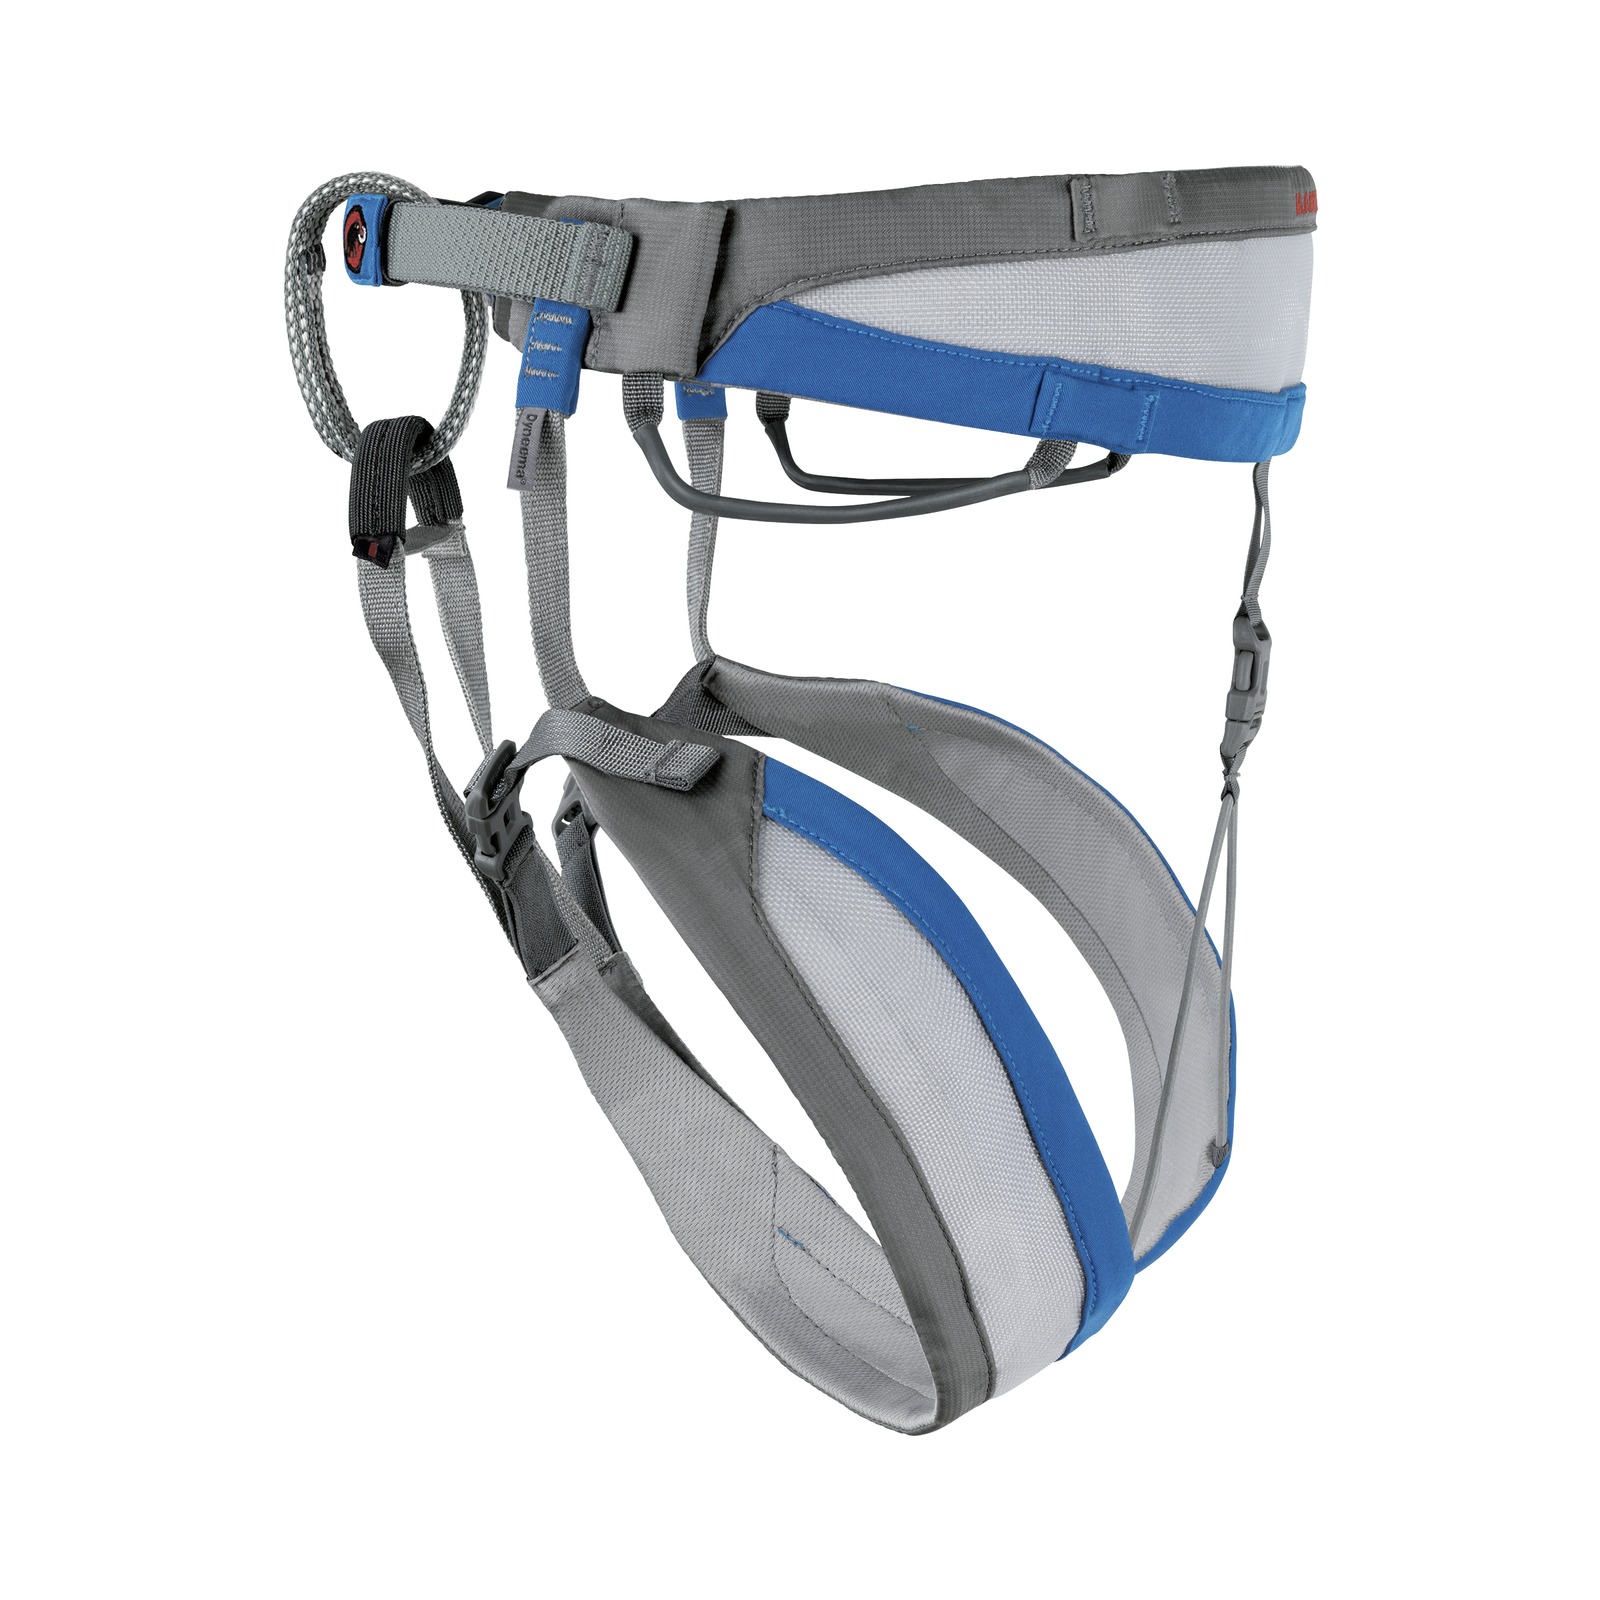
Photo: Mammut
Harness: Mammut Zephir Altitude ($117)
A climbing harness provides a connection point between the climber and the rope. Harnesses come in a variety of shapes and sizes, but they mostly feature the same parts: waist belt, buckles, leg loops, a belay loop, tie-in points, and gear loops.
Mountaineering harnesses are lightweight and packable; often use less waistbelt padding in order to cut down on bulk, ensuring that they can be comfortably worn all day with packs.
Weighing in at less than half a pound, the Mammut Zephir Altitude is the lightest climbing harness in the world. Mammut saved weight by splitting the waist belt webbing — allowing the use of less material while still distributing weight. Dyneema leg loops contribute to its light weight, while providing equal strength to that found in much bulkier harnesses. Clips on the buckle, leg loops, and a drop-seat make the harness easier than ever to put on or take off, making it perfect for alpine adventures.

Belay Device: Petzl Reverso 4 ($41)
A belay device is a piece of climbing equipment that is used to control a rope while one climber supports another. They allow the belayer to exert minimal physical effort, by applying friction as the rope passes through the device. In the event of a fall, the belay device will allow a much lighter person to arrest a much heavier person’s fall. Belay devices can also be used for rappelling.
The Petzl Reverso 4 is a lightweight, versatile belay device that was designed with multi-pitch climbing in mind. It features an auto-blocking mode, which enables a leader to easily belay followers in-between pitches thanks to its large carabiner loop on one end — which allows the device to be attached to an anchor. At just over 57 grams, it’s one of the lightest belay devices on the market.
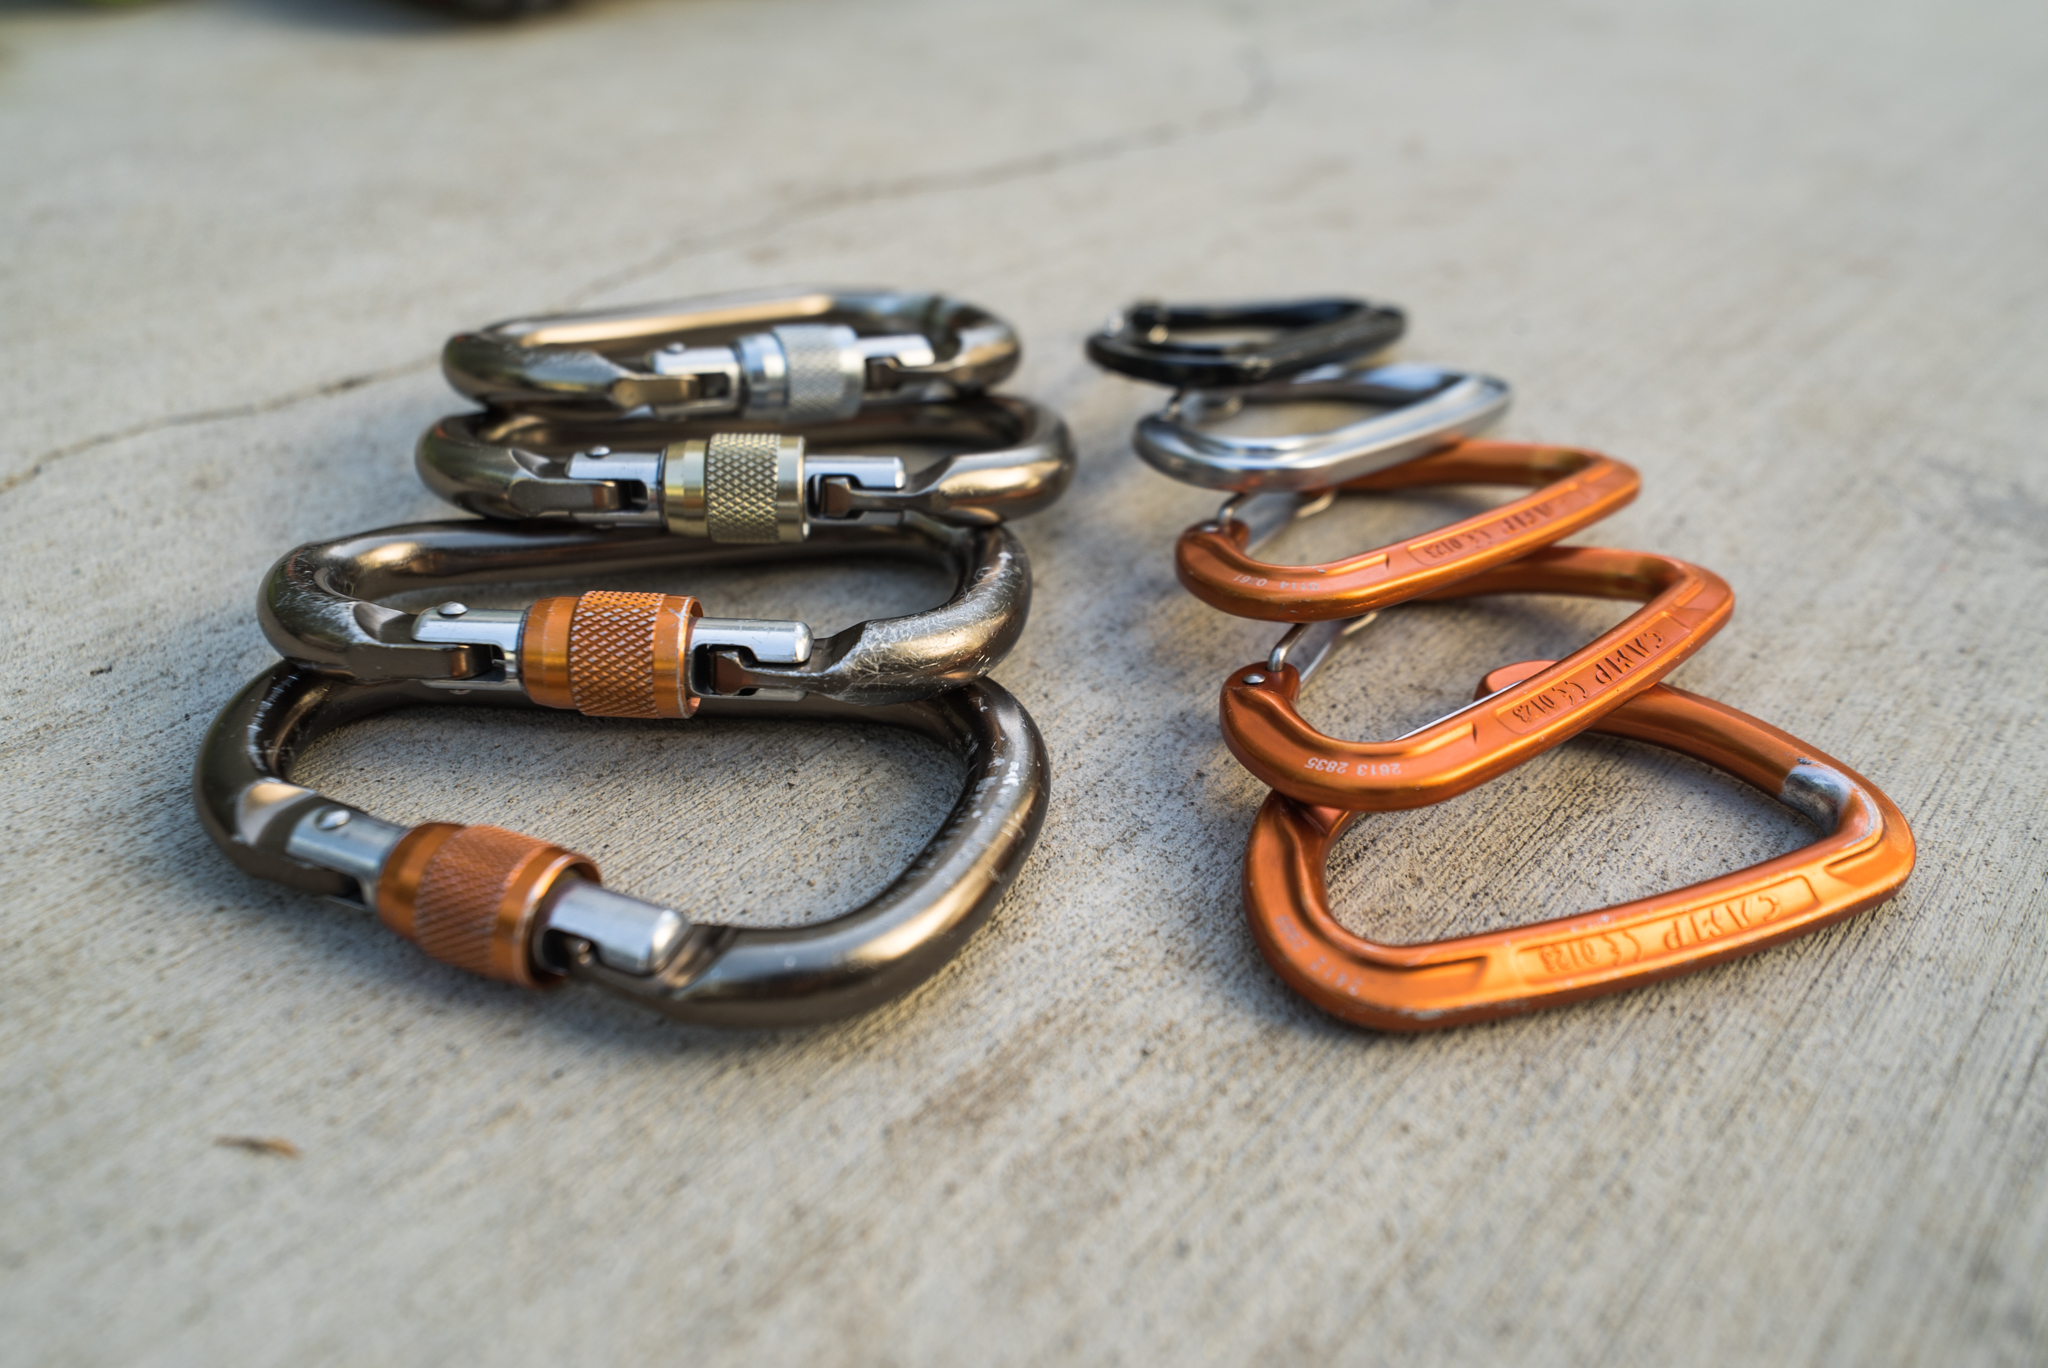
Carabiners
The core purpose of a carabiner is to connect things. What and how you are connecting things, however, makes carabiner selection become much more complex.
Carabiners come in all shapes and sizes, but there are two major distinctions: locking and non-locking. Locking carabiners feature gates that can be locked down to prevent accidental opening. They should be used anytime you’re stationary at an anchor, clipping in to a critical piece of protection, or using a belay/rappel device. I prefer to use Black Diamond RockLock Screwgate carabiners because they are offer a good balance of versatility, ease-of-use, weight, and price.
Non-locking carabiners are generally lighter and simpler than locking carabiners and can be used when attaching things in non-critical scenarios when speed and efficiency are key. My go-to non-lockers are the Black Diamond HoodWire carabiners thanks to their lightweight and easy-to-open wire gate.
Here a student of AAI’s Alpinism I course ascends a rope, using only accessory cord tied into prusiks.
Accessory Cord/Prusiks
Accessory cord serves a variety of purposes on the mountain, most notably for anchor building, and to create prusiks, which are used for self-rescue in the event of a crevasse fall. Accessory cord can be bought and cut to length at your local outdoor recreation store. 6-7mm is a good diameter; this guide is useful for figuring out the lengths.
(As a word of advice, don’t buy pre-sewn prusiks, because they are less versatile than those created from accessory cord using double fishermens bends to connect the ends.)
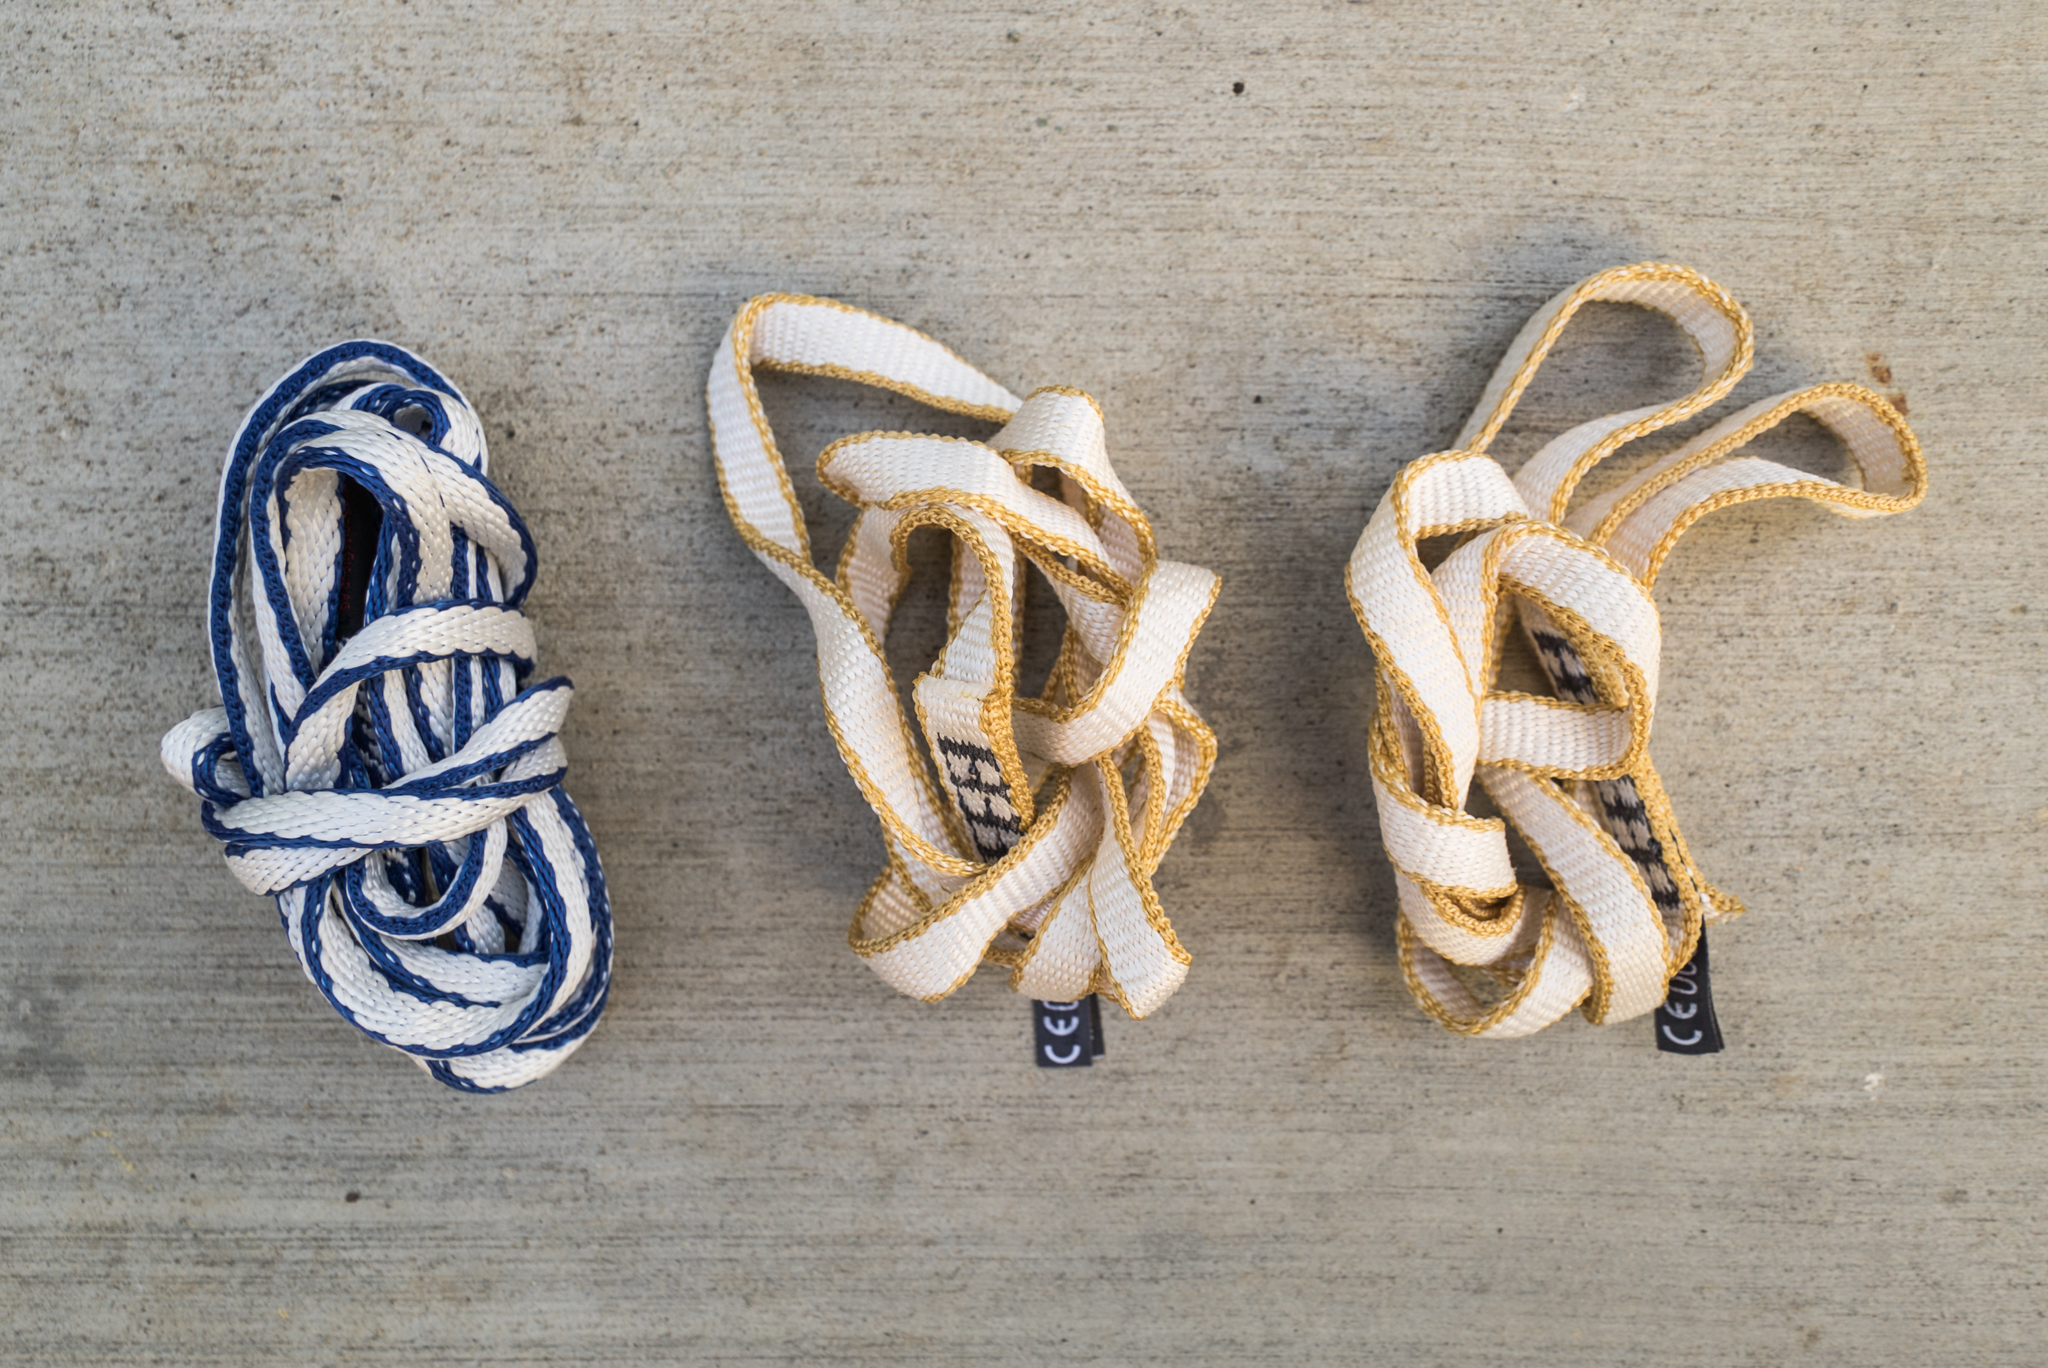
Slings: Mammut Contact 8 ($12.50 each)
Slings are simply lengths of webbing that are sewn together, forming a loop. Like accessory cord, they serve a lot of purposes on the mountain. Slings can be used to build anchors, extend anchors to reduce rope drag, or to create extensions for rappelling.
For alpine climbing, double length (120 cm/47 in) slings are most useful. The Mammut Contact 8 is an 8mm wide sling that is very strong (breaking strength is rated at 22kn, about 5,000 lbs of force) and very light because it’s made from Dyneema.
Accessories
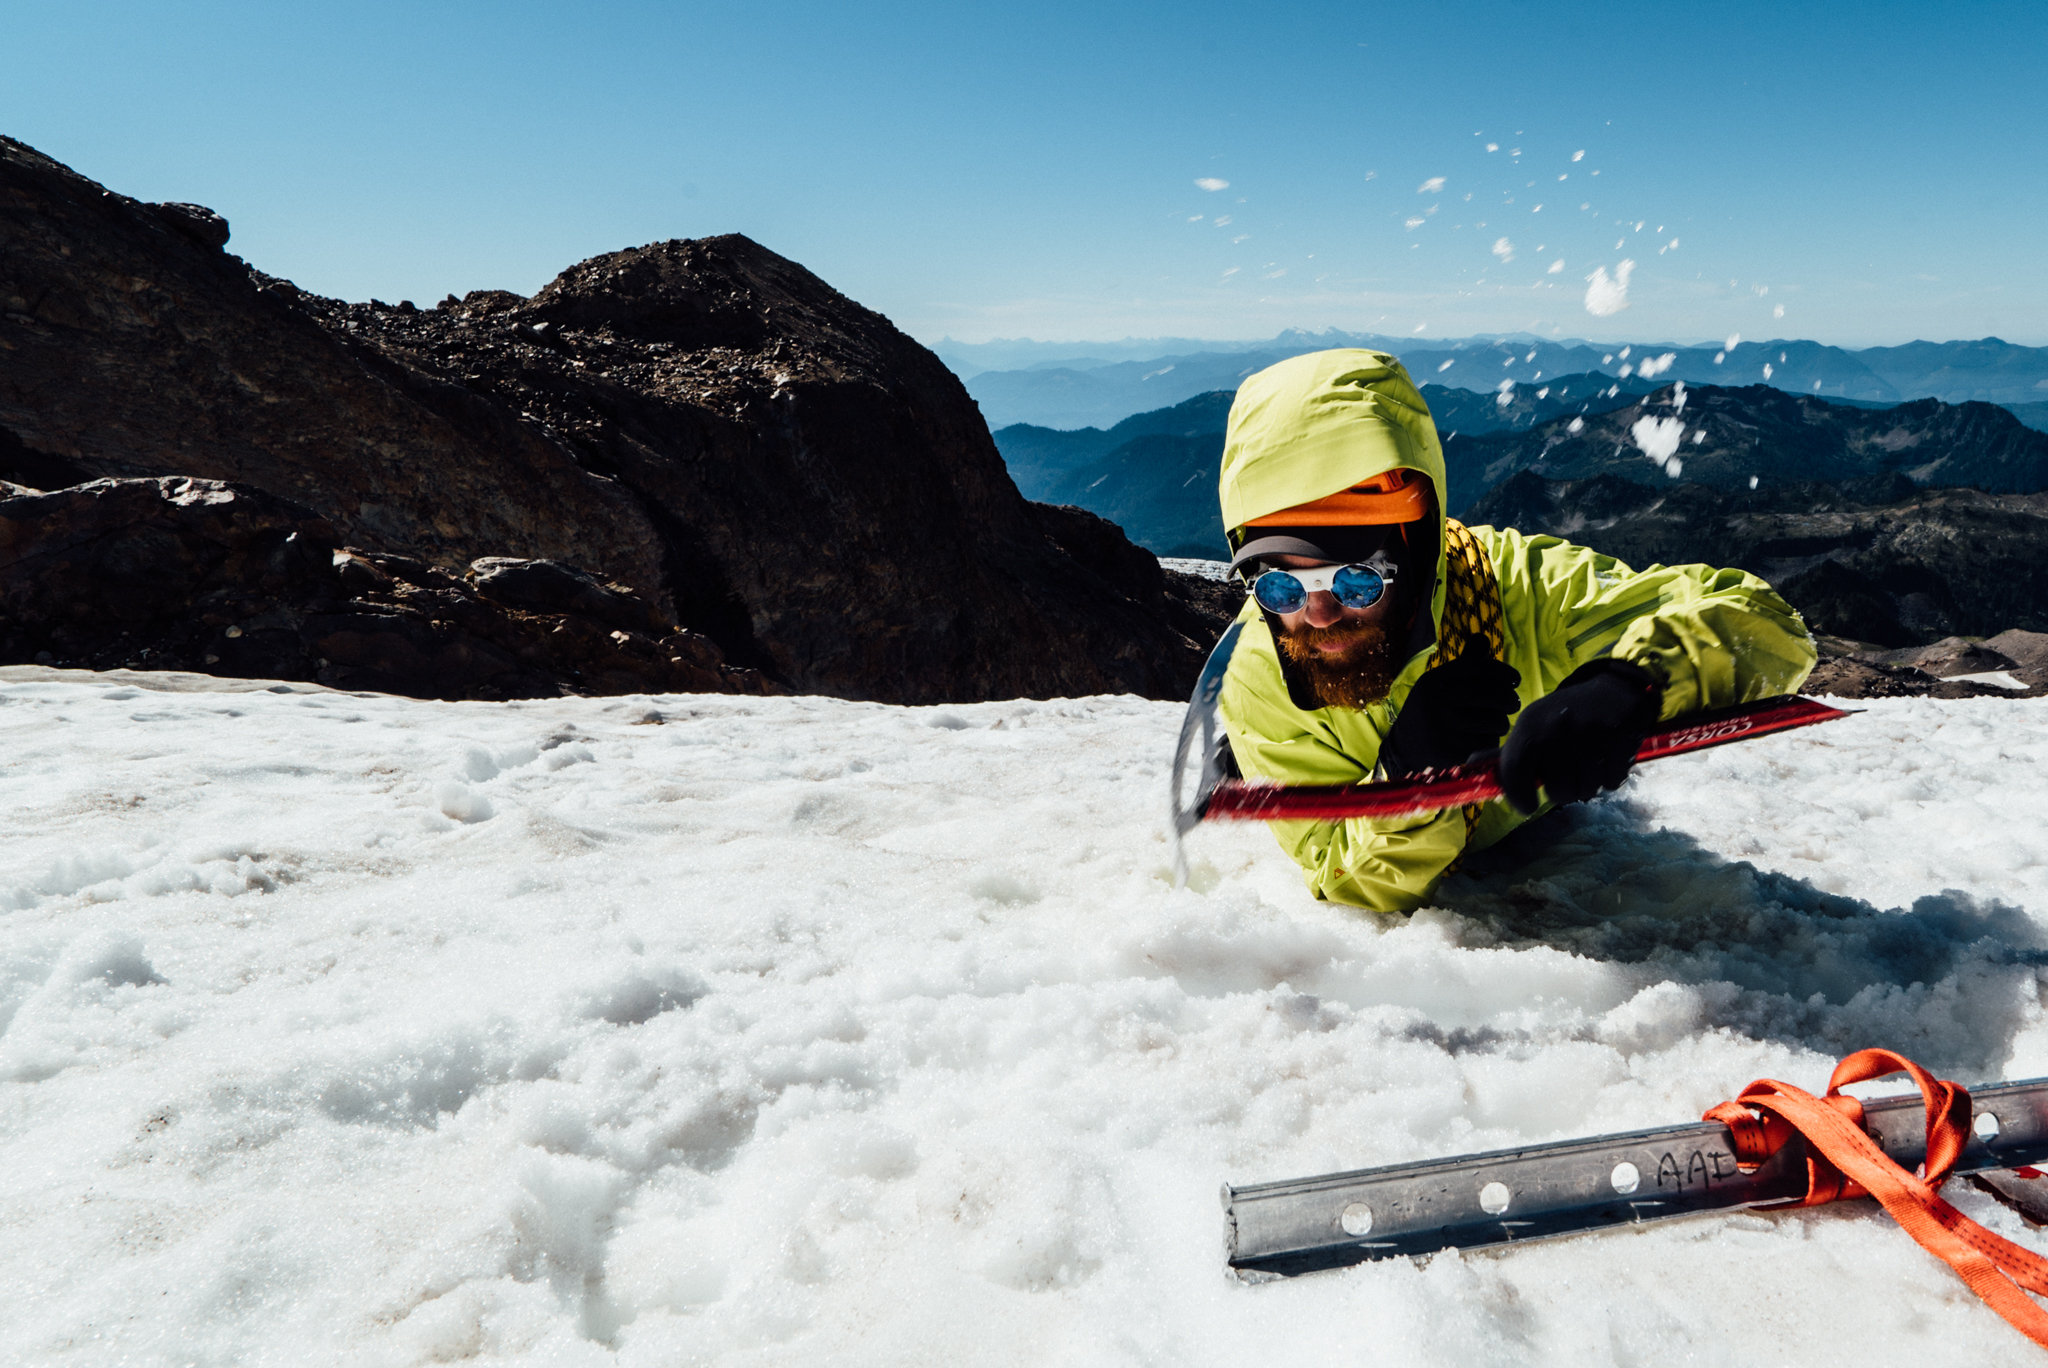
Photo: Andrew Yasso
Glacier Glasses: Julbo Vermont Mythic ($358)
Due to the extremely bright conditions encountered while travelling on glaciers and across snowfields high in the mountains, extra care for the eyes must be taken to prevent snow blindness.
Glacier glasses are designed with that specific purpose in mind. Low-transmitting optics are extremely protective, while side and nose guards prevent light leakage from the peripherals. The Julbo revolutionised the mountaineering world with their introduction of the Vermont in 1950; the Mythic are an updated version of that classic design. They feature scratch and shock resistant mineral glass lenses with an anti-reflective coating, leather guards, and rubberised earpieces that lock them in place. If you’ve gotta wear glasses while climbing mountains, you might as well look hella cool while wearing them.
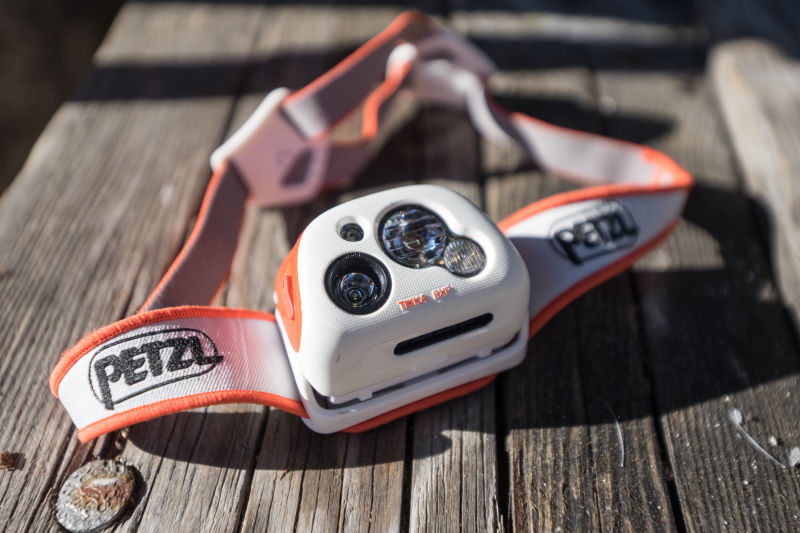
Photo: Corey Hass
Headlamp: Petzl Tikka RXP ($138)
A headlamp is absolutely necessary for keeping hands free while accomplishing tasks in the dark, whether it’s at camp or getting an alpine start.
Most headlamps have different beam settings which are useful dependent upon the environment and task at hand. The Petzl Tikka RXP is smart enough to automatically distinguish them, however. Corey did a full review on one, check it out!
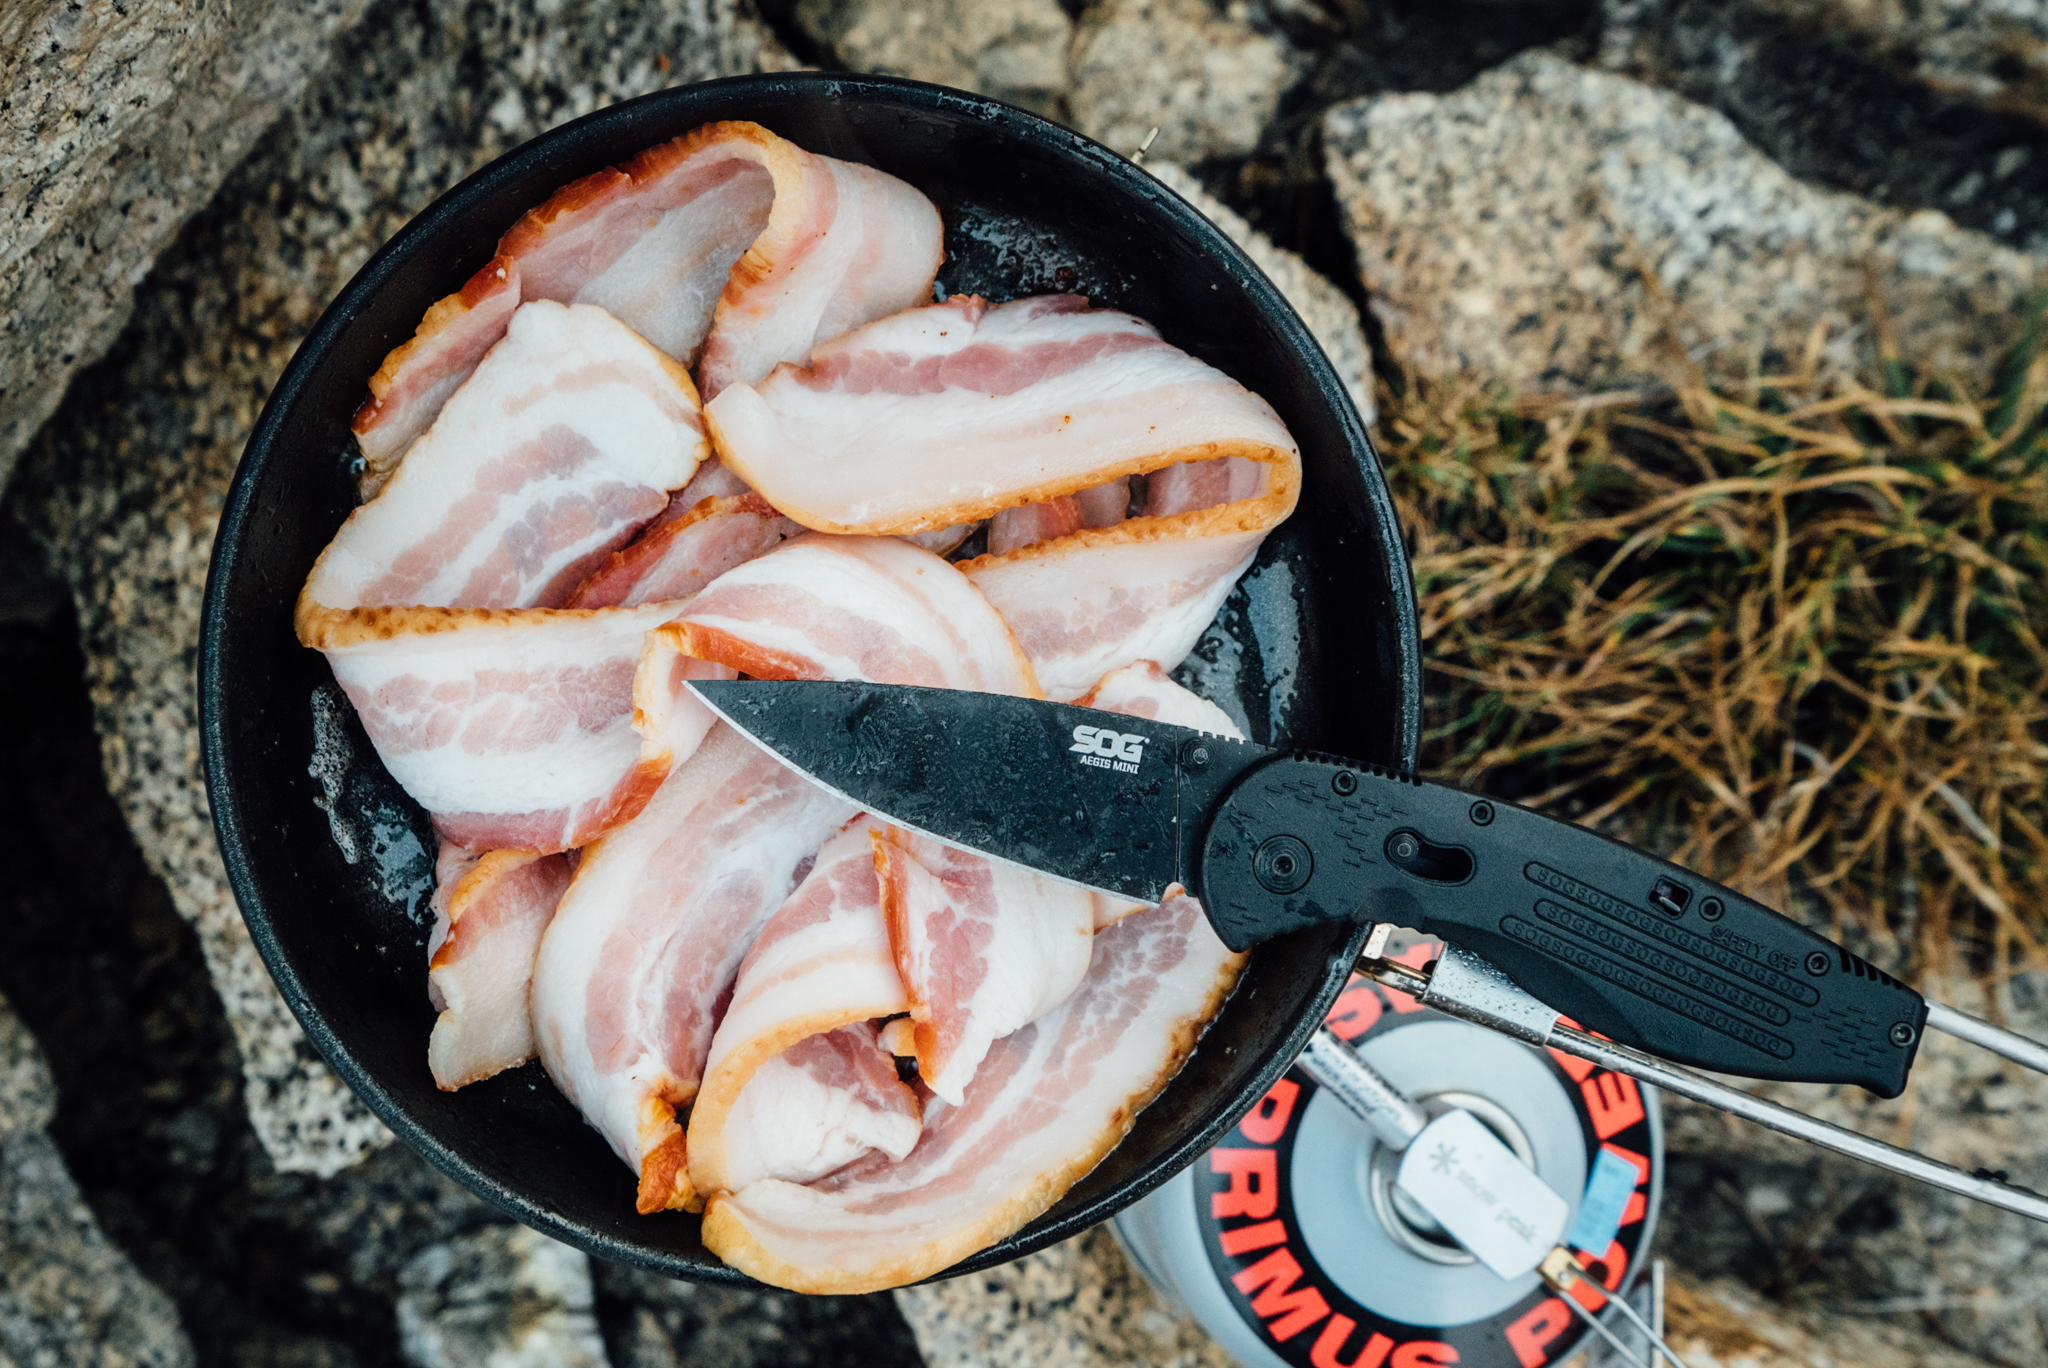
Let’s be honest. All we really use our knives for is to open the package of bacon.
Knife: SOG Aegis Mini ($69)
A knife is an invaluable piece of gear that you should carry (almost) everywhere. They can be especially useful anytime rope, cord, or webbing is involved, like while climbing.
My EDC is the SOG Aegis Mini. It has a versatile, 3″ drop point blade, one-handed assisted opening, an anti-slip grip that’s not obnoxious — and it only weighs 57 grams, so it won’t weigh down my pack if it’s not in my pocket (like while wearing a harness).
Electronics
Ambit2 pictured. Aside from functionality, there are only minor cosmetic differences between the Ambit2 and Ambit3.
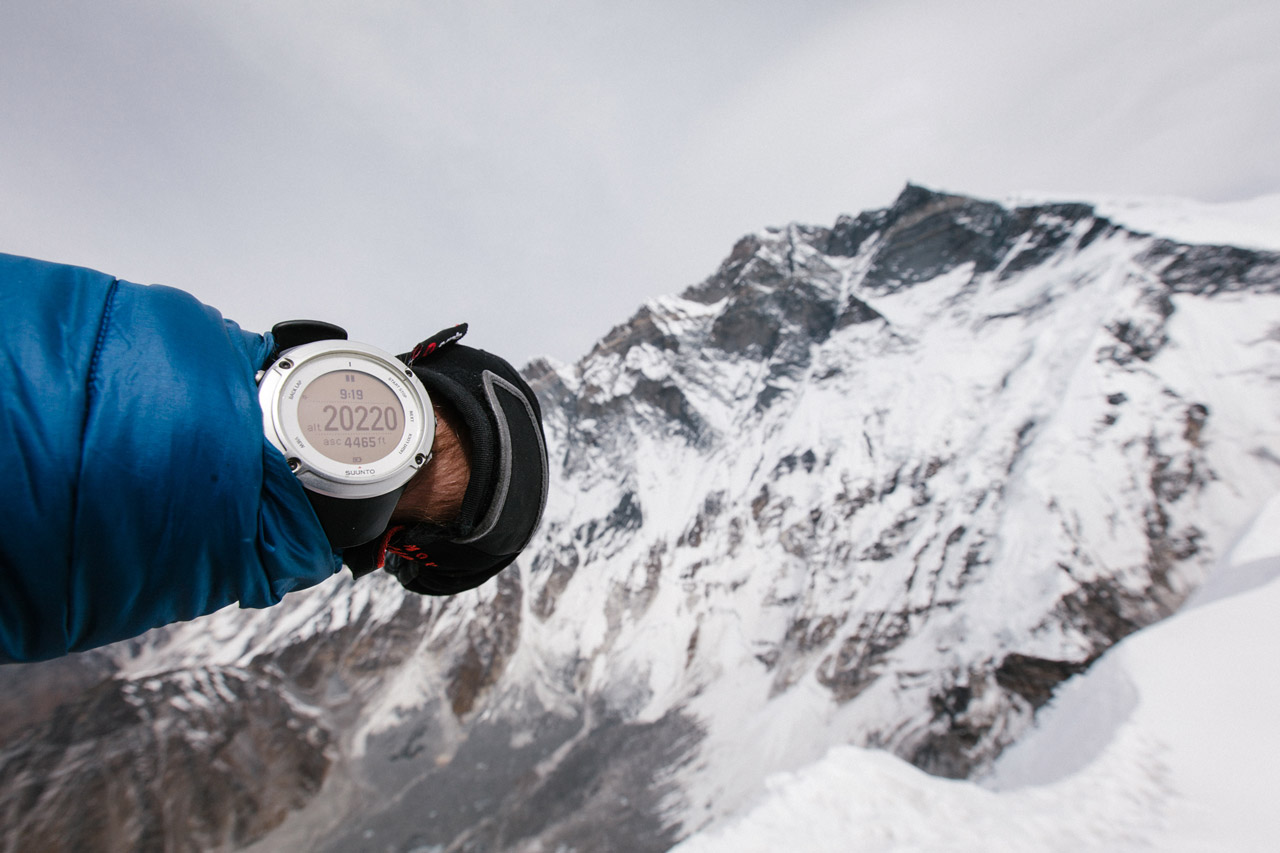
Watch: Suunto Ambit3 Peak + HR ($826)
Watches aren’t necessary for mountaineering, but I find them to be incredibly useful — especially when they feature an altimeter and GPS.
The Ambit3 Peak is a multisport GPS watch from Suunto. With GPS mode activated, it gets up to 100 hours of battery life, which is pretty damned good. Different sport modes prioritise different readings and metrics, depending on the most vital information needed for the activity at hand.
The trekking mode gives priority to the distance readout; then users can toggle between secondary metrics on the same screen. In mountaineering mode, elevation is prioritised; you can toggle between gain, loss, speed, or a plethora of other metrics for the secondary display.
There are literally dozens of modes, all of which can be toggled on through your Movescount account when syncing the watch to your computer or with your phone via the watch’s built-in Bluetooth. Still can’t find the activity you’re looking for? Log into Movescount to create a custom one.
Pair it with the included heart rate monitor, you can track your body’s vitals in real time; and check them out later on Movescount. The watch also has a built-in storm alarm, which detects sudden changes in atmospheric pressure using a built-in barometer and alerts users that a storm lies ahead. It really works.
I’ve been using the Ambit3 Peak for all of my climbs and treks; it constantly proves to be invaluable.
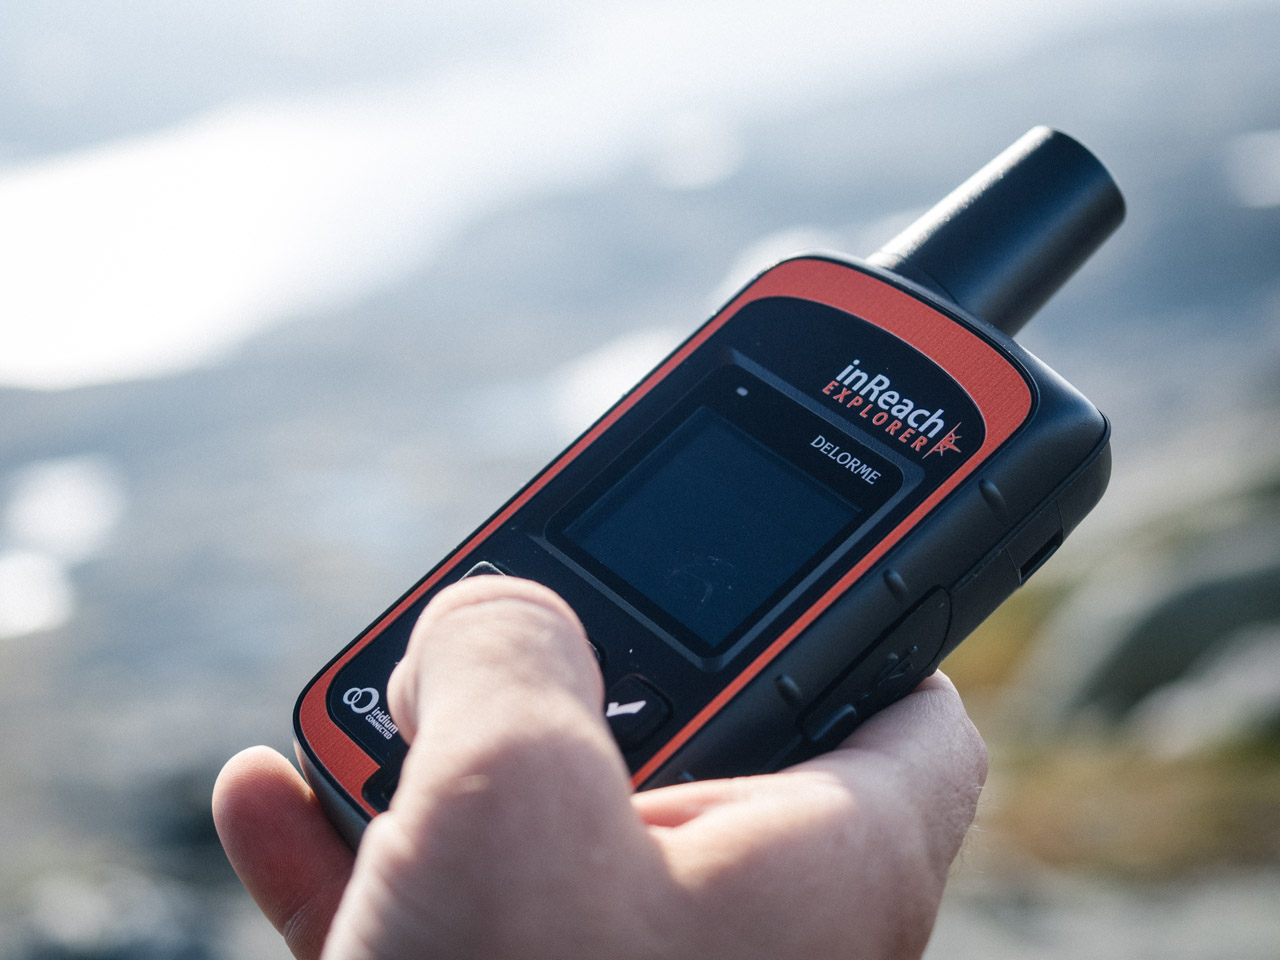
Photo: Daniel Bruce Lee
GPS: InReach Explorer ($550 + Subscription)
The InReach Explorer is a two-way satellite communicator that also functions as a GPS and SOS device.
Thanks to its built-in GPS, it allows users to track mileage, speed, elevation, and location. Just like a dedicated GPS, you can upload GPX/GPS coordinates to use it for navigation.
Though its interface is pretty primitive, it can be used as a means to conduct text-based conversations with family and friends while on remote trips. Travelling abroad without a data plan? You can also send status updates to Facebook and Twitter from the device; each status or message is integrated with MapShare, a GPS tracking service. MapShare allows others to follow along with your journey in real-time.
I’ll never forget getting a text message on the InReach from my mum while adventuring in Iceland: “You just descended 1,200′ in 10 minutes, are you rappelling?” When it all goes wrong, there’s a one-touch SOS button that’s ready to bring in the cavalry (potentially in the form of a helicopter.)
The device’s interface is rudimentary (think Motorola RAZR-era phones), there’s no physical keyboard (instead, one must rely on a D-pad and virtual keyboard to type messages or pair it with a smart phone), and the screen is small. Battery life is great, however; I can run detailed GPS interval tracking for days on-end without recharging (by USB).
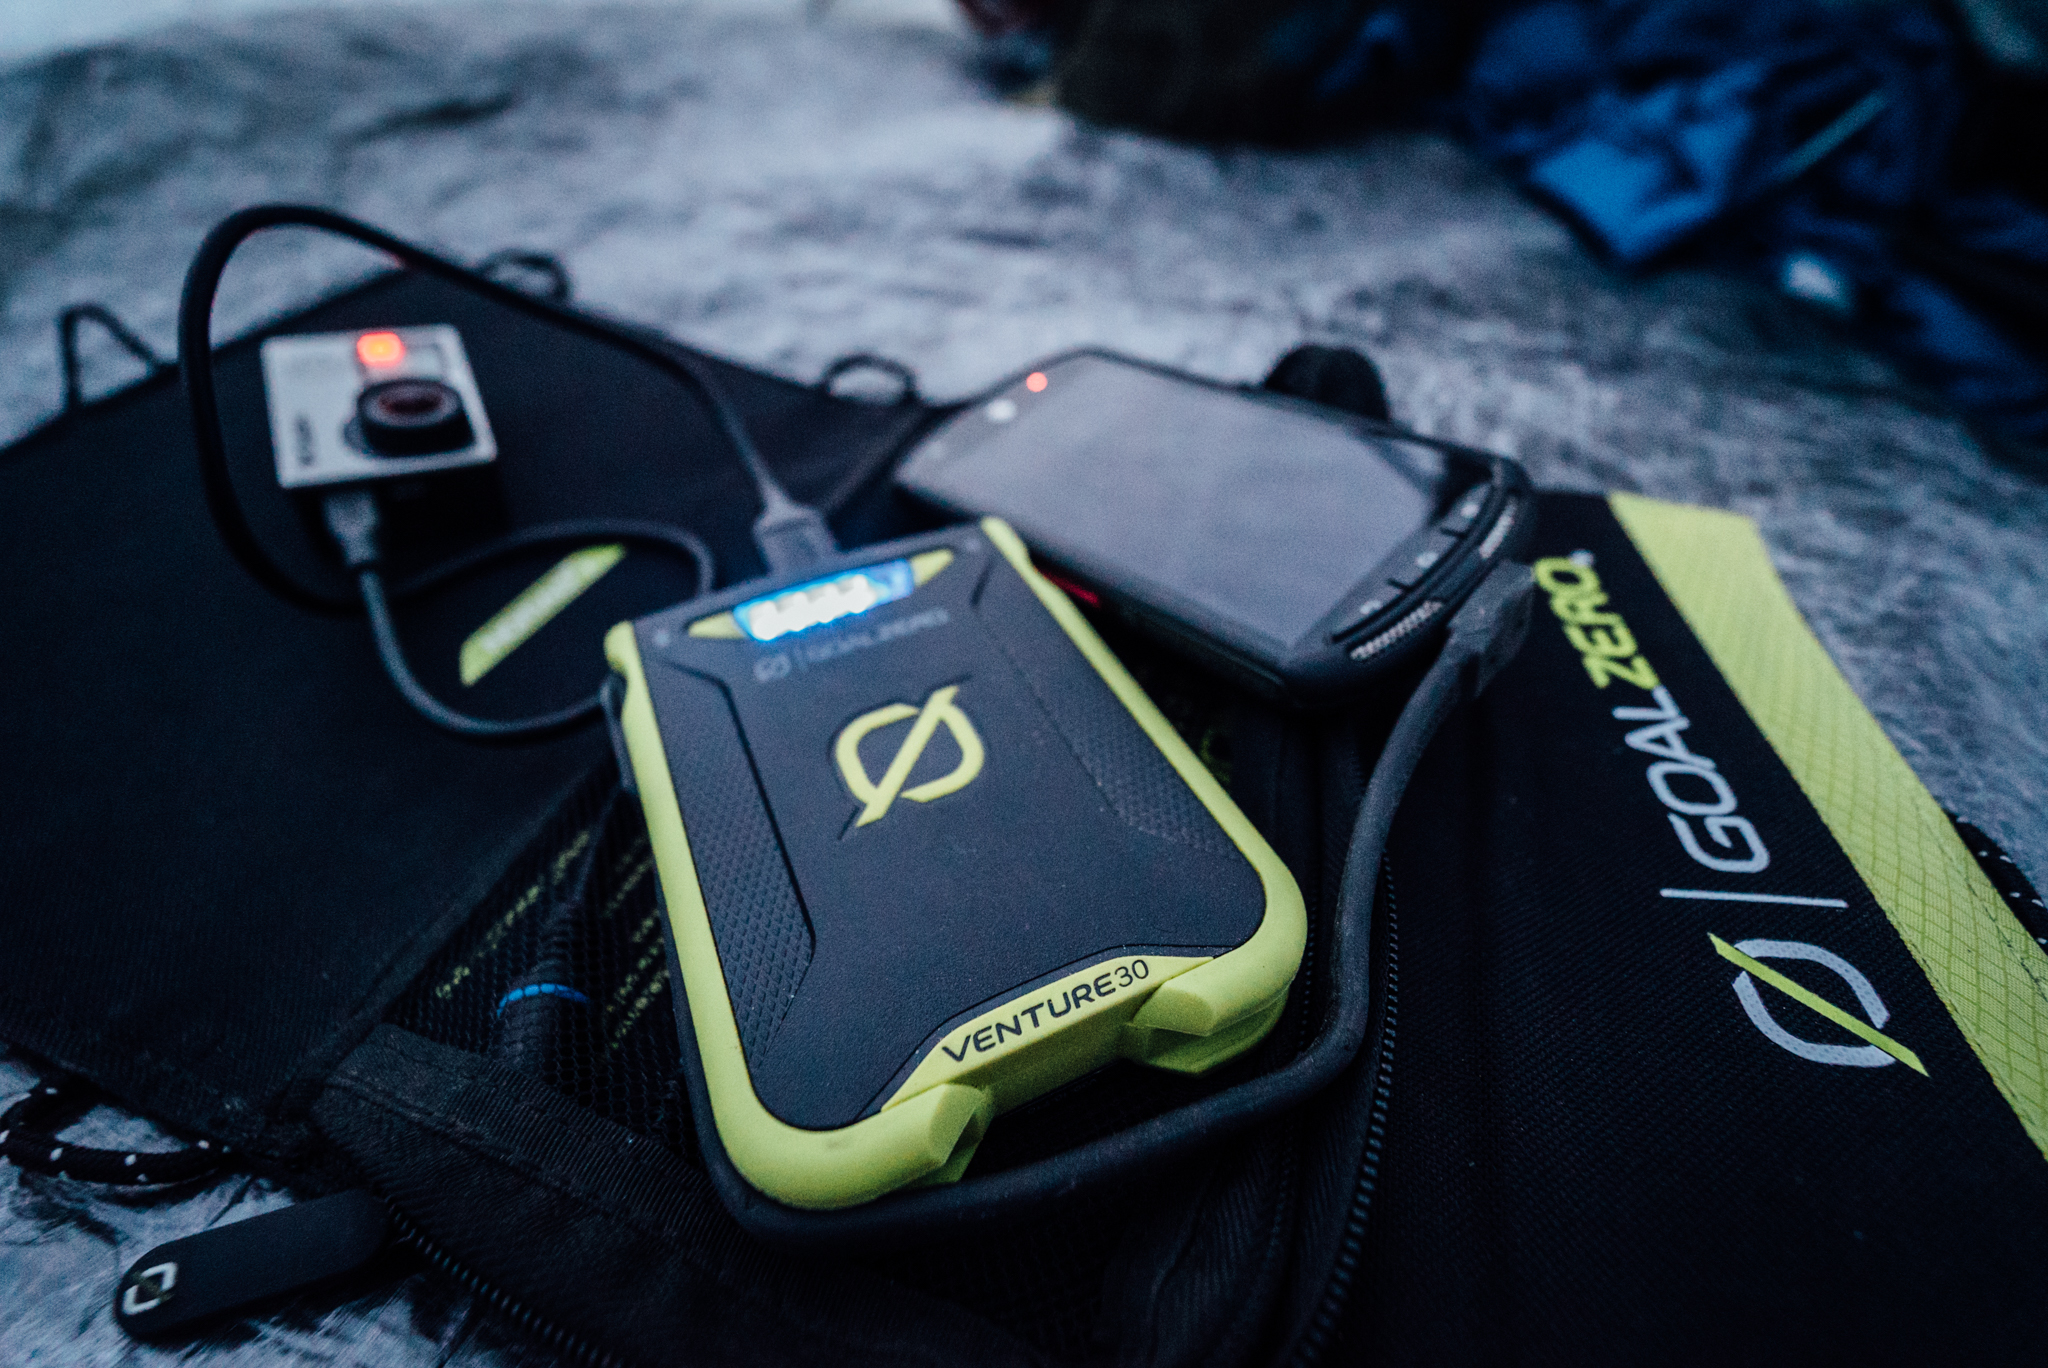
The Goal Zero Venture 30 is lightweight, powerful, and is waterproof, thanks to its IPX6 rating — making it perfect for charging rugged devices like the Kyocera DuraForce in the backcountry.
Portable Power: Goal Zero Venture 30 Kit ($234)
You’ll need a portable and self-sustaining device to recharge all of that high-tech, battery powered gear that you carry into the mountains.
The Goal Zero Venture 30 kit is my go-to on extended climbing trips, when I need to keep my cameras, GPS, watch, headlamp, and phone charged. At 30Wh and 7800mAh, the recharger stores enough juice to fully charge a smartphone two to three times, or a GoPro up to five. Smaller devices like headlamps or GPS watches can be charged up to ten times. In full sun, the Nomad 7 panel will recharge the device in nine hours.
The Venture 30 features two female high-speed 4.8A USB ports, one female micro USB port, and a built-in cable with male connectors for each size. The entire kit weighs a pound and a half. On short climbing trips, I’ll leave this behind, but the Venture 30 is invaluable when I’m going to be out for more than a couple of days.
About the Author:Chris Brinlee Jr.is an adventurer and storyteller who can’t stay put for more than a few weeks at a time. Follow his adventures on Instagram:@chrisbrinleejr.
Photos: Chris Brinlee, Jr. unless otherwise noted.
.