Video content is readily available online for you to download, but the download process isn’t always as simple and automated as using something like a TiVO to simply schedule the content you want to watch. Fortunately, there are some great tools to help you do that with both BitTorrent and Usenet. Here’s how to set them up and turn your computer into an internet PVR.
Note: Note: This tutorial is going to mention Usenet. We’re aware that a lot of you have a problem with that. We’ve discussed this issue before (see “Regarding the First Rule and Other Issues”) so we’re not going to discuss it here.
BitTorrent and Usenet are tools that allow you to download files easily. Some of those files are TV shows and they’re not necessarily legal to download. What you choose to download with the software described in this tutorial is entirely up to you. You accept responsibility for your actions if you choose to download content you are not legally authorised to download. We’re going to provide you with the information necessary to set up and use the described software, but your ethical and legal decisions will be left up to you.
With all of that out of the way, you need to choose what you want to use. First we’re going to take a look at setting up a PVR using BitTorrent and then we’re going to look at doing the same thing with Usenet. If you prefer Usenet to BitTorrent, jump down to the Usenet section below.
The BitTorrent-Based PVR
Setting up a PVR with BitTorrent is incredibly simple, primarily because there are RSS feeds online that update with new episodes for a given show so you can easily obtain torrent files for the latest episodes. While many BitTorrent clients have RSS feed support, we’re going to look at using separate applications that intelligently read these feeds to make the downloading process even easier.
Windows and Linux: TED
If you’re running Windows or Linux, you can use a neat little application called TED to schedule your show downloads. You can also use TED on a Mac, so you can use these instructions to set up TED on your Mac as well (although we’re going to look at a different application for Mac in just a bit). First, download and install TED. Once you’re all set, open it up and you should see a screen similar to the one pictured on the left. To get started, cick the “Add Show” button up top and you’ll be presented with a new panel containing a large list of shows. Find the one you want by browsing or search, then click on it. You’ll be given information about the show as well as a few options. Select which episode you want to start with, whether or not you want to watch it in HD, and click the “Add” button. Once you do that, just repeat for all the shows you want to add and wait until they download. TED will let you know when the next air date is for each episode and will check for new episodes every 60 minutes (which you can change in TED’s settings). When TED finds a new episode, it will download a torrent file to your computer and open it in your default BitTorrent client.
That’s it, you’re all set!
UPDATE: Windows users may also want to check out TVTrigger, an all-in-one TV show searching and BitTorrent-downloading application.
Mac OS X: TVShows
Setting up a PVR with BitTorrent on Mac OS X is ridiculously simple While you can use TED, the same application described in the Windows section, TED isn’t exactly geared towards Mac and might confuse some novice Mac users. For that reason, we’re going to look at TVShows as it’s Mac-only and very simple to use. If you’d like the additional features that TED provides, check out the Windows section above. The instructions will work just the same for Mac.
To get started, first download TVShows and open it. TVShows requires a BitTorrent client to already by installed on your Mac. If you have yet to install one, it will recommend Transmission and help you download it. All that you really need to do to get it working at this point is start adding shows. To do that, scroll through the list (or search it) and click the “Subscribe” button. This will tell TVShows to watch for new episodes and download them as soon as they’re available. When it finds a new episode, it will download a torrent file and open it in your default BitTorrent client. Your BitTorrent client will then download that episode and it will be waiting for you on your computer without any effort on your part.
While that’s all you really need to do, TVShows also has some useful options. If you head into the preferences panel, you can set how often it checks for shows and also set the quality of the file. If you prefer HD, a 720p option is available. You can also set the folder it uses to save torrent files so you don’t find them popping up somewhere you don’t expect.
That’s all you need to do — it’s really that easy.
The Usenet-Based PVR
For both Windows and Mac, Sick Beard is the software of choice. You can also install Sick Beard on Linux, but we won’t be covering that here (although the Linux installation process is not much different from the one for Mac OS X). Sick Beard isn’t as simple to set up as the software in the BitTorrent section of this tutorial, but it’s still pretty easy and it provides much more advanced functionality. It can also facilitate BitTorrent downloads as well as Usenet. First we’ll take a look at installing Sick Beard on Windows (which is very easy), then Mac OS X (which is a little more work), and then take a look at how to use Sick Beard’s web interface on any platform.
Note: Before we get started, you should know that Sick Beard requires that you have Usenet access and you use SABnzbd as your Usenet binary downloader. If you haven’t taken care of this already, read our guide on setting up Usenet, which will walk you through the entire process in three easy steps (with video).
Installing Sick Beard on Windows
To get Sick Beard set up on your Windows PC, go to the Sick Beard downloads page and download it. Unzip Sick Beard to whatever folder you’d like it to live in (it’s really up to you), then launch the installed executable. There’s really nothing to installing Sick Beard on Windows, so if you’re a Windows user, you can jump down to the Using Sick Beard section below.
Installing Sick Beard on Mac OS X
Sick Beard isn’t available as an executable for Mac, but installing the necessary software to run it and update it is very easy. While the following instructions may seem a little daunting, especially if you’re not comfortable with the command line, it’s actually very easy. In most cases you should be able to complete the installation in just a few minutes. Here’s how to do it.
First, if you’re not running Mac OS X 10.6 Snow Leopard this may not work. You can try it, but we can’t promise Sick Beard will run. If you are running Mac OS X 10.6, you’ll need to install a couple of things:
Downloading and installing Git is very easy because it’s packaged up for you. You just double-click on the installer once you’ve downloaded it, run through the usual installer screens, let the installer do its thing, and then you’re done.
Cheetah requires a tiny bit more effort to install. Once you’ve downloaded Cheetah, open up the Terminal application (you’ll find it in Hard Drive -> Applications -> Utilities). Once terminal is open, type cd, a space, and then drag the folder containing Cheetah onto the terminal window. This should add the path to the Cheetah folder to command you’ve started typing. For most of you, it should look like this:
cd /Downloads/Cheetah-2.4.4
Press enter, then type this command (or just copy and paste it into your Terminal window):
sudo python setup.py install
Press enter and you’ll be asked for your password. Type it in, press enter again, and then Cheetah will install. This should only take about a minute.
Once Cheetah has been installed, we can start installing Sick Beard. If any of the following does not work, try quitting and reopening Terminal and trying again. Before we start the installation, we have to decide where to install Sick Beard. I like it in my Applications folder, but you can put it anywhere you want. To put it in your applications folder, enter the following into Terminal and press enter:
cd /Applications
Now that you’re in the folder where you want to install Sick Beard, we need to download all the files from Git. To do that, enter the following command:
git clone git://github.com/midgetspy/Sick-Beard.git
Once Git has finished downloading all the Sick Beard files to your Applications folder (or wherever you chose to put them), you’ll have a folder called Sick-Beard. To start Sick-Beard, just enter the following in Terminal and press enter:
cat
python /Applications/Sick-Beard/sickbeard.py
The first time Sick Beard starts up it should take a little longer than usual, so don’t worry if nothing happens for 30 seconds or so. When Sick Beard is ready to go, it will open in a new window (or tab) in your default web browser. That’s it, you’re done!
When you want to update Sickbeard, you can do so easily with the following Terminal commands (note that the first line contains the path to Sick Beard, so if you installed it somewhere other than applications you’ll need to change the path):
cd /Applications/Sick-Beard
git pull
Just make sure you shut down Sick Beard before you update. That’s it!
Special thanks to jetshred for the great instructions!
Using Sick Beard
Sick Beard is very easy to use, as its function is to make downloading shows a simple and automated process. Once Sick Beard is running, you can access it from your web browser (on the same machine) at http://localhost:8081. If you want to access Sick Beard from another computer, just replace localhost with the local IP address of the machine that’s running Sick Beard.
Once you get to the main screen (pictured to the right), you can add shows to Sick Beard by clicking the “Add Show” button in the episode list. This will present you with two options: Add New Show or Add Existing Show. This might be confusing at first because if you have no shows added to Sick Beard, how could you possible add an existing show? An “Existing Show” is defined by Sick Beard as a show that already has a folder on your hard drive. This means that if you’ve used SABnzbd (or something else) to download a show and it’s already in your SABnzbd downloads folder, it counts as an existing show. If you have no previously-created folder for a show, however, it is considered a “New Show” and you’ll want to choose that option.
New Shows
Adding a new show is very simple. First, search for the show you want. After a few seconds, Sick Beard will return a list of shows it recognises. It will, most likely, automatically choose the show you want. If not, just select that show from the list. Click next to move to step two, which will let you select a download location. Do this, then move on to step three and select download options for the show. When you’re done, click “Add Show”. That’s all you have to do.
Existing Shows
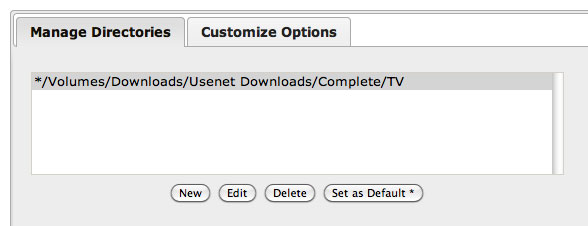
If you chose existing shows, you’ll be first asked to manage the directories that Sick Beard works with. Click the “New” button in the Manage Directories panel (pictured to the right) and browse to the directory that holds your TV show downloads. Once you select it, Sick Beard will read the downloads folder and give you a list of all the shows it finds. Uncheck any of the shows you don’t want to add and then click the Submit button. Sick Beard will then walk you through matching each show directory you added with information it finds about those shows. You’ll also be able to set whether or not you prefer SD or HD quality at this time. Sick Beard will ask you for your preferences for every show you add, so this process may take a little while. Once you’re done, however, Sick Beard will be ready to start downloading every one of these shows for you, automatically.
Additional Sick Beard Configurations
While Sick Beard will do its job without additional configuration, if you’re using SABnzbd and a NZB tracking site (like NZBMatrix or Newzbin), you can add your credentials and API keys to Sick Beard so that Sick Beard uses those tools for downloading rather than relying on the defaults (which are not necessarily as good). You can also configure Sick Beard to automatically update your XBMC (and other media centre) data when it finishes downloading a new show, among a few other neat options. While we’re not going to get into the specifics of Sick Beard’s config options, you should definitely run through them so you can configure Sick Beard to work best with your setup. To do this, just click “Config” in the Sick Beard navigation and choose the subcategory you want to edit.
Republished from Lifehacker