
When it comes to powerful photo editing software developed by Adobe, Photoshop isn’t your only option: There’s also Photoshop Elements, the stripped-down, simpler, and more affordable version of the same software. Photoshop will set you back $343.07 a year, or $28.59 a month, but Photoshop Elements is available for a one time purchase of $US100.
Editor’s note: Why is the US$100 not converted to AUD? Because a notification on the Adobe website tells us it’s not available in Australia. But if you know your way around a VPN and want to give it a go (we cannot confirm or deny that this will in fact work, as we haven’t tried), here’s an explainer on what you can do from one of our U.S.-based writers.
For a lot of people — anyone for whom photo editing isn’t an essential part of their job, really — the Photoshop Elements deal is a better one. You still get plenty of advanced editing tools, you still get the Adobe guarantee in terms of reliability and support, and you’re not paying indefinitely to keep using the software.
If you’ve decided Photoshop Elements is the imaging editing solution for you, we’ve got some tips and tricks to help you get more out of it on Windows or macOS — and whether you’re a complete beginner or a seasoned Elements user, you should be able to find some useful advice in what follows.
1) Reduce the effects of camera shake
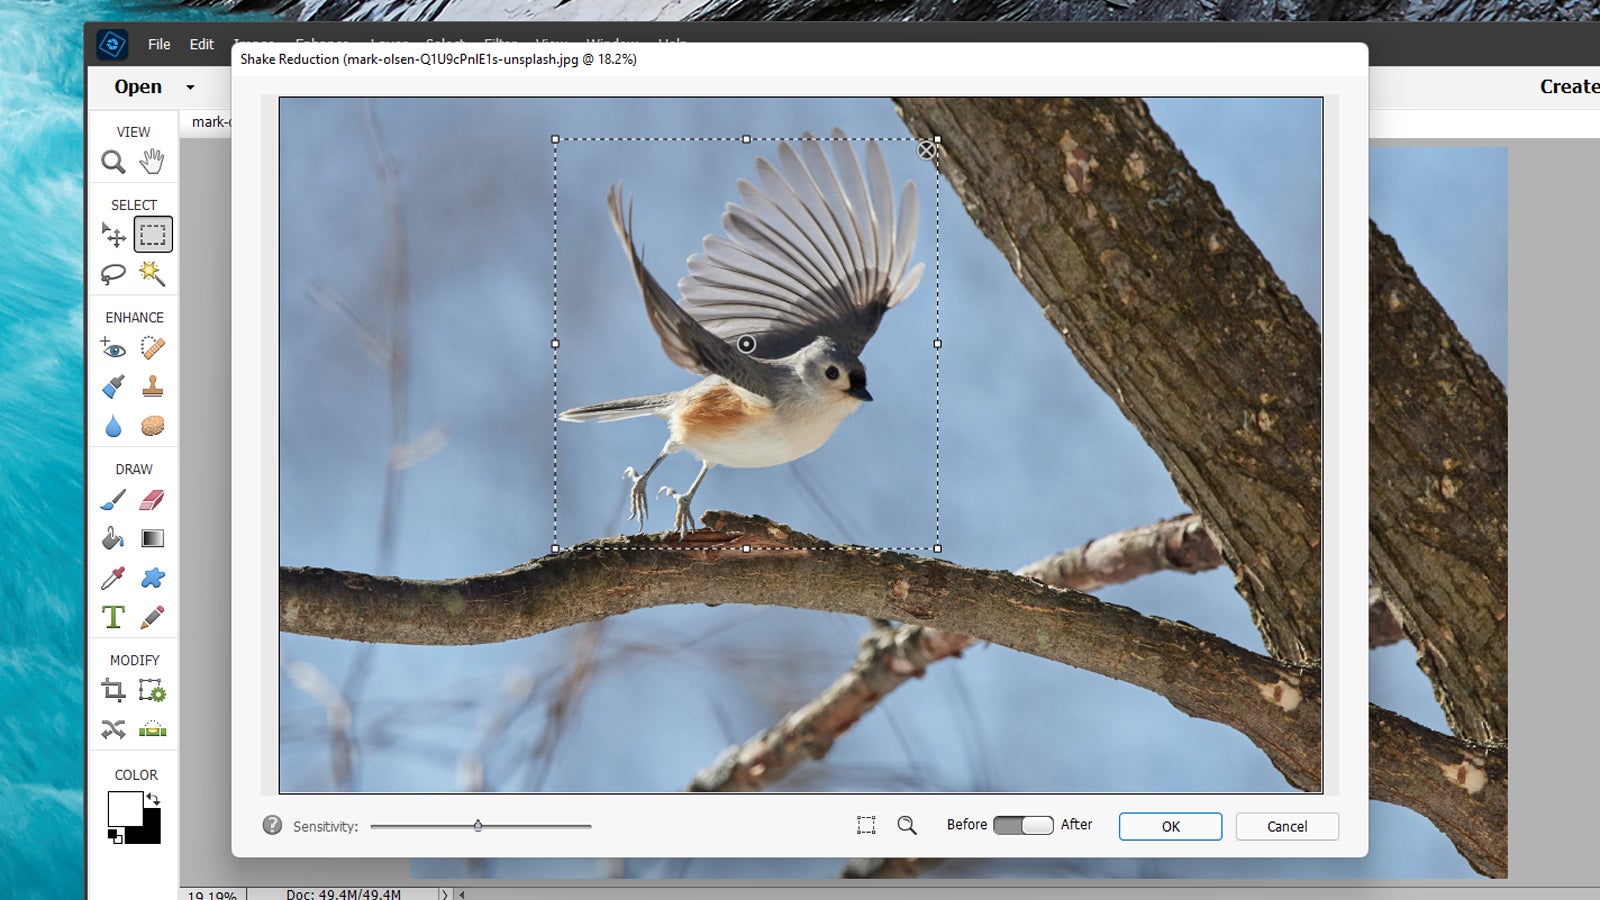
The whole reason for the existence of Photoshop Elements is to make tricky image editing tasks very straightforward to accomplish — and correcting camera shake is one of those really useful edits that can take a long time if you don’t know what you’re doing. With this application, even complete beginners can take care of it with a few clicks of the mouse.
With a photo open in the Expert mode inside the program, choose Enhance and then Shake Reduction to apply the edits. You can pick out your subject, adjust the effect sensitivity, and see before and after previews. If you’d rather let Photoshop Elements take care of everything for you, try selecting Enhance and then Auto Shake Reduction instead.
2) Turn your photos into art
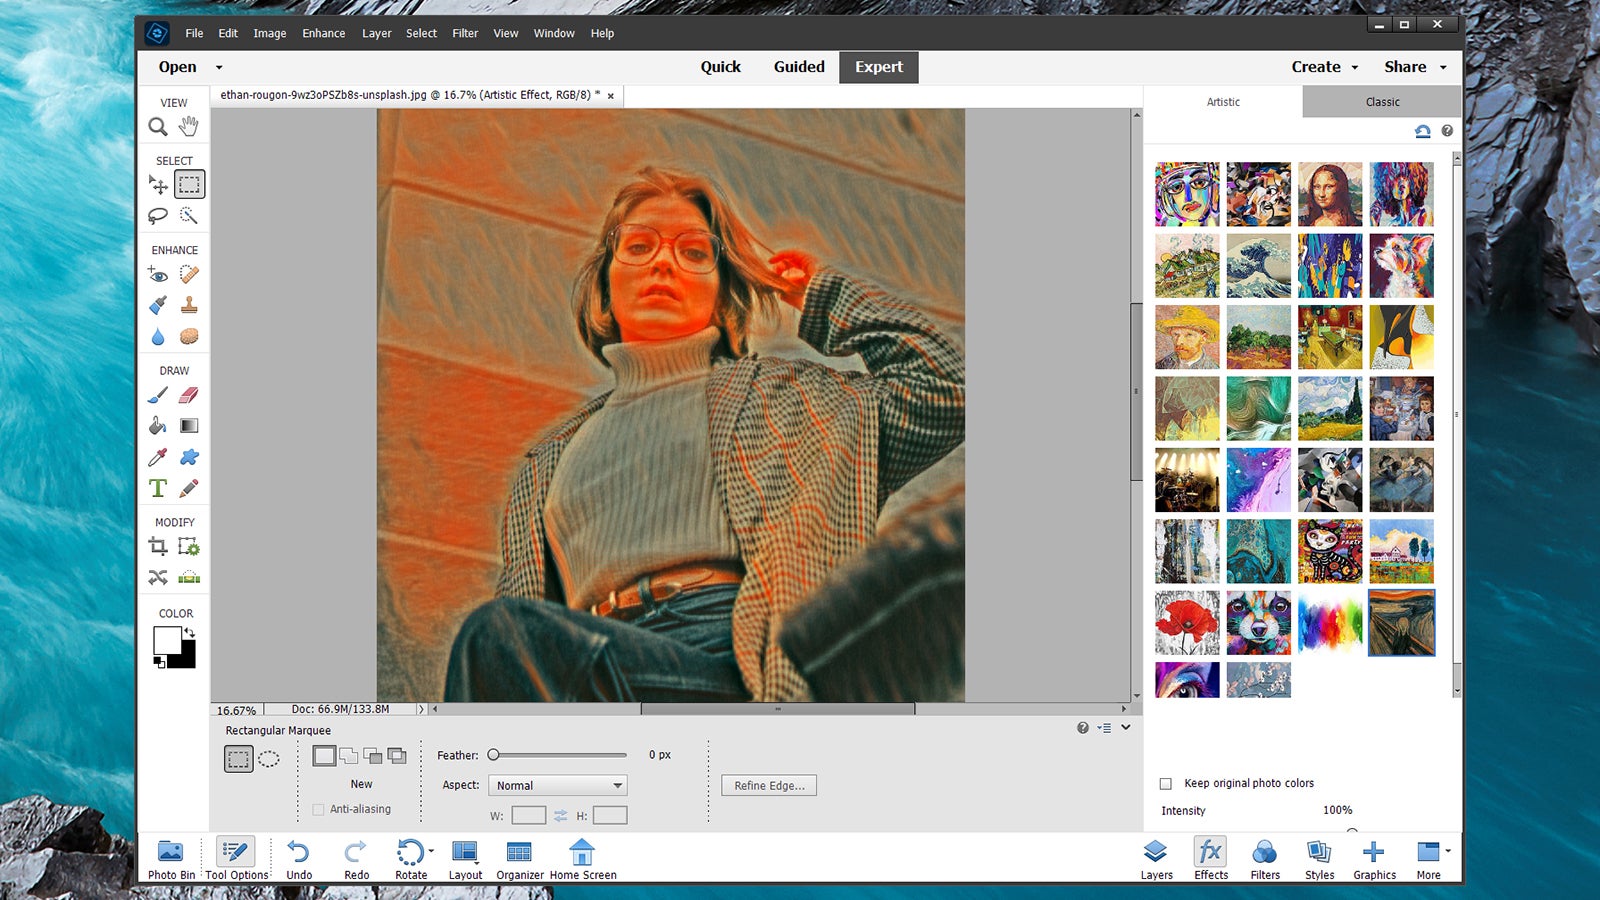
Photoshop Elements excels at enabling you to produce professional-looking edits with the minimum of effort. For example: Open an image in Expert mode and click the FX Effects button in the lower right corner to choose between a variety of simple Classic effects and more advanced Artistic options (these include Modern, Cubist, or Expressionist).
If you find any of the effects a little too much, use the slider underneath the effects to change the intensity. Check the Keep original photo colours box to have the filter change the style of the image without altering the colours or their saturation. You can quickly add some style to the most mundane of images, and effects can be combined together too.
3) Use the zoom wheel to scroll
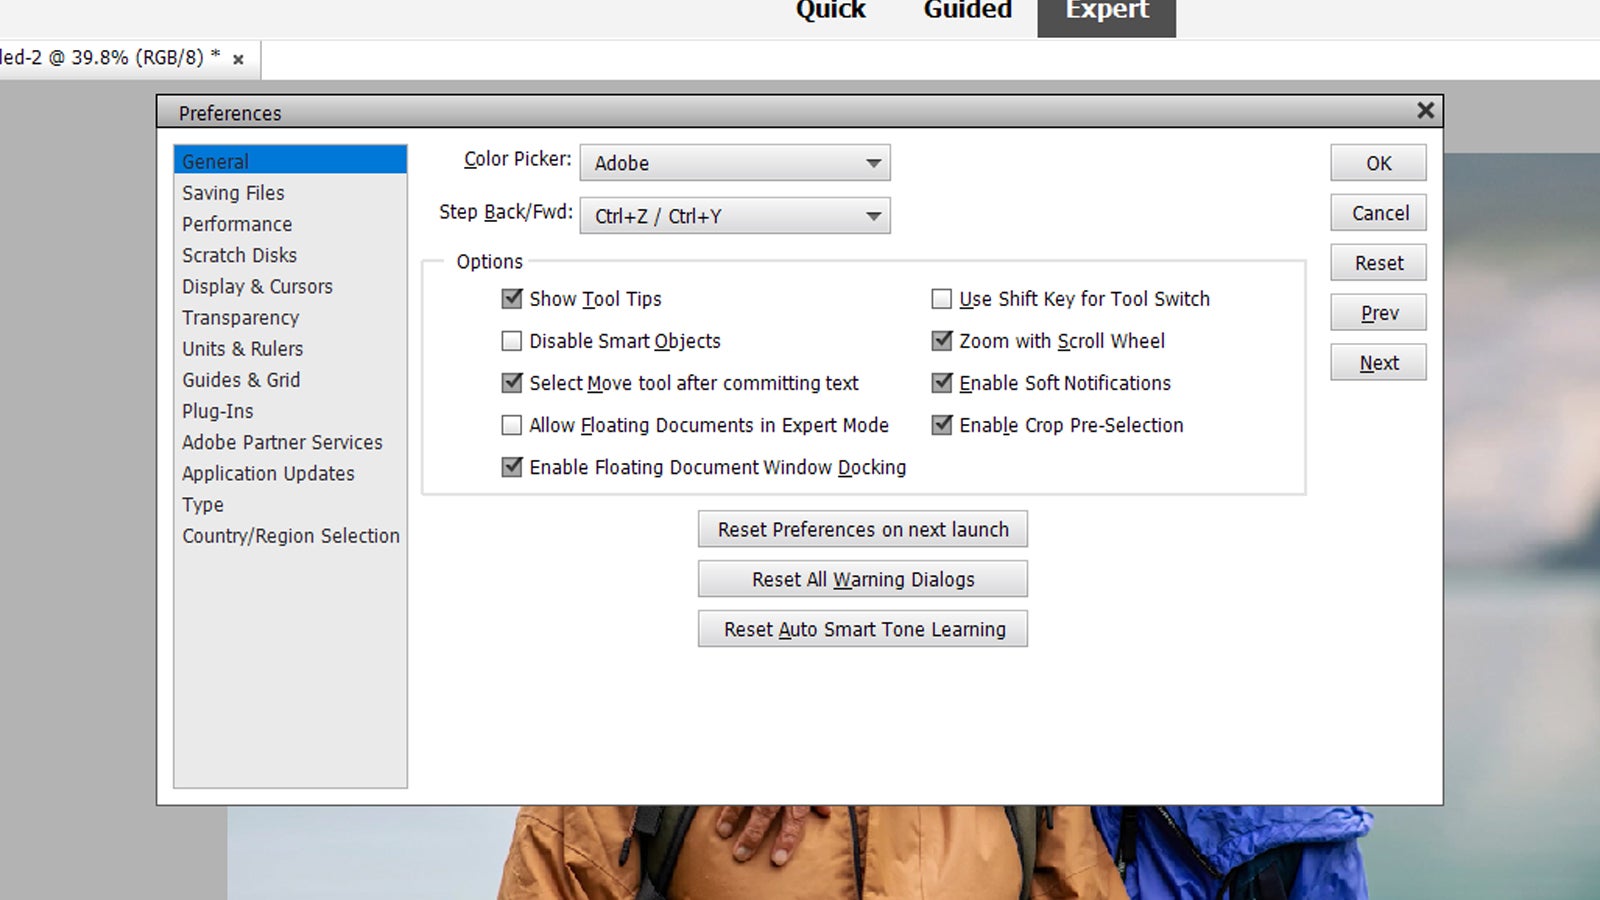
Dive into the Photoshop Elements Preferences panel and you can customise the way the application works to suit your requirements and your personal taste: There are more options than you might think for tweaking the operation of different tools and features inside the program. To browse through them, open the Edit menu and pick Preferences.
One of the most useful tweaks we’ve found down the years — though your mileage may vary — is using the mouse scroll wheel to zoom in and out of an image rather than to scroll up and down it. If you think you might find this as helpful as we do, open up the General tab and check the box marked Zoom with Scroll Wheel. Click OK to confirm the switch.
4) Select subjects with just one click
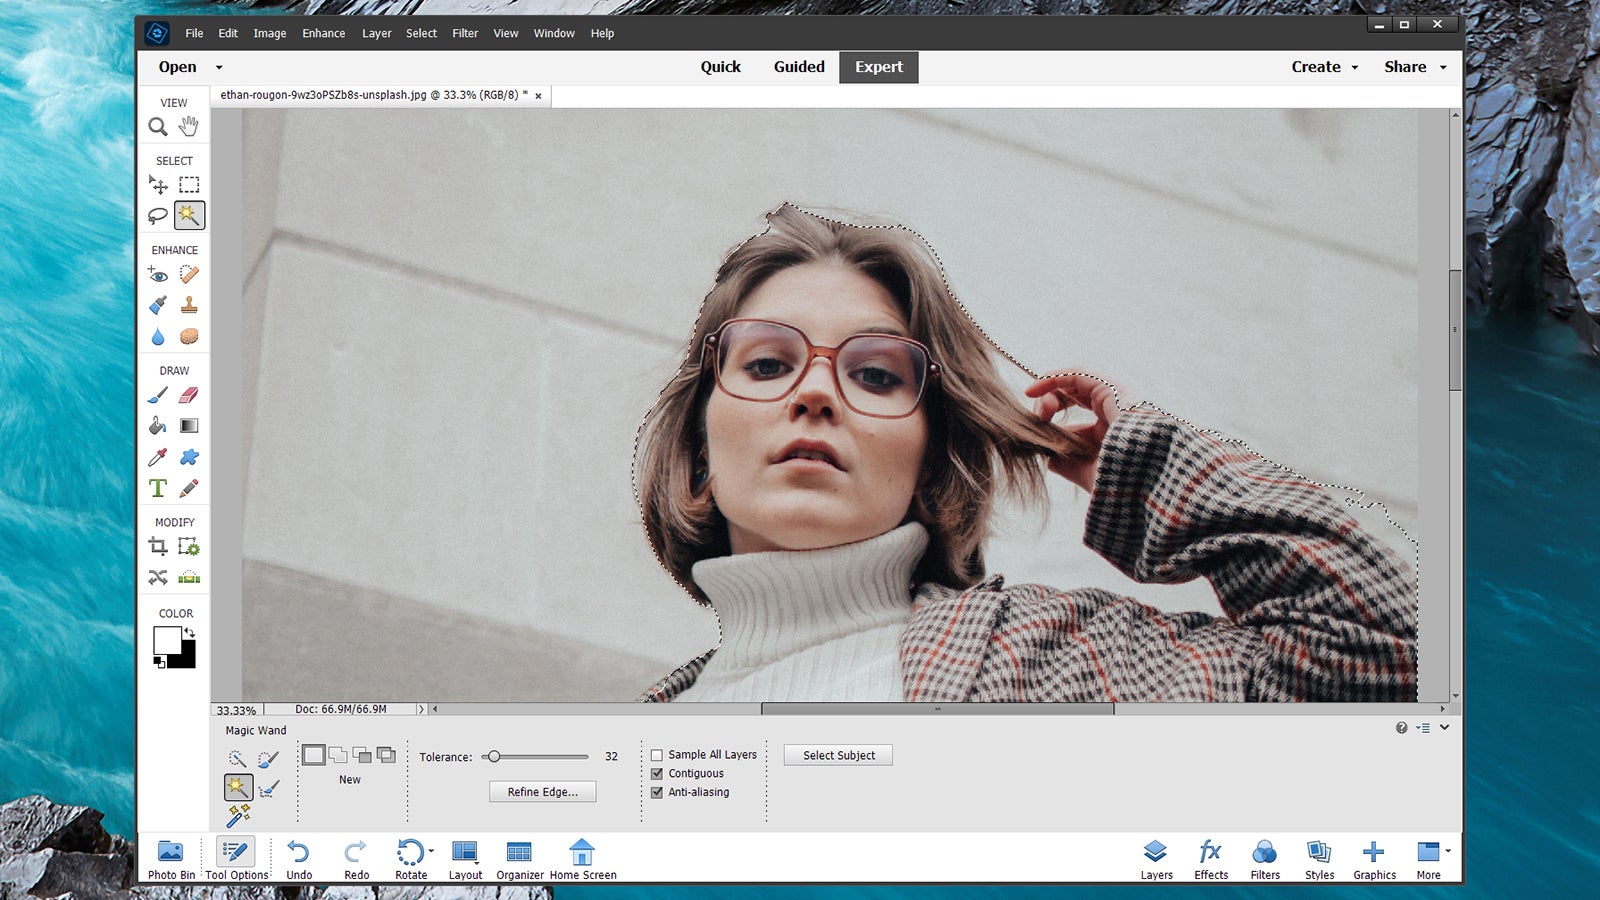
One of the ways photo editing software like Adobe Photoshop Elements has progressed in recent years is in being able to automate a lot of tasks that would previously require a lot of time and careful attention — such as selecting specific people or objects in an image so that you’re able to move them to a different background or adjust them somehow.
Photoshop Elements can apply some clever artificial intelligence algorithms to do this with a couple of clicks: In Expert mode, open the Select menu, choose Subject and the program should pick out a person in the image, if they’re well defined enough. You can make edits on just this selection, or choose Select and Inverse to edit everything else.
5) See more views of an image
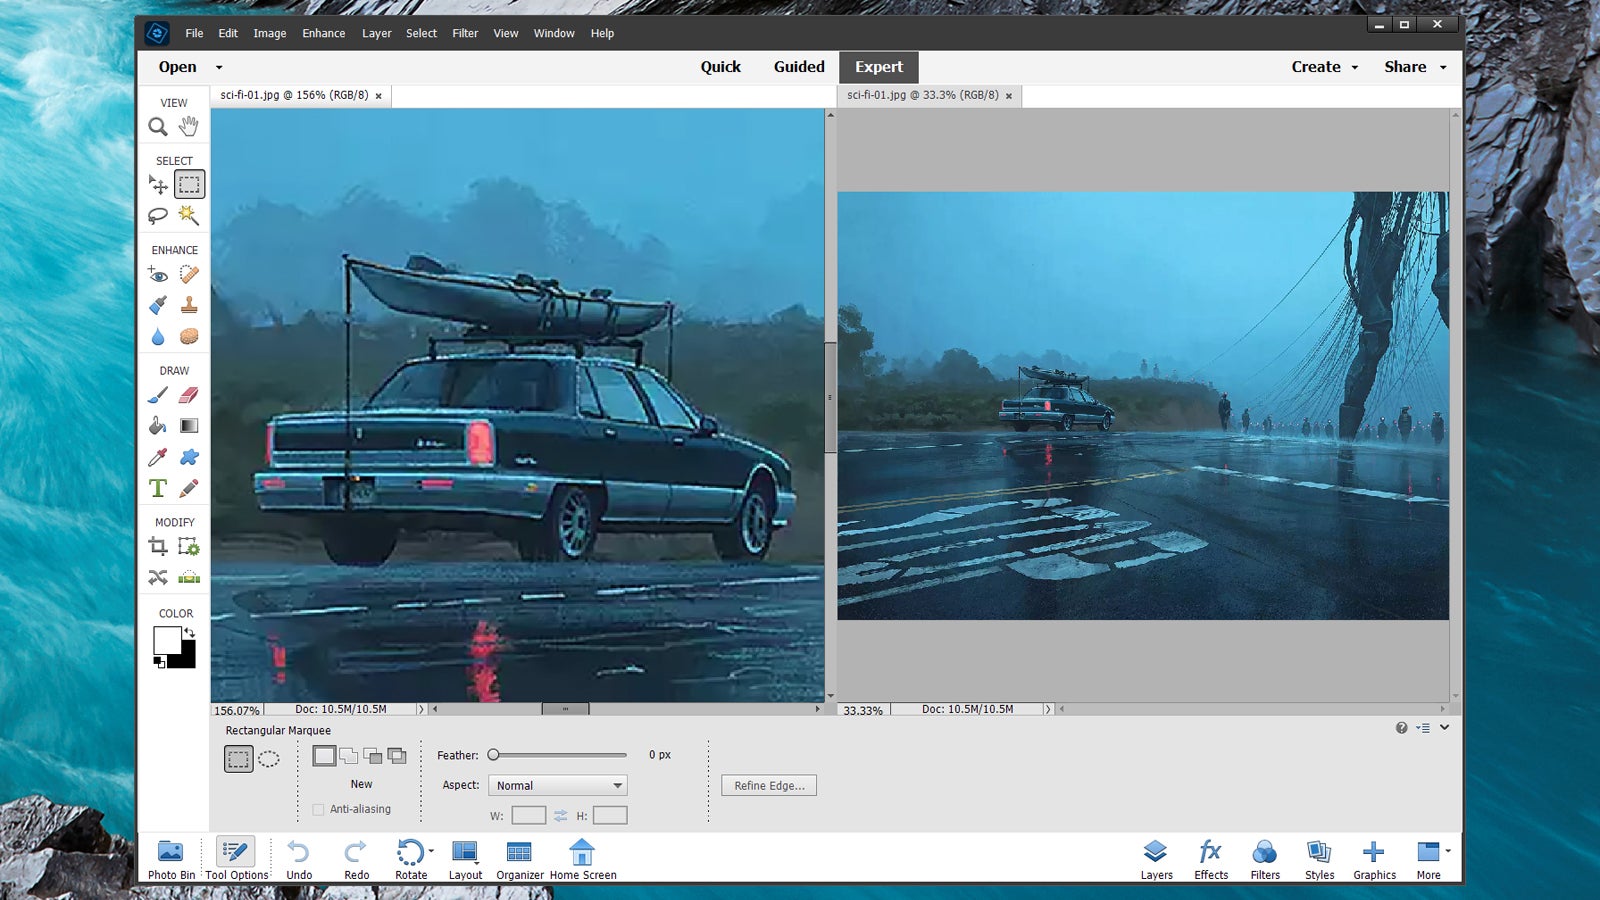
Sometimes you’ll want to perform detailed edits on one particular part of an image while still needing to see the bigger picture, as it were. Constantly zooming in and out of a photo can be difficult and time consuming, but Photoshop Elements has a solution: You can easily open up the same image in multiple windows, all set to different zoom levels.
With your photo opened up in the Expert mode inside Photoshop Elements, select View and then New Window for… which will have the name of the current image added to it. When you’ve got multiple windows on screen you can arrange them however you like (try the Layout button for example), just as you would if they all showed different images.
6) Open closed eyes
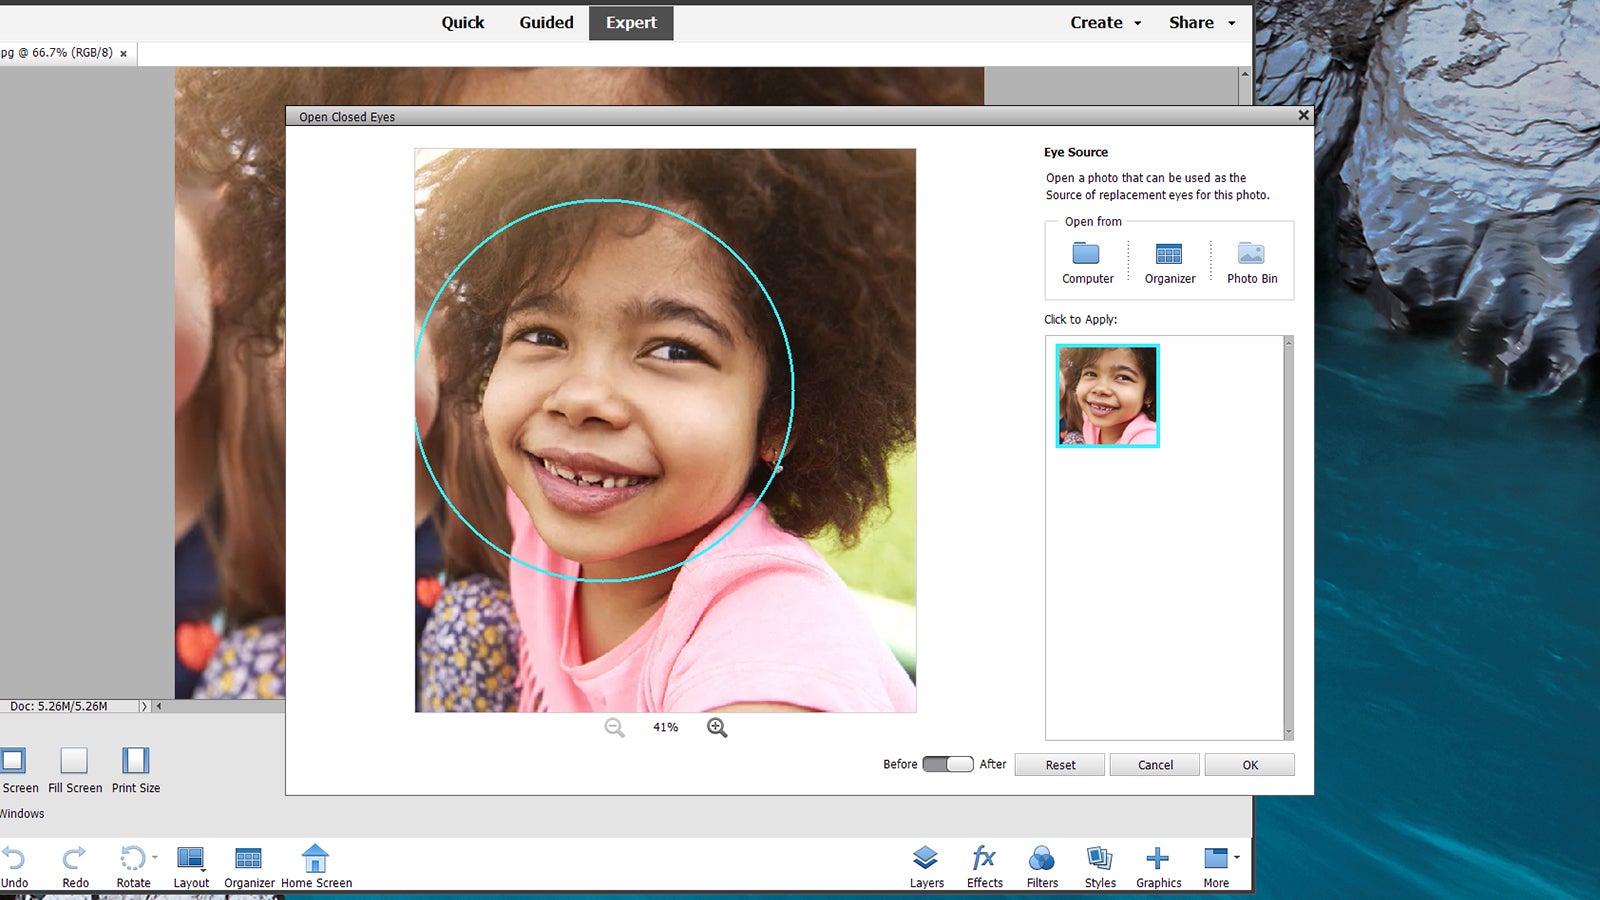
One of the most common problems you’ll find with your photos is that someone in frame had their eyes closed at the crucial moment. Photoshop Elements can use some artificial intelligence magic to open them again: In Expert mode, select the Eye Tool on the left, then choose Open Closed Eyes from the tool options dialog at the bottom of the interface.
There is a caveat here that you will need a good photo of your subject with their eyes open (you can use some sample eye images instead, but the results tend to look a little weird). From the dialog that pops up, choose the image that has your replacement eyes in it, and after a few seconds the application should be able to fix them in the correct position.
7) Take a few steps back
In the Expert view, there are plenty of useful panels you can have up and visible while you’re working on images in Photoshop Elements: Open the Window menu to see what’s available. You can keep the effects or filters panels open at all times, for example, or see what layers make up your image, or keep an eye on the key details of an opened file.
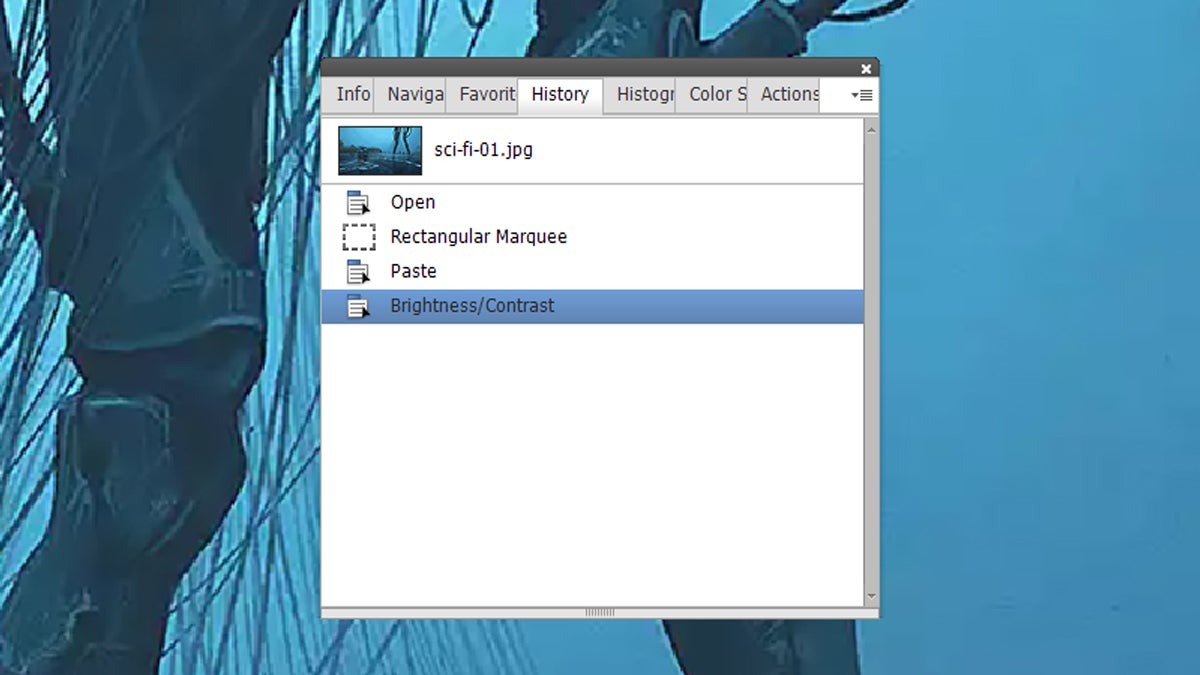
One of the floating windows we find most useful is the History one. You’re probably aware of the Ctrl+Z (Windows) or Cmd+Z (macOS) shortcut that enables you to undo the last change you’ve made to a picture, but the History pane lets you go back dozens or even hundreds of steps — very handy if you’re not happy with the way your edits are turning out.
8) Correct skin tones
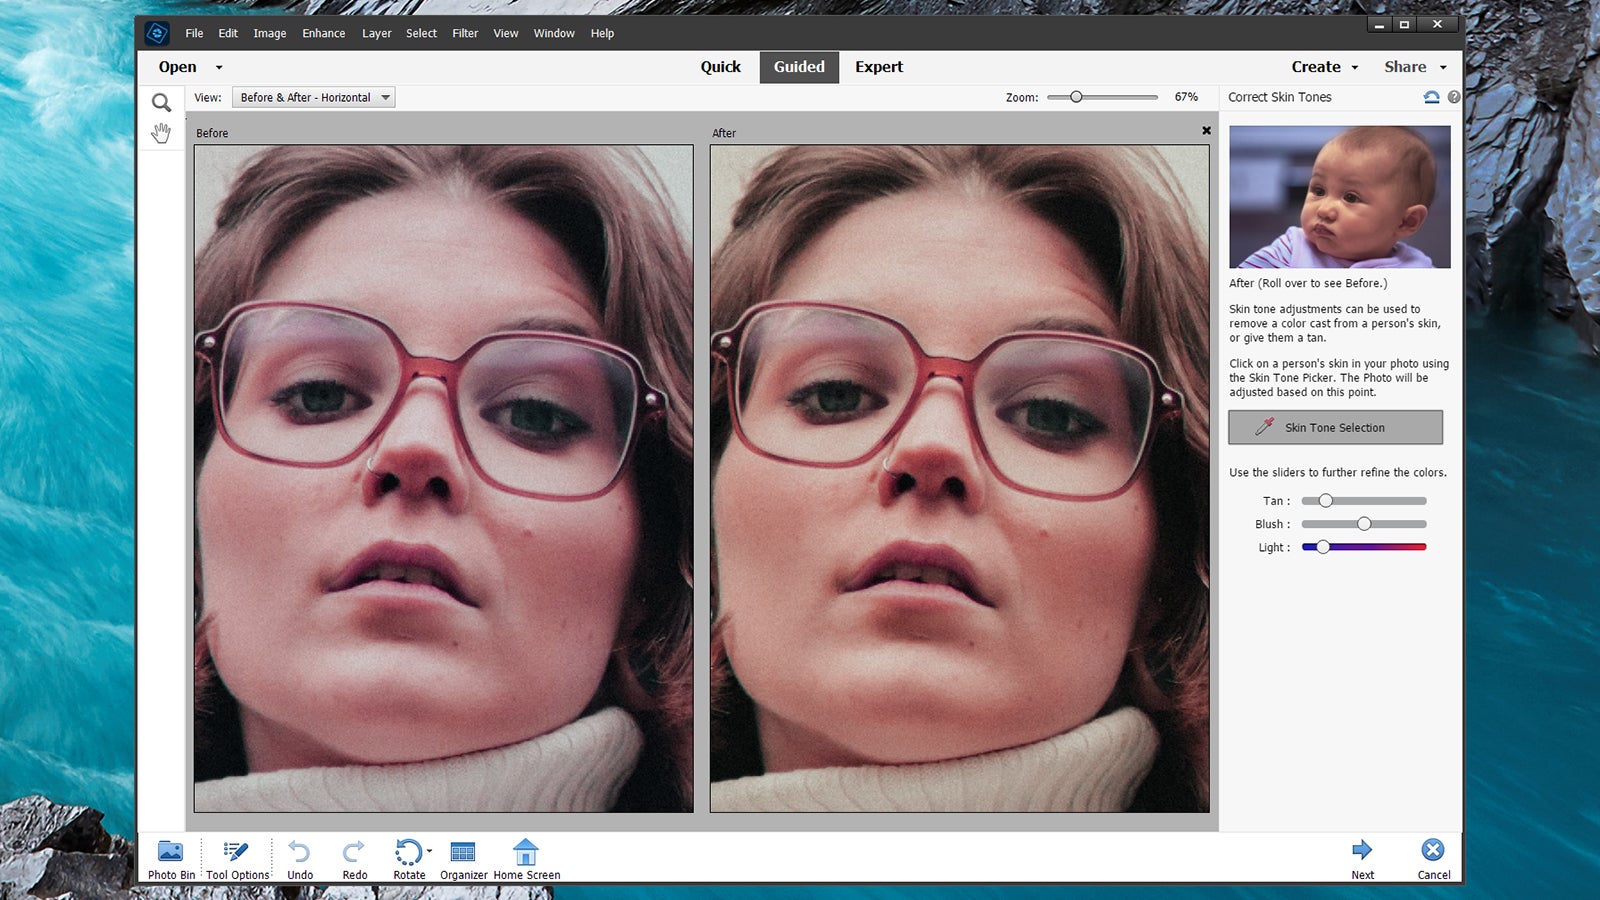
If you’re taking shots of people indoors then you may come across problems with skin tones on your subjects, if the lighting is a particular type or creates a particular cast. Photoshop Elements enables you to correct this problem as one of its Guided Edits: You can find it by clicking on Guided at the top and then Correct skin tone from the list.
First you’ll be asked to click on an area of skin, which Photoshop Elements will then use as a reference. Then, use the sliders on the right to adjust its colour, making sure to select a before and after view from the drop-down list in the top left corner so you can see the difference. When you’re happy with the changes, click on Next so you can save them.
9) Improve Photoshop Elements performance
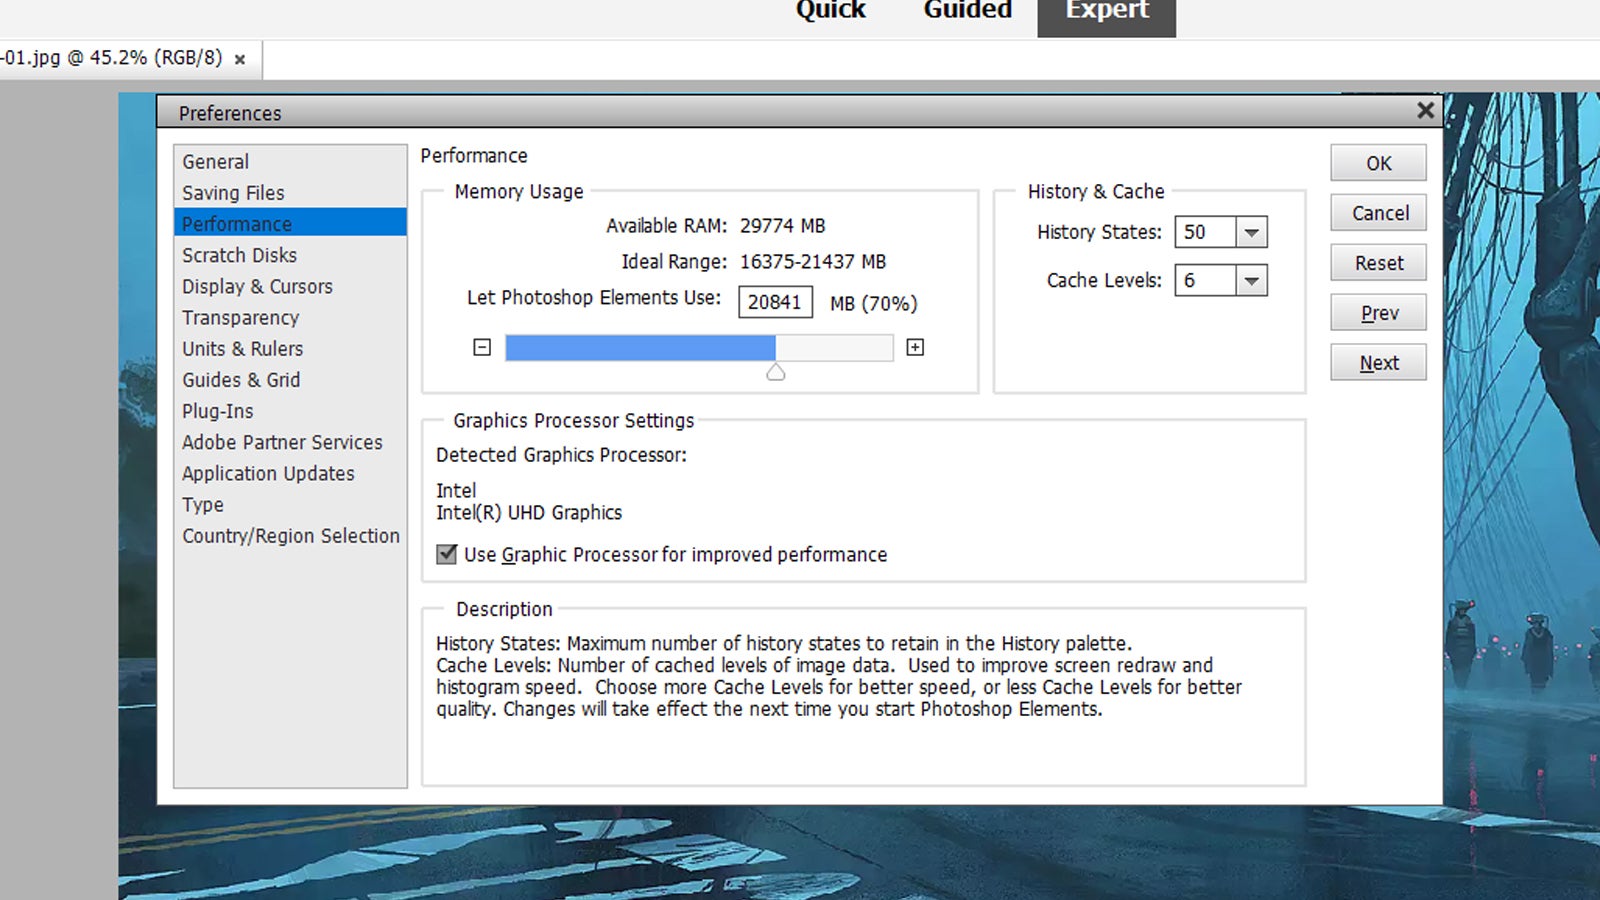
If Photoshop Elements isn’t running very well on your hardware, there are ways you can try and fix this. Choose Edit, Preferences and Performance to see what’s available: Lowering the number of history states can reduce the demands on your system, for example, though it does mean you’re more limited when undoing your image edits.
On the same dialog you can increase or decrease the amount of RAM available to Photoshop Elements (the program will advise you on what the “ideal range” is for your system, and choose whether or not to utilise your computer’s GPU for improved performance. When you’re happy with your selections, click OK to apply the changes.
10) Extend photo backgrounds
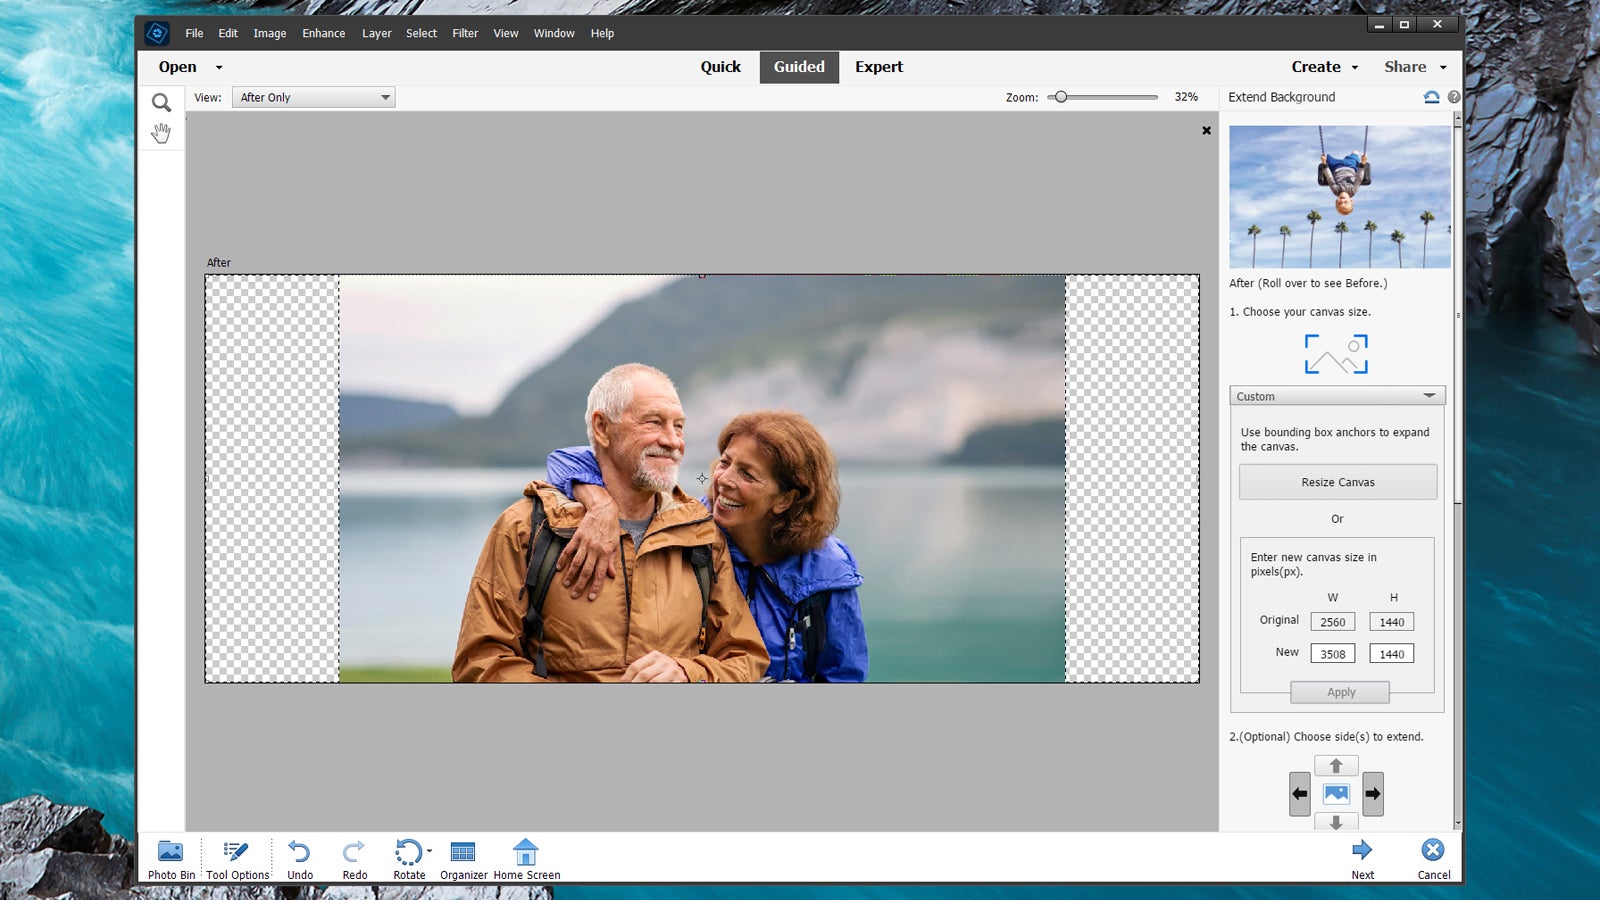
If you need a photo that’s a little larger than the original, and it has a background that can be reproduced reasonably easily (like a beach and a sky), Photoshop Elements is able to take what’s already in the picture to produce a convincing extension of it. This is another Guided Edit, so open your photo, click Guided at the top, and then choose Special Edits.
There are several cool effects here, but the one we want is Extend background. Use the options on the right to choose your finished photo size (some social media template sizes are offered if you need them), then decide if you want to stretch the background (Extend) or clone the background to fill the space (Autofill) while keeping the subject untouched.