Most of us have been using a laptop to work and play for years and years, but aside from your well-worn routines, have you actually explored every utility and feature that would make your life easier? Are you sure? Take a trip off the beaten track to some of the lesser-known features and options available to you — from expanding your screen space to improving system security.
1. Go dark
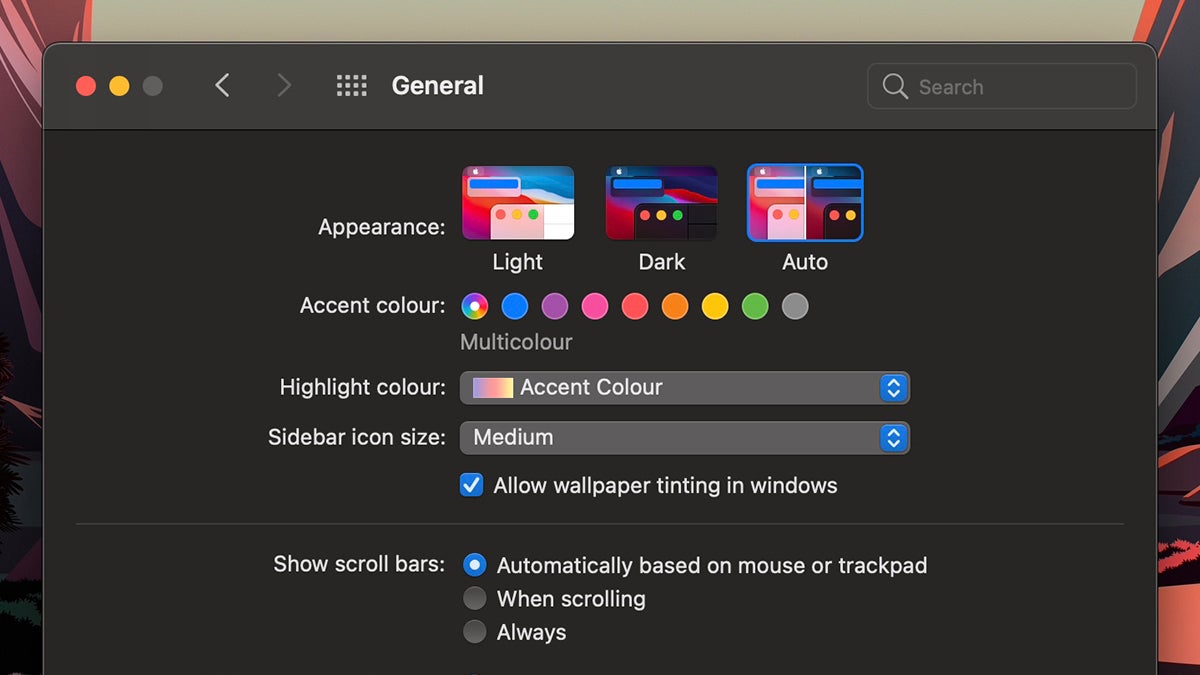
Dark mode is available on pretty much every app and device these days, and of course, you can enable the setting on Windows and macOS, too. On macOS, open up System Preferences and then choose General and either Light, Dark, or Auto — that last one changes the setting based on the time of day in your location.
If you’re on Windows, open up the Settings panel and pick Personalisation, Colours, and then click the Choose your colour drop-down to see the options. In addition to Light and Dark, there’s a Custom option that lets you pick separate settings for apps and Windows itself.
2. Stream games from your console
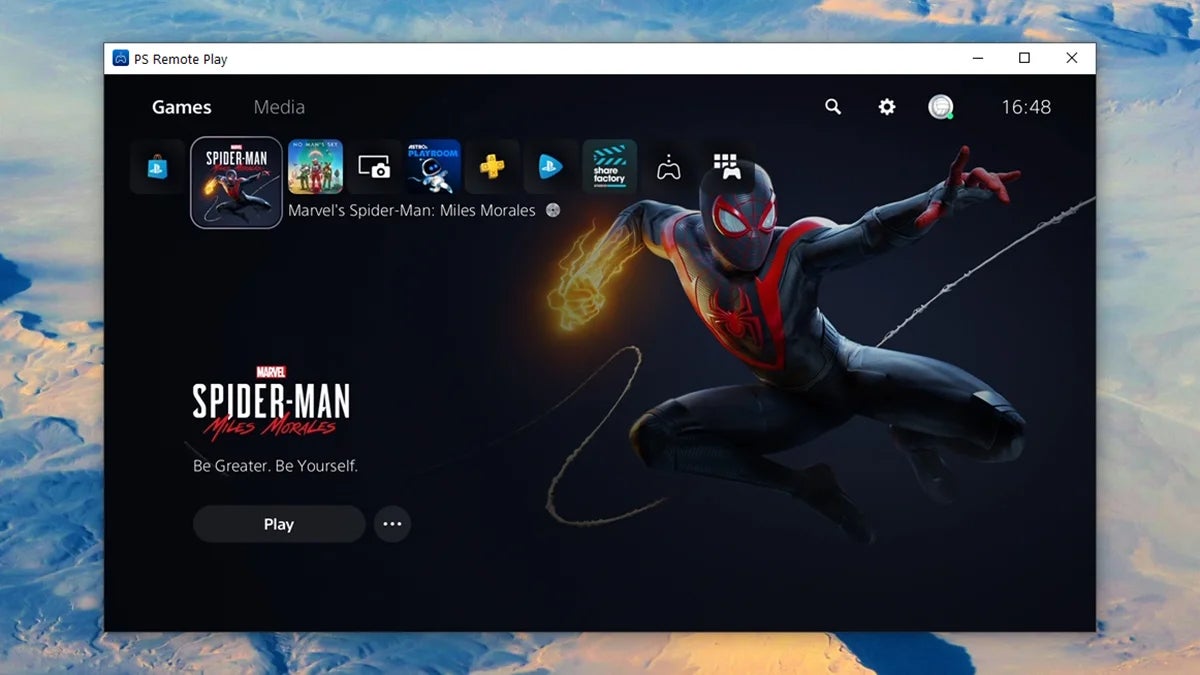
Laptops have been able to stream games from a Sony or Microsoft console on the same wifi network for a while now, and we’ve written about it before on last-gen and next-gen consoles. All you need is to install the right software on your computer to get up and running.
If you own a PS4 or PS5, you need the free PS Remote Play. If you’re on an Xbox One X or S, you need the Xbox app built into Windows, or OneCast for macOS ($27 after a free trial). Xbox Series X and S boxes can’t do this for now, but should get the option eventually.
3. Pin websites to the dock or taskbar
In addition to pinning apps to the dock or taskbar, you can also pin websites that you frequently visit in the same place for speedy access — a sort of upgrade to the bookmarking system already available as a built-in feature of your web browser.
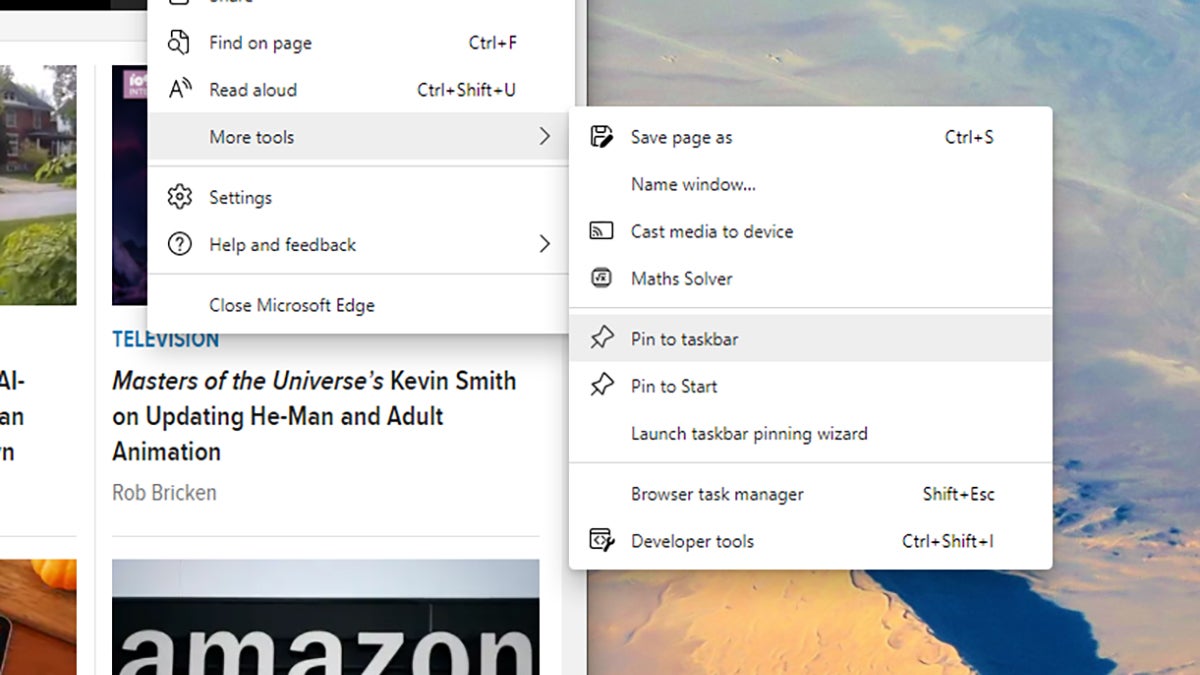
Mac users can just drag down a URL from the Safari address bar to the right-hand side of the dock. If you’re on Windows, it’s most easily done from Microsoft Edge. Open the main browser menu (the three dots, top right), then choose More tools and Pin to taskbar.
4. Send messages from your phone
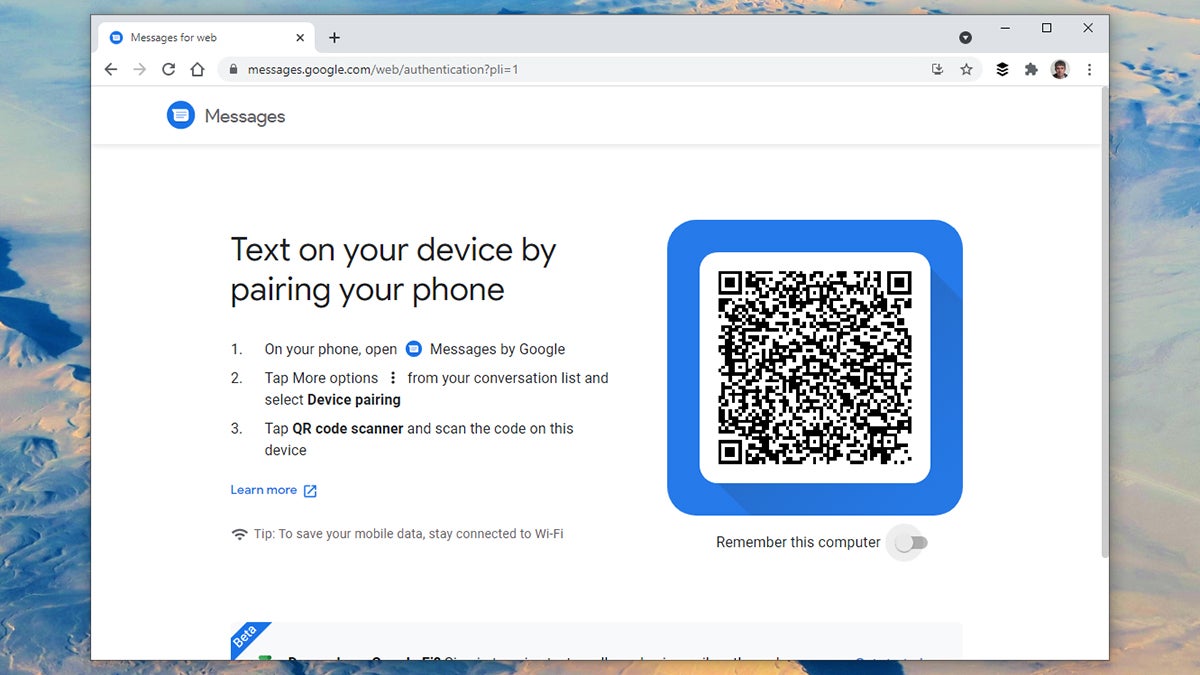
This is second nature for Mac and iPhone users — you just need to log into the Messages app using your Apple ID on both devices — but you can also send SMS messages from Android through the Your Phone app in Windows (search for it from the taskbar) and the companion mobile app.
If you need to text from Android on a Mac, the Android Messages web interface is probably your best option. Sending texts from an iPhone on Windows isn’t really an option, but WhatsApp, Facebook Messenger, Signal, and Telegram all have web or desktop apps.
5. Spread out across multiple desktops
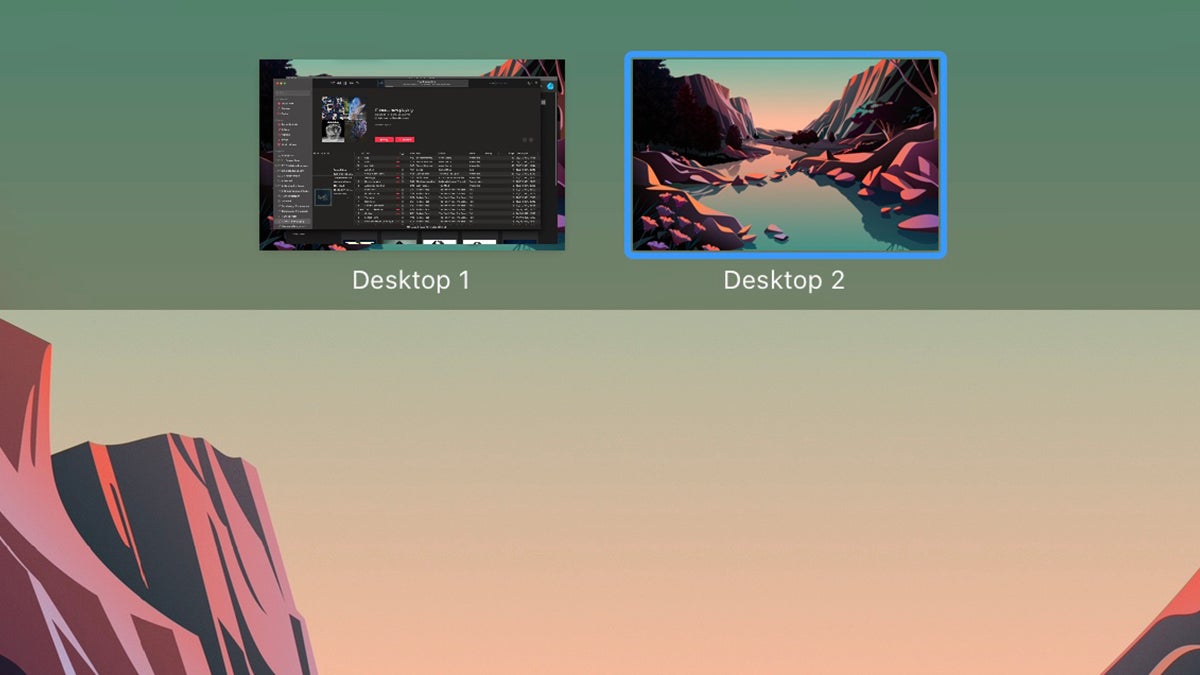
You don’t need another monitor to get more room in Windows or macOS — there are software options, too. On macOS, you can use what’s called Spaces, and you can add one by hitting Ctrl+Up or swiping up with four fingers on the trackpad, then clicking the + (plus) icon.
On Windows they’re just called multiple desktops, and you can add a new one by clicking the Task View button (to the right of the search box), then New desktop. Whichever platform you’re using, you can now give your open apps a bit more breathing space.
6. Install dynamic, changing wallpapers
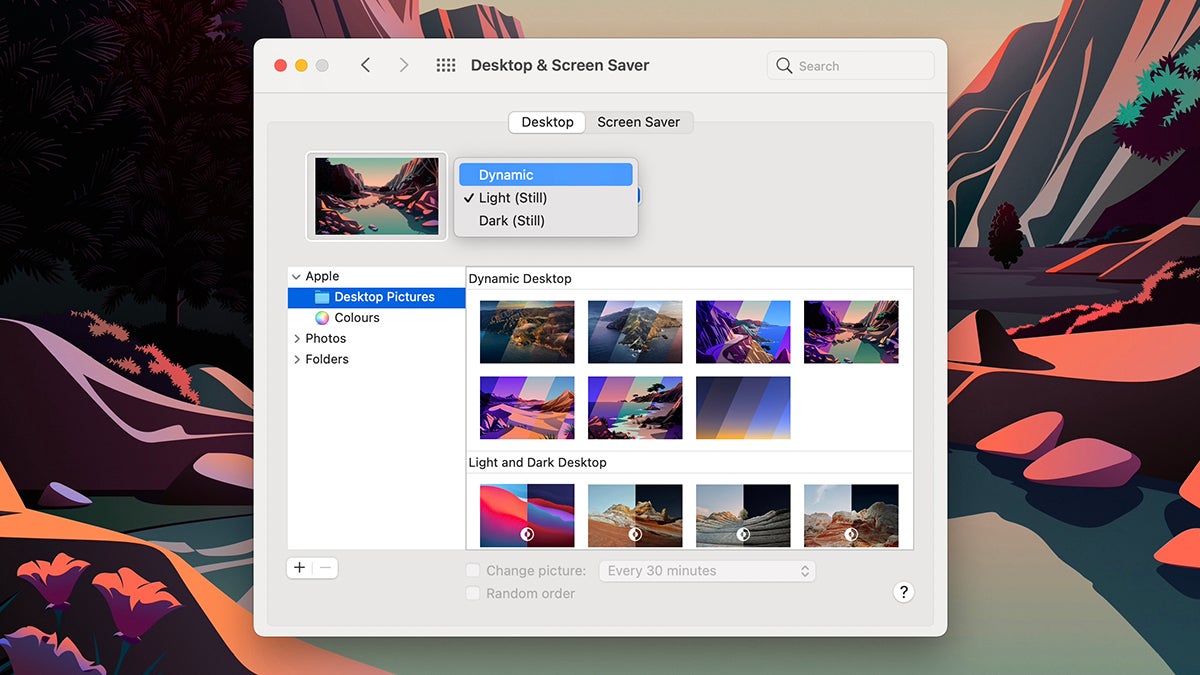
Still using static wallpapers? Both Windows and macOS support dynamic, animated ones if you prefer. On macOS open up System Preferences, then pick Desktop & Screen Saver, Desktop, and Desktop Pictures under Apple (you can find some more here and here).
Adding moving wallpapers on Windows isn’t as easy as it used to be — you now need a third-party app for the job. Desktop Live Wallpapers will do it for you (free with optional paid extras), as will DeskScapes ($7, but with a free trial available to test it).
7. Set up ‘do not disturb’
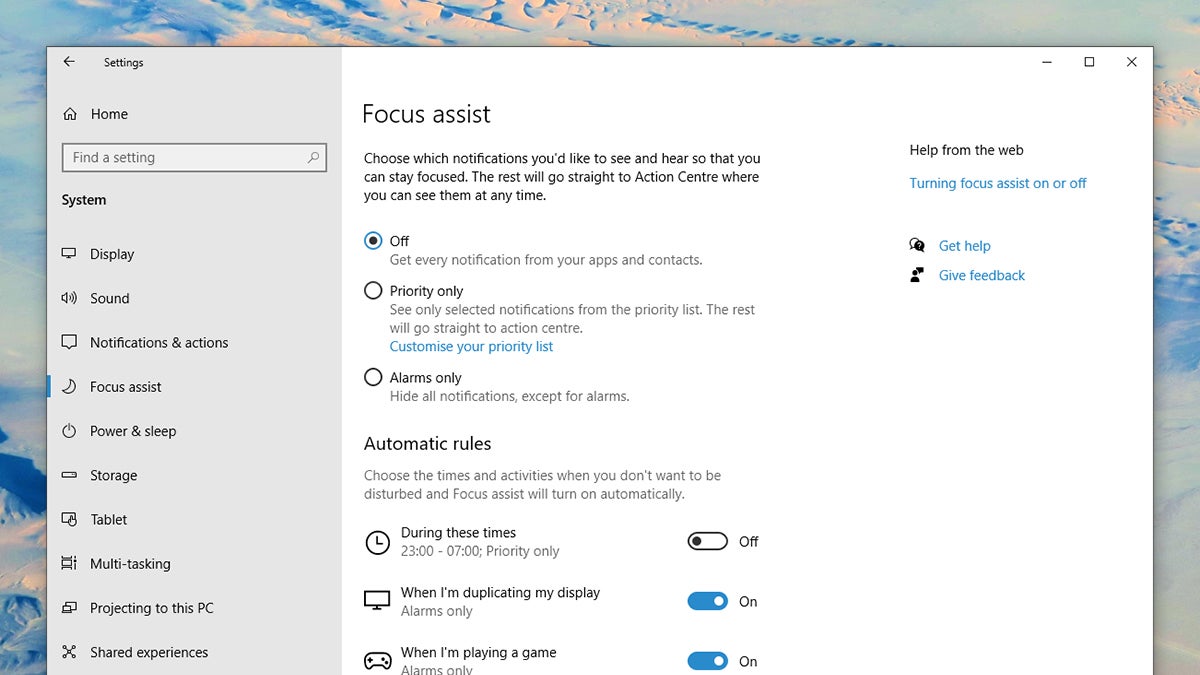
Do Not Disturb is available on laptops as well as phones. From Settings on Windows, pick System and Focus assist to configure how notifications and notification rules work — the mode itself can be launched from the Action Centre (click the icon on the far right of the taskbar).
On macOS, from System Preferences choose Notifications and Do Not Disturb to set a schedule. Alternatively, hold Option and click the notification icon on the right of the menu bar to temporarily turn it on until you turn it off again or the clock turns midnight.
8. Annotate your screenshots
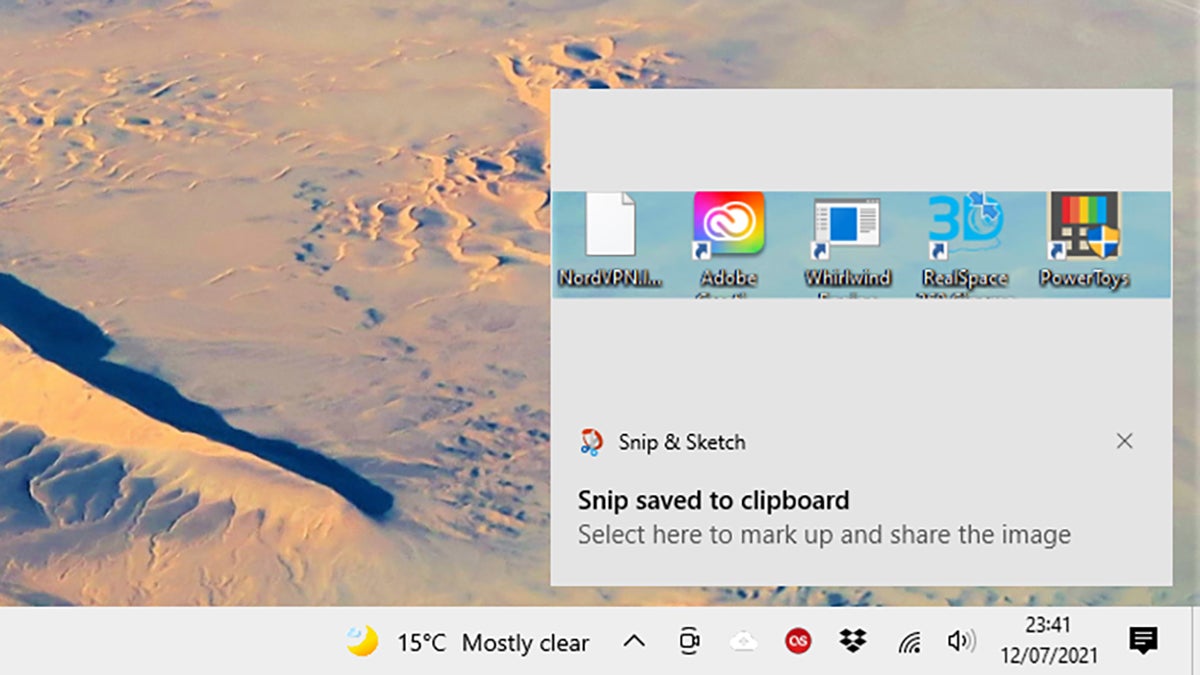
You’ve got a plethora of options for taking screenshots on Windows and macOS, but both now have added annotation options in the native screen-grabbing tools. Depending on what you want to do with your grabs, you might not need to use any other utility.
On macOS, hit Cmd+Shift+5, and make sure Show Floating Thumbnail is selected under Options menu — you can click this to add annotations whenever you take a screenshot. On Windows, hit Win+Shift+S, grab your image, then click the thumbnail to add annotations.
9. Copy between devices
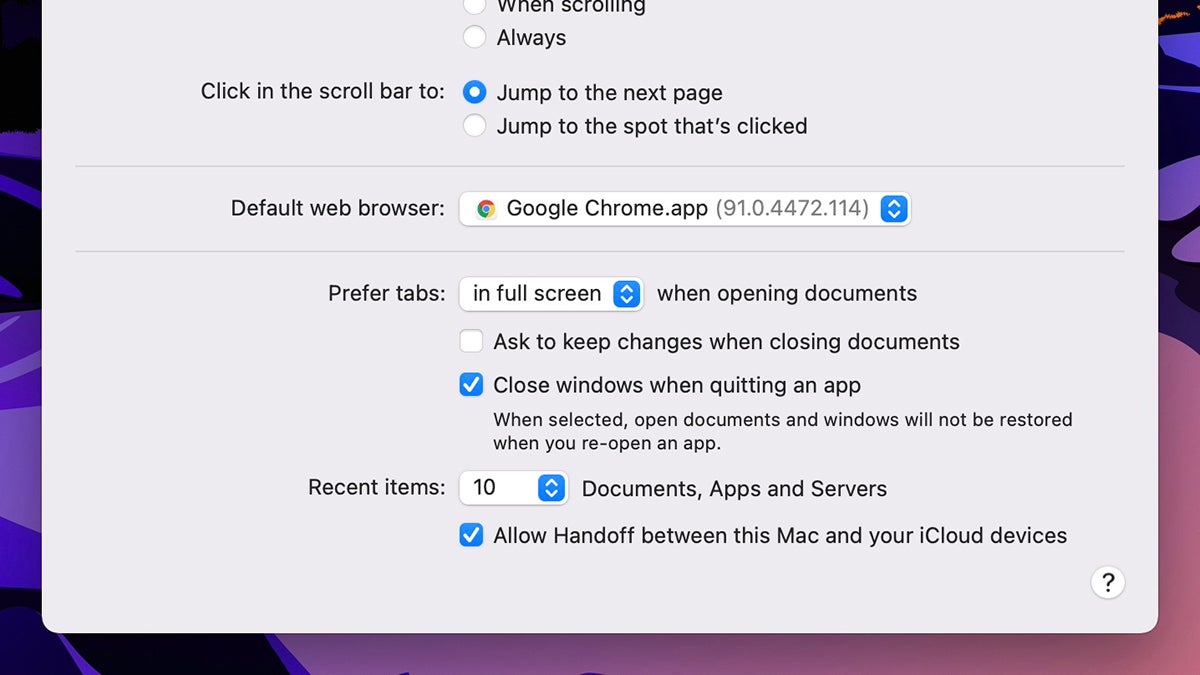
The humble clipboard isn’t restricted to just one device anymore. In Windows, from Settings pick System and Clipboard to sync your copying and pasting across devices (linked by your Microsoft ID). You can also have the clipboard remember multiple items.
Over on macOS, the Universal Clipboard just works across every device that you’re signed into with your Apple ID — you don’t need to configure anything. Just make sure the Allow Handoff option is ticked under General in the main System Preferences panel.
10. Mirror your screen wirelessly
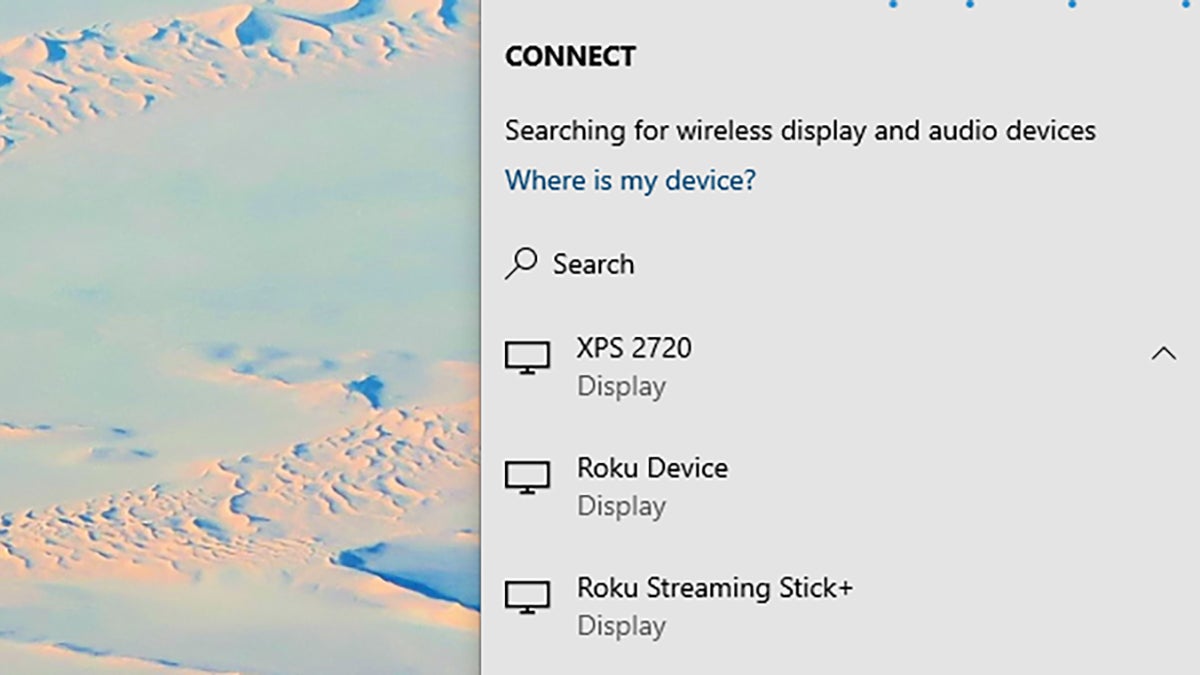
To get your Windows laptop display up on a big screen, you might not need a cable. Open the Action Centre (the icon on the right of the taskbar), then choose Connect to see a list of all wireless devices supporting the Miracast standard (like Roku dongles, for example).
On macOS the protocol is AirPlay. Click the AirPlay button on the menu bar to see available Apple TVs and other compatible devices on your network. On both macOS and Windows, the Chrome browser can also mirror your display to any Chromecast device.
11. Speak to your laptop
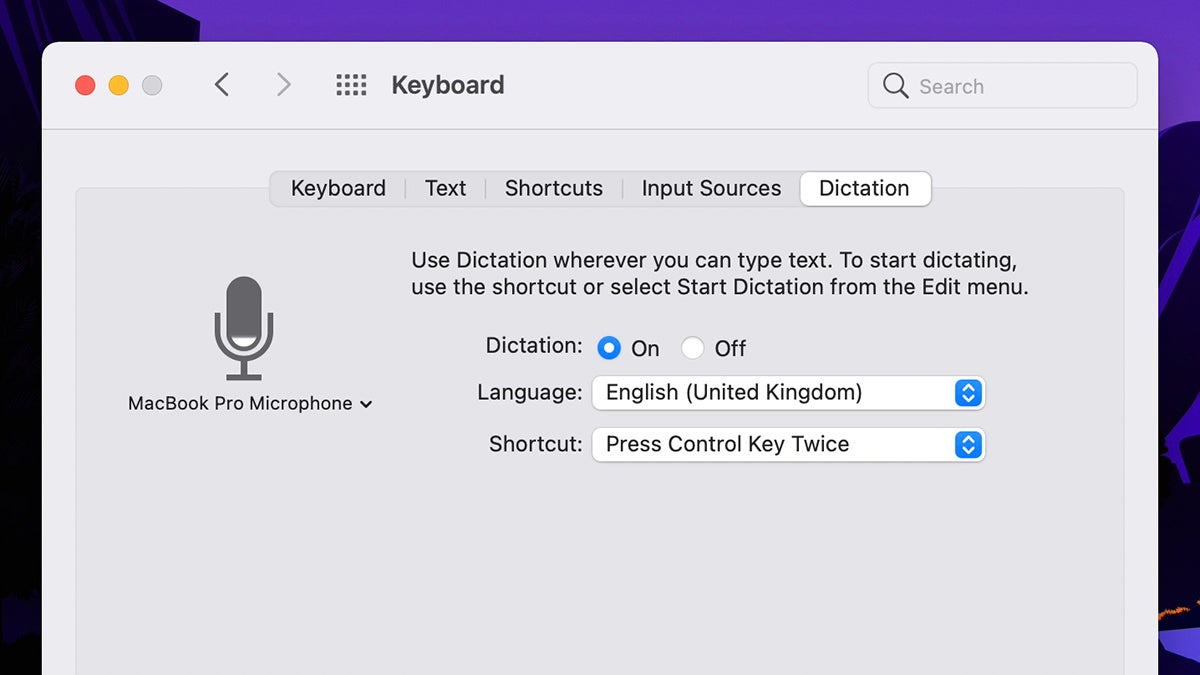
To save you from typing, you can dictate text to your laptop. On Macs, open System Preferences and pick Keyboard, then Dictation. The default keyboard shortcut for turning dictation on is two taps of Ctrl, or you can choose Edit and Start Dictation inside any app.
When it comes to Windows, dictation is set up through Ease of Access then Speech in Settings. With that done, it’s just a question of hitting Win+H whenever you want to dictate some text instead of typing it out — it should work seamlessly across all of your programs.
This article has been updated since it was first published.