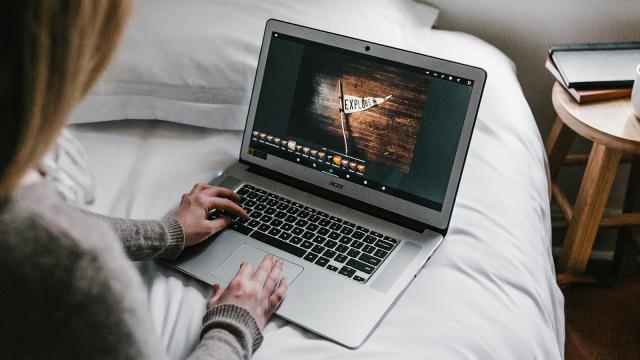
Chromebooks continue to find success as affordable, simple, cloud-based laptops. Chrome OS isn’t as complex as Windows or macOS, but sometimes less is more (especially when you’re saving money). If you have a Chromebook of your own, these are some of the most useful features you need to make yourself aware of.
1. Record screen activity
The screen capture capabilities of Chrome OS have been significantly improved recently. Press Ctrl+Shift+Show Windows (the fifth button from the left at the top), or click Screen capture in the Quick Settings pane, and you get a new pop-up panel. This lets you switch between image and video capture, opt to include the microphone in video recordings, capture part or the whole of the screen, or capture activity in one specific window.
2. Pin files to the shelf
Need easy access to a specific file or group of files in Chrome OS? If you open up the Files app on your Chromebook, then right-click on a particular file or folder and choose Pin to shelf, you’ll then be able to access it by clicking on the icon just to the left of the Quick Settings buttons. Note that some types of file, including screenshots and downloads, automatically appear in this pinned section so you can access them more quickly.
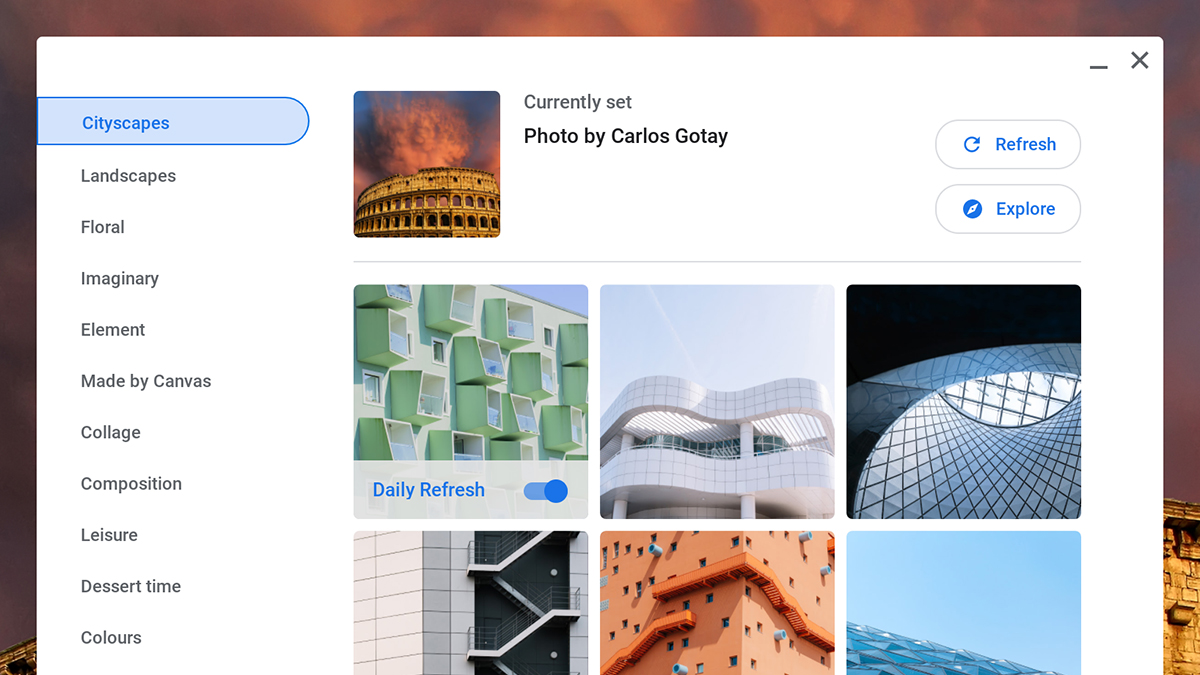
3. Change wallpapers automatically
Make sure you’re fully aware of all the options you get for setting the wallpaper on your Chromebook. If you right-click on the desktop and choose Set wallpaper, you can pick from a wide range of gorgeous-looking images provided by Google (or select an image of your own). Note that some categories on the left (including Landscapes and Art) reveal a Daily Refresh toggle switch when selected. Enable this to get a new backdrop every day.
4. Access the clipboard history
The traditional computer clipboard has always been somewhat limited, what with it only being able to hold one item at a time. That’s starting to change across multiple platforms now though, including Chrome OS: If you hit the Search+V keyboard shortcut rather than the more traditional Ctrl+V shortcut, you’ll see the last five items copied or cut to the clipboard. Click on anything in the list to paste it, or use the X icons to remove something.
5. Open up virtual desks
Chrome OS supports virtual desktops, similarly to Windows and macOS. Google calls them Desks, and you can find them by hitting the Show windows key (it’s fifth from the left on the top row). Click the Desk you want to switch to, or the + button to add a new one. You can have up to eight Desks in total, and by right-clicking on the title bars of windows you’re able to access a Move window to desk option which can come in handy.
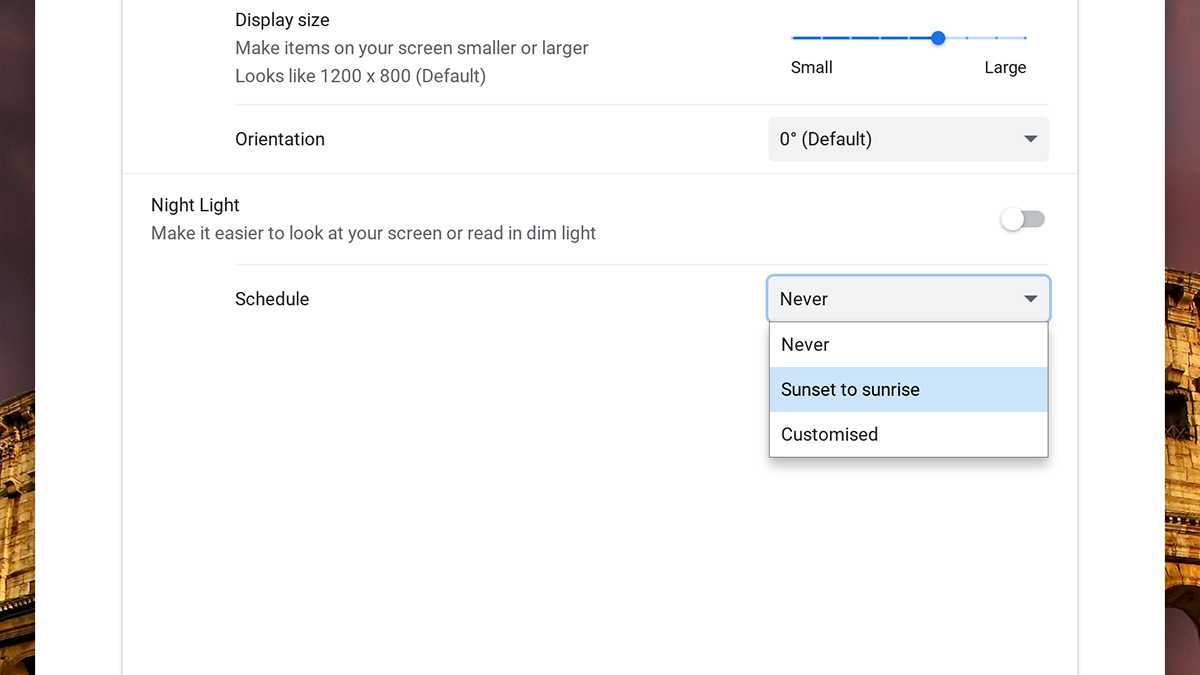
6. Turn on the Night Light
Chrome OS comes with a built-in feature for making the display warmer and reducing the strain on your eyes late at night. To turn it on, click the time (bottom right) to bring up the Quick Settings panel, then choose Night Light. It’s also available in the main Chrome OS Settings pane (under Device and Displays). Here you can also schedule Night Light to turn on automatically, either from sunset to sunrise, or at a time of your choosing.
7. Right-click for quick answers
The right-click option in Chrome OS is more powerful than you might have realised: Select a word or phrase in a webpage, right-click on it, and Google Assistant swings into action to bring you definitions, translations and conversions right in the pop-up menu. (The options you see will vary depending on what you’ve selected.) You can click the Google Assistant icon on the left to open up the full Google Assistant interface and get more answers.
8. Scan QR codes
You might not spend much time thinking about the camera(s) on your Chromebook — at least not in between video call meetings — but if you open up the Camera app you’ll notice a little QR code icon on the right (just above the shutter button). Click this to open the QR code scanner, and you’ll be shown where the QR code needs to be lined up. The other icons in the app let you mirror the camera, set up a timer, and put up a grid overlay.
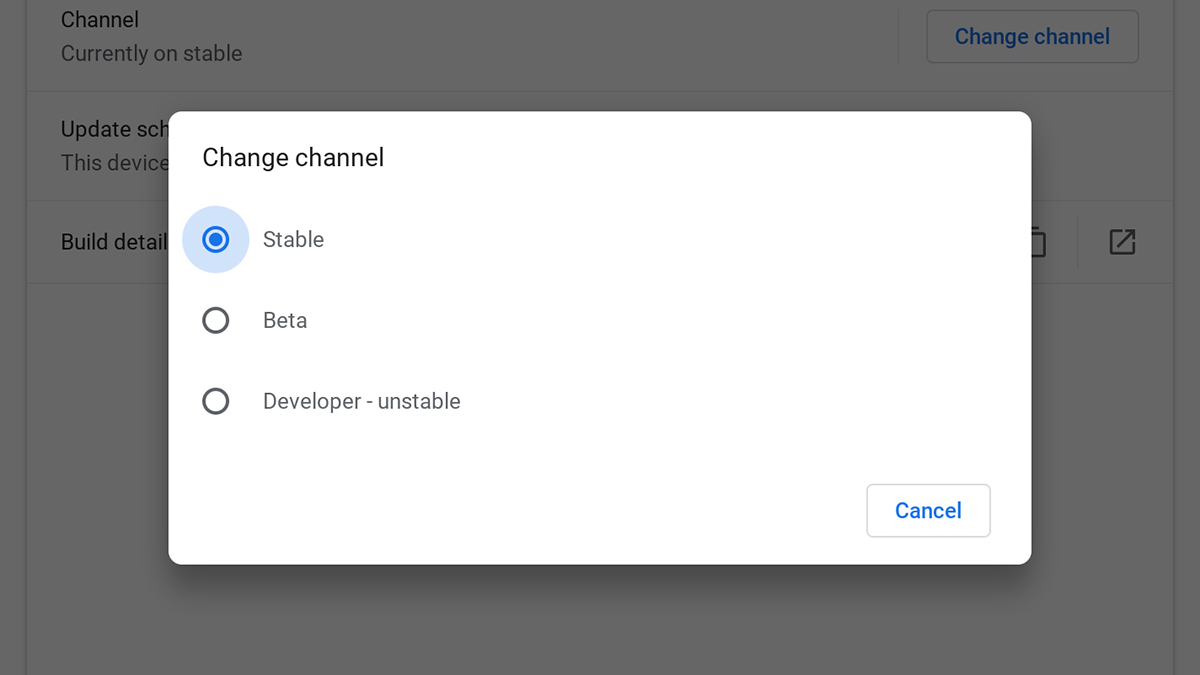
9. Switch channels
There are multiple channels of Chrome OS, just as there are multiple channels of Chrome. You can switch to the Beta or Dev channels rather than the Stable one if you don’t mind a few bugs and want to check out new features earlier. To change channels, from the Settings pane pick About Chrome OS, then Additional details, then Change channel (note that switching to a more stable channel will require a full reset).
10. Read text aloud
Having your Chromebook read out text to you can be helpful for those with low vision or who are blind, but can also be beneficial for everyone. Click the time in the lower right corner, then Accessibility and Select to Speak. Any text on screen that you’d like to be read out loud can then be selected by holding down the Search button and clicking and dragging, or by clicking on the Select to Speak button in the shelf and then making your selection.
11. Pin media controls to the shelf
Start playing media in one of the Chrome OS tabs, and you get a handy mini player in the Quick Settings panel (click the time in the lower right hand corner to see it). Open up these controls, click on the pin icon up on the right, and this pop-up box gets pinned to the shelf for easy access. You may prefer having it pinned if you’re often playing audio in the background. If multiple tabs are playing audio, you’ll get a mini player for all of them.
12. Connect an Android phone
To get your Chromebook and Android phone working more closely together, open the Settings dialog and click Setup next to Android phone (under Connected devices). Once the connection has been made (via your Google account), you can have notifications and Chrome tabs sync between the two devices, enable instant tethering from your phone, use your phone to unlock your Chromebook, and more. We’ve put together a full guide here.