Last week, we all had our minds blown by the realisation that Marvel’s movies just look a bit flat. Visually stunning, sure, with amazing CGI and flawless cinematography, but also with mastering and grading that leaves blacks looking grey and scenes looking washed out. But there’s a way to fix that. Here’s how.
Patrick H Willems’ recent YouTube video explains the situation: Marvel’s recent movies don’t have any pure blacks.
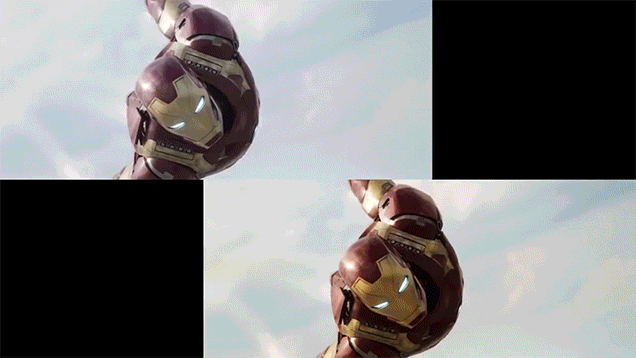
And you can see the difference. Jump on to Netflix and watch a couple of scenes from Avengers: Age of Ultron, then flick over to Daredevil. Where Ultron was shot on the ARRI Alexa and graded with that as a starting point, Daredevil kicked off Marvel using cameras from RED like the Epic Dragon 6K and Weapon 8K. (The same is true of Deadpool, if you want a movie to compare rather than a TV show.)
Most Marvel movies look a bit flat. There are a few reasons for this, bu the stylistic decisions made during the grading of The Avengers in 2012, and carried on through this year’s Doctor Strange, don’t go as far in terms of stretching contrast — the range between a film’s lowest black level and its brightest white level — as many other modern movies shot on digital. The low-contrast look shows more detail, but doesn’t carry as much impact visually — especially when you’re viewing on a small screen. This counts for a lot.
In cinemas, too, you’re watching in a very dark room on a projector that has been calibrated for that particular movie. Projectionists can set the luminance of their projectors to achieve the best possible contrast from the movies that they’re showing, whether they’re delivered on film or on digital. In the comfort of your own home, your viewing setting is much brighter and your TV is set up out of the box for a one-size-fits-all compromise that usually pushes brightness a bit to compensate — with the end result that a Marvel flick looks flat.
Tweaking Your TV’s Picture Settings
I did my testing on an Xbox One S playing back a bunch of different Marvel movies on Netflix, like most viewers would be using. To get my bearings on colour and contrast and brightness, I used the new 4K re-master of Pacific Rim, which is one of the best movies you’ll find in terms of black levels and an out-of-the-box grading for maximum contrast without destroying detail in highlights or shadows. I also gave Deadpool on 4K a quick whirl, to see what Marvel can make its films look like.
I tested everything on a LCD TV (Samsung’s 65-inch KS9500) and an OLED (LG’s 65-inch EF950T) and while there is a huge difference between the screens, at the end of the day the majority of your viewing experience comes from whatever source you’re watching. I’m assuming your TV is straight out of the box in Standard picture mode, too.
These settings are very much a catch-all, and you might find they’re a little too hardcore — or not hardcore enough — for your screen. But they’re intended as a starting point for you to tweak more to your own tastes, and to suit the TV that you’re watching on. They’ll also make everything else that you watch look better, for a certain value of the word, but if you’re watching something that already has perfectly zeroed black levels and maximised contrast then you won’t be seeing the full picture. Caveat lector.
1. Lower The Brightness
Lowering the brightness — not the brightness of your TV’s backlight, which might be called something like ‘backlight’ or ‘screen light’ (who would have thought) — will bring the darkest black levels of whatever video content you’re watching down further again. You’ll be sacrificing some of the detail in those darkest areas as they disappear, but what you’ll get as a trade-off is deeper blacks and a relative boost in contrast. It looks worse if you’re a nerd, it looks better if you’re a normal human.
I dropped brightness on the LCD by five points (50 down to 45) to bring black levels to an appropriately dark starting point, while on the OLED I only needed to drop brightness by two points (50 to 48) to achieve roughly the same effect.
2. Raise The Contrast
Raising the contrast in your TV’s picture settings will counteract that overall brightness drop on a LCD or OLED by artificially stretching the range between darkest black and brightest white. Since you’ve already dropped the blacks somewhat, that end of the curve will deepen more — goodbye more shadow detail, hello more immersive picture overall — but the brightest parts of a scene will become brighter by the same token. If you only had one setting to change to make a Marvel movie look better, this would be it.
On my LCD TV I bumped contrast by seven points (50 up to 57) to get the extra luminance in bright scenes and highlight areas, while on the OLED I was a little less gung-ho and bumped contrast by four points (50 to 54) to get roughly the same picture.
3. Raise The Saturation
Once you’ve adjusted brightness to gain a good black level and boosted contrast to gain a good compromise in on-screen whites, you’ve got one piece of the puzzle left to make your Marvel movie look like you might remember it from the cinema. This is your final step in back-of-the-envelope tweaking to make your TV look quote-unquote better while you’re watching a relatively low-contrast movie like The Avengers or Ant-Man or Iron Man 2. Raising saturation in small steps will make your TV’s colours pop more.
I bumped the saturation on my LCD — already quite richly saturated out of the box — by four points (50 to 54) to add some vibrancy, but on the OLED I needed to push saturation significantly more at eight points (50 to 58) to gain the same effect.
This Is Only A Partial Solution
Here’s the thing. Tweaking each one of these settings does, in theory, degrade the quality of the picture you’re watching. With each increment of brightness and contrast and saturation, you’re robbing fine image detail from the mastered source your TV is being fed. But this whole thing is subjective, and you want your movie to look good when you’re watching it, right? So big deal.
If your TV were perfectly calibrated and perfectly able to display the perfect picture straight out of the box, these settings would be for naught. But your Xbox or PlayStation or Chromecast or whatever already has its own imperfect processing going on anyway. You may as well embrace it.
Of course, a proper calibration is always the way to go if you want your TV to look its best. These eyeballed settings are a best guess for a bunch of different TVs to do a little bit better with a just a few films, likely streaming a compressed file off Netflix at mediocre quality in the first place. But the improvement these changes make is noticeable, and to my eye, it’s a worthwhile, if temporary, change.
Ideally, Marvel would go back and re-grade all its digital stock from 2012 to 2016 and set those deepest black levels to zero in each scene and would push the highlights as far as possible and would do a lot of things to make us happy. But stylistic choices are a thing, and that’s why we have so many movies that are orange and teal. If you want to drop those black levels, then this is how to do it.
Starting with Guardians Of The Galaxy Vol. 2, Marvel is switching to the RED Weapon 8K, and that means the studio will likely approach grading its digital stock in a different way. With cinematic trends being what they are, and even advances in digital sensor dynamic range mean that more impressive detail in shadows and highlights is available.
Until then, this is your best bet to make Marvel movies look good on your big-screen TV.