
There’s a good chance you’ve got more than one laptop or desktop computer hooked up to your home wifi, and that means you might well need to share files between these devices. How to set this up has changed quite a bit in recent years, and you’ve now got more options than ever if you need certain files and folders accessible anywhere.
To get started, you just need your computers hooked up to the same network, whether that’s through a wifi connection or a wired Ethernet cable. Once you’ve picked your method or methods of choice, getting files shared only takes a few clicks — whether that’s with your own devices or the devices of other people.
How to share files with Windows networking
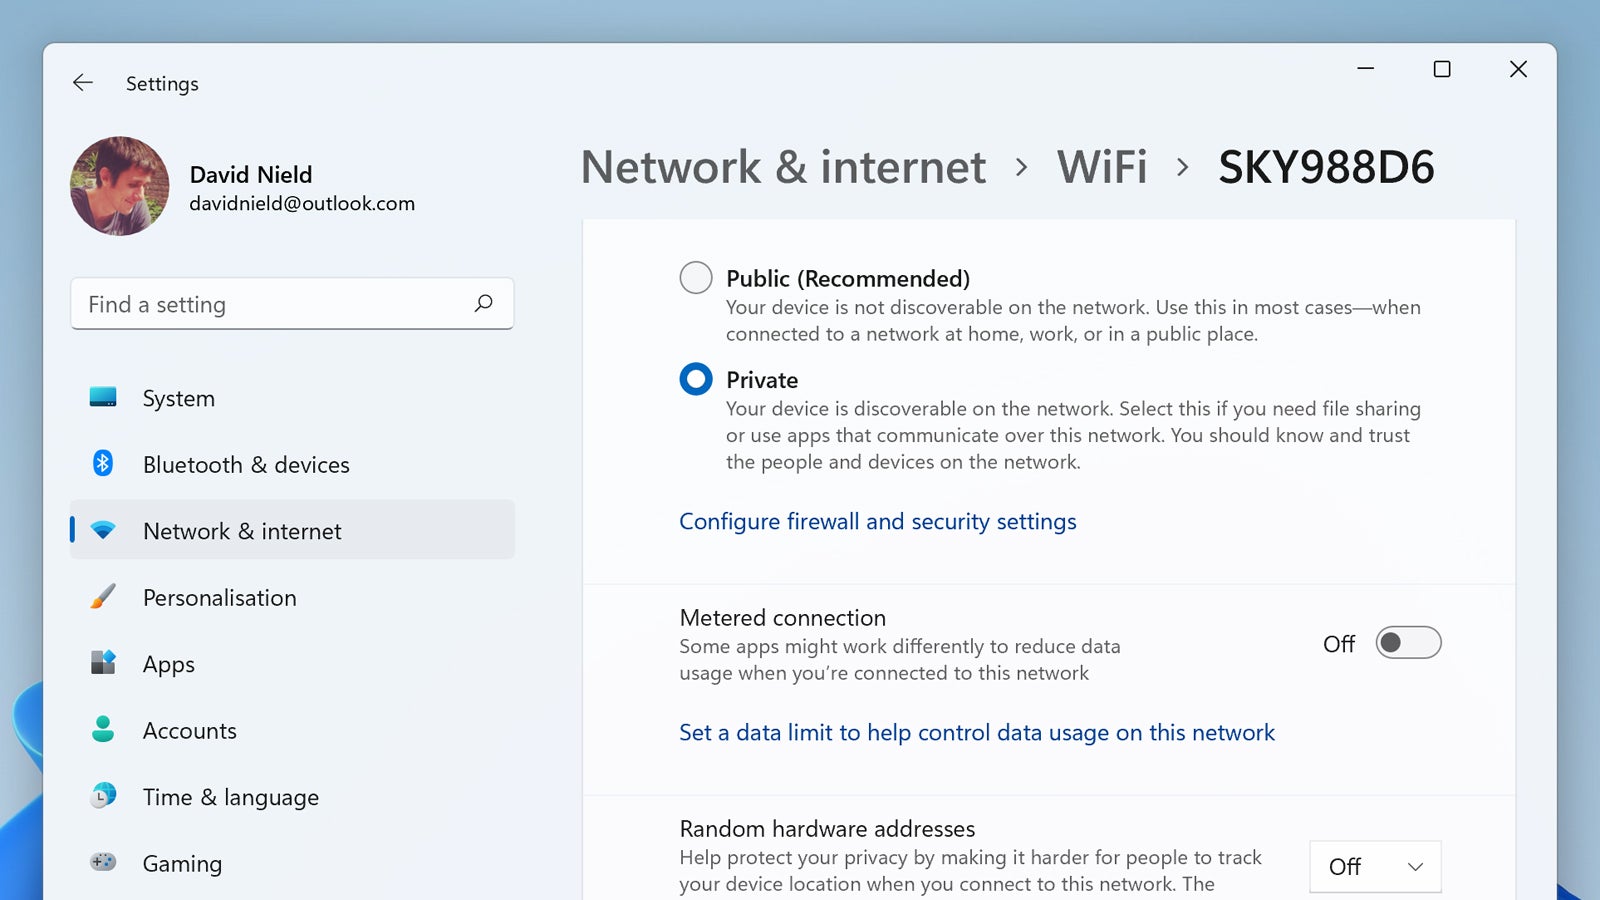
If you’re using Windows and want to turn on its built-in networking features, you need to open up Settings, then choose Network & internet, WiFi, and the name of the wifi network you’re connected to. Pick Private network and you’re all set — you’ll be able to see other computers and devices on the network, and they’ll be able to see the Windows computer you’re using.
Then search for the “Advanced sharing settings” part of the old Control Panel, and make sure Turn on sharing… is selected under Public folder sharing. You might also want to select Turn off password-protected sharing further down to make it easier to connect. These settings may already be enabled depending on how you set up Windows initially, but you need both to be enabled for file sharing to work properly. By default, the public folder associated with your Windows user account is available on the network. Click on Network in the File Explorer navigation pane to see other computers and devices (if you can’t see it, choose View, Show and Navigation pane).
To share specific files and folders outside of the public folder for your user account, right-click on them in File Explorer, then select Show more options, Give access to, and Specific people: You can enter the details of particular Windows users who can have access, or pick Guest or Everyone to make the chosen files and folders more widely available over the local network. At the same time you can also set read and write permissions from the same dialog.
How to share files with macOS networking
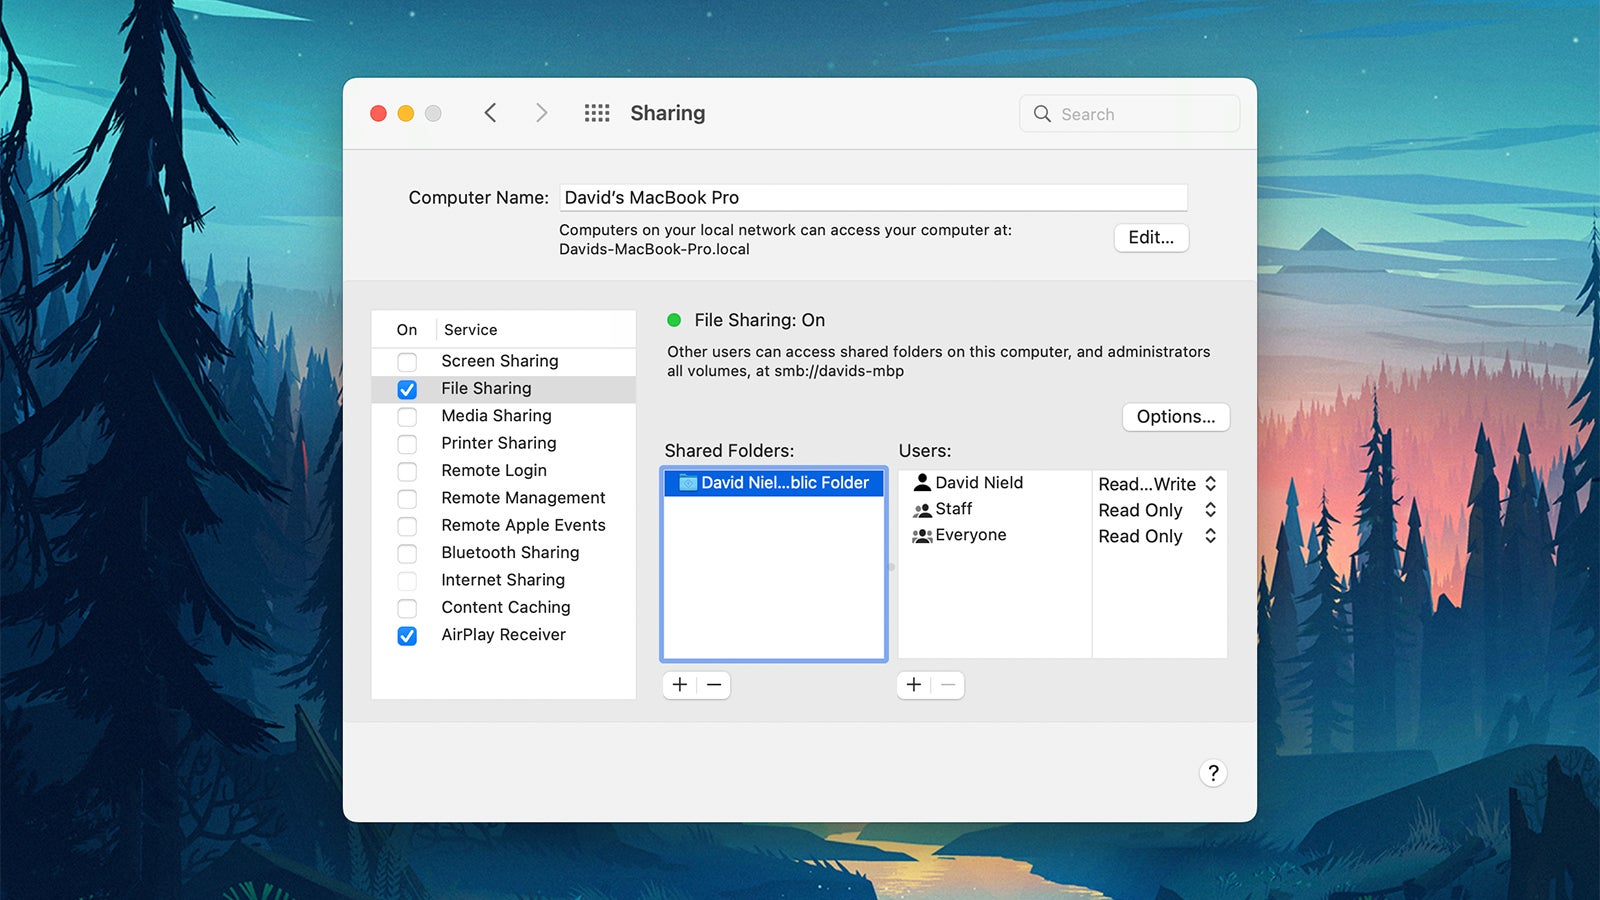
To make your Mac and its files visible to other macOS and Windows computers on your home network, open up the Apple menu and choose System Preferences, then Sharing. You’ll see there are various choices here for sharing printers and other resources, but the one we’re interested in is File Sharing: Check this box to grant access to specific files and folders across the network.
The settings on the right let you specify which files and folders are available to other computers (the public folder associated with your user account is shared by default), as well as whether users on other computers can edit as well as view files. If you run into issues with Windows computers, click the Options button on the dialog to enter your macOS user account password, which may be required in some cases.
With that done, your Mac should show up on the network. To see locations on a home network in macOS, open Finder and then click Network in the panel on the left (or open the Go menu and choose Network). The options you see when you connect to another computer will vary depending on how the device you’re connecting to has been set up — you may need to enter your Apple ID username and password for example, if required by the owner of the other computer (which in this case is also you).
What are NAS drives?
We’ve written before about the benefits of a NAS (Network Attached Storage) drive, which is like a supercharged external hard drive that connects directly to your home network rather than one specific computer. That configuration means that it’s accessible from all your computers and other devices at all times.
While the access times aren’t quite as fast as they are for a drive that’s connected directly to your computer (or fitted inside it), they’re quick enough for most tasks — and setting up one of these NAS units so that all of your computers can get at them is very straightforward. The software that comes with the NAS enables you to control who can access what with just a few clicks.
You are looking at an additional expense with a NAS drive, but the benefits go way beyond being able to share files across a network. Many people use a NAS as a secure, automated backup — models with multiple drive bays can create copies of your files so that you’ve always got a spare — while another popular use case is as a media streamer, sending videos, audio and photos around the home to whatever devices need them.
Third-party apps networking apps
Part of the reason that the built-in networking tools available for Windows and macOS have fallen out of favour is the rise in cloud syncing and storage apps such as OneDrive and iCloud. As broadband speeds have increased, the delay in waiting for files to upload to the cloud before being downloaded to other computers has come right down, and you of course get plenty of control over which files and folders are shared too.
OneDrive and iCloud are the options that come with Windows and macOS respectively, but there are options such as Dropbox and Google Drive as well. On top of the ability to share files around a local home network, you also get all of your data backed up safely to the web, as well as a host of other features — the ability to recover deleted files, tools for collaborating on files with other people, and so on.
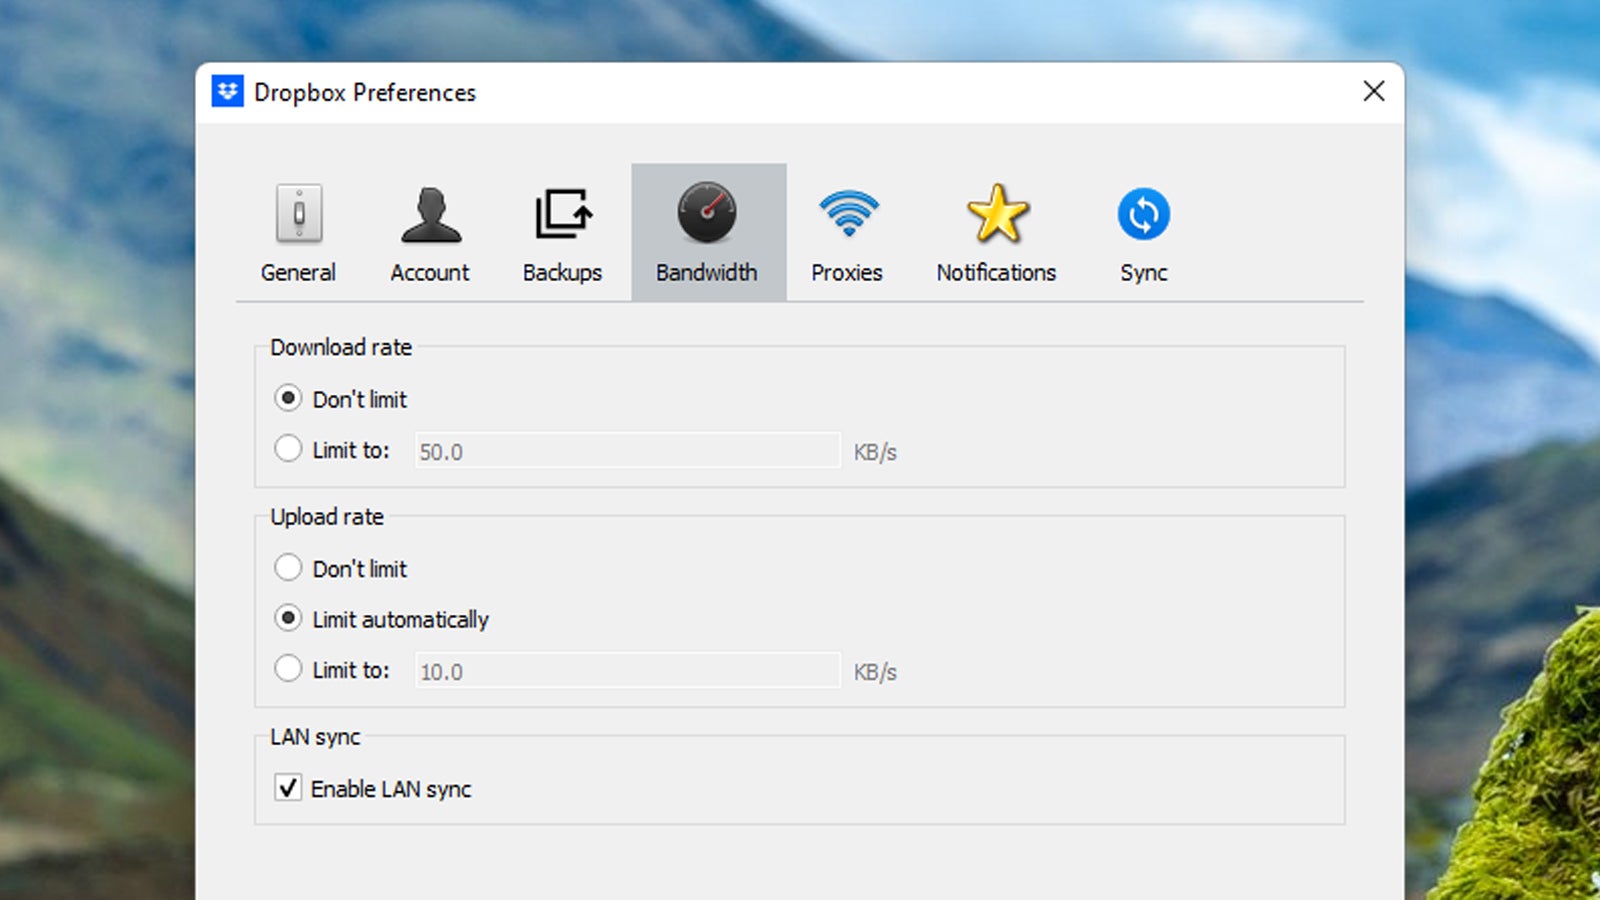
Dropbox actually includes a feature called LAN sync, which you can enable in the Preferences dialog in the client (it’s under Bandwidth on Windows and Network on macOS): It will identify when two computers that are on the same local network are connected and sync files directly between them rather than going through the cloud first, which can significantly speed up the process.