My house is currently being gutted and the place we’re living in temporarily doesn’t have internet or cable, so I’ve been working out of my shop space for about a month. Last week I was finishing an edit that had consumed most of my morning when the internet went out. I was editing in our CMS and hadn’t saved recently, so I ran to the house to see if there was a problem with the router I’d set up in the house’s old office.
One of the guys doing the house-gutting had unplugged the router by accident. I plugged it back in — crisis averted. But there was a bigger problem: He told me that soon there would be no safe space for a router and I’d have to figure something else out. I assumed it would be a while, possibly even long enough to develop a plan. A day or so later, I was informed that the time had come. The office was about to become a non-office. I tried moving everything into the basement, but surprisingly putting networking equipment in an underground concrete block structure 30.48 m from my desk ended up not working out.
It was time to solve the problem with what I had laying around. We’re in the process of moving, so I have plenty of terrible, brittle Sterilite bins lying around. By now, you have to know where this is going.
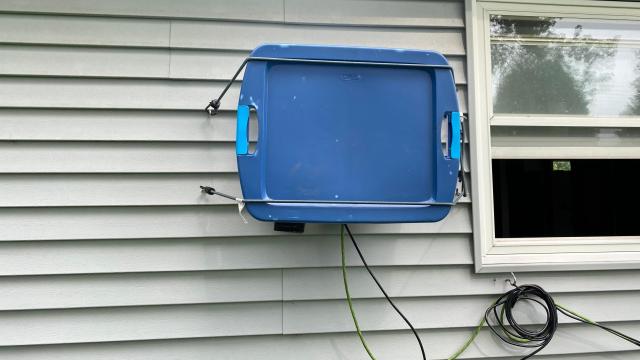
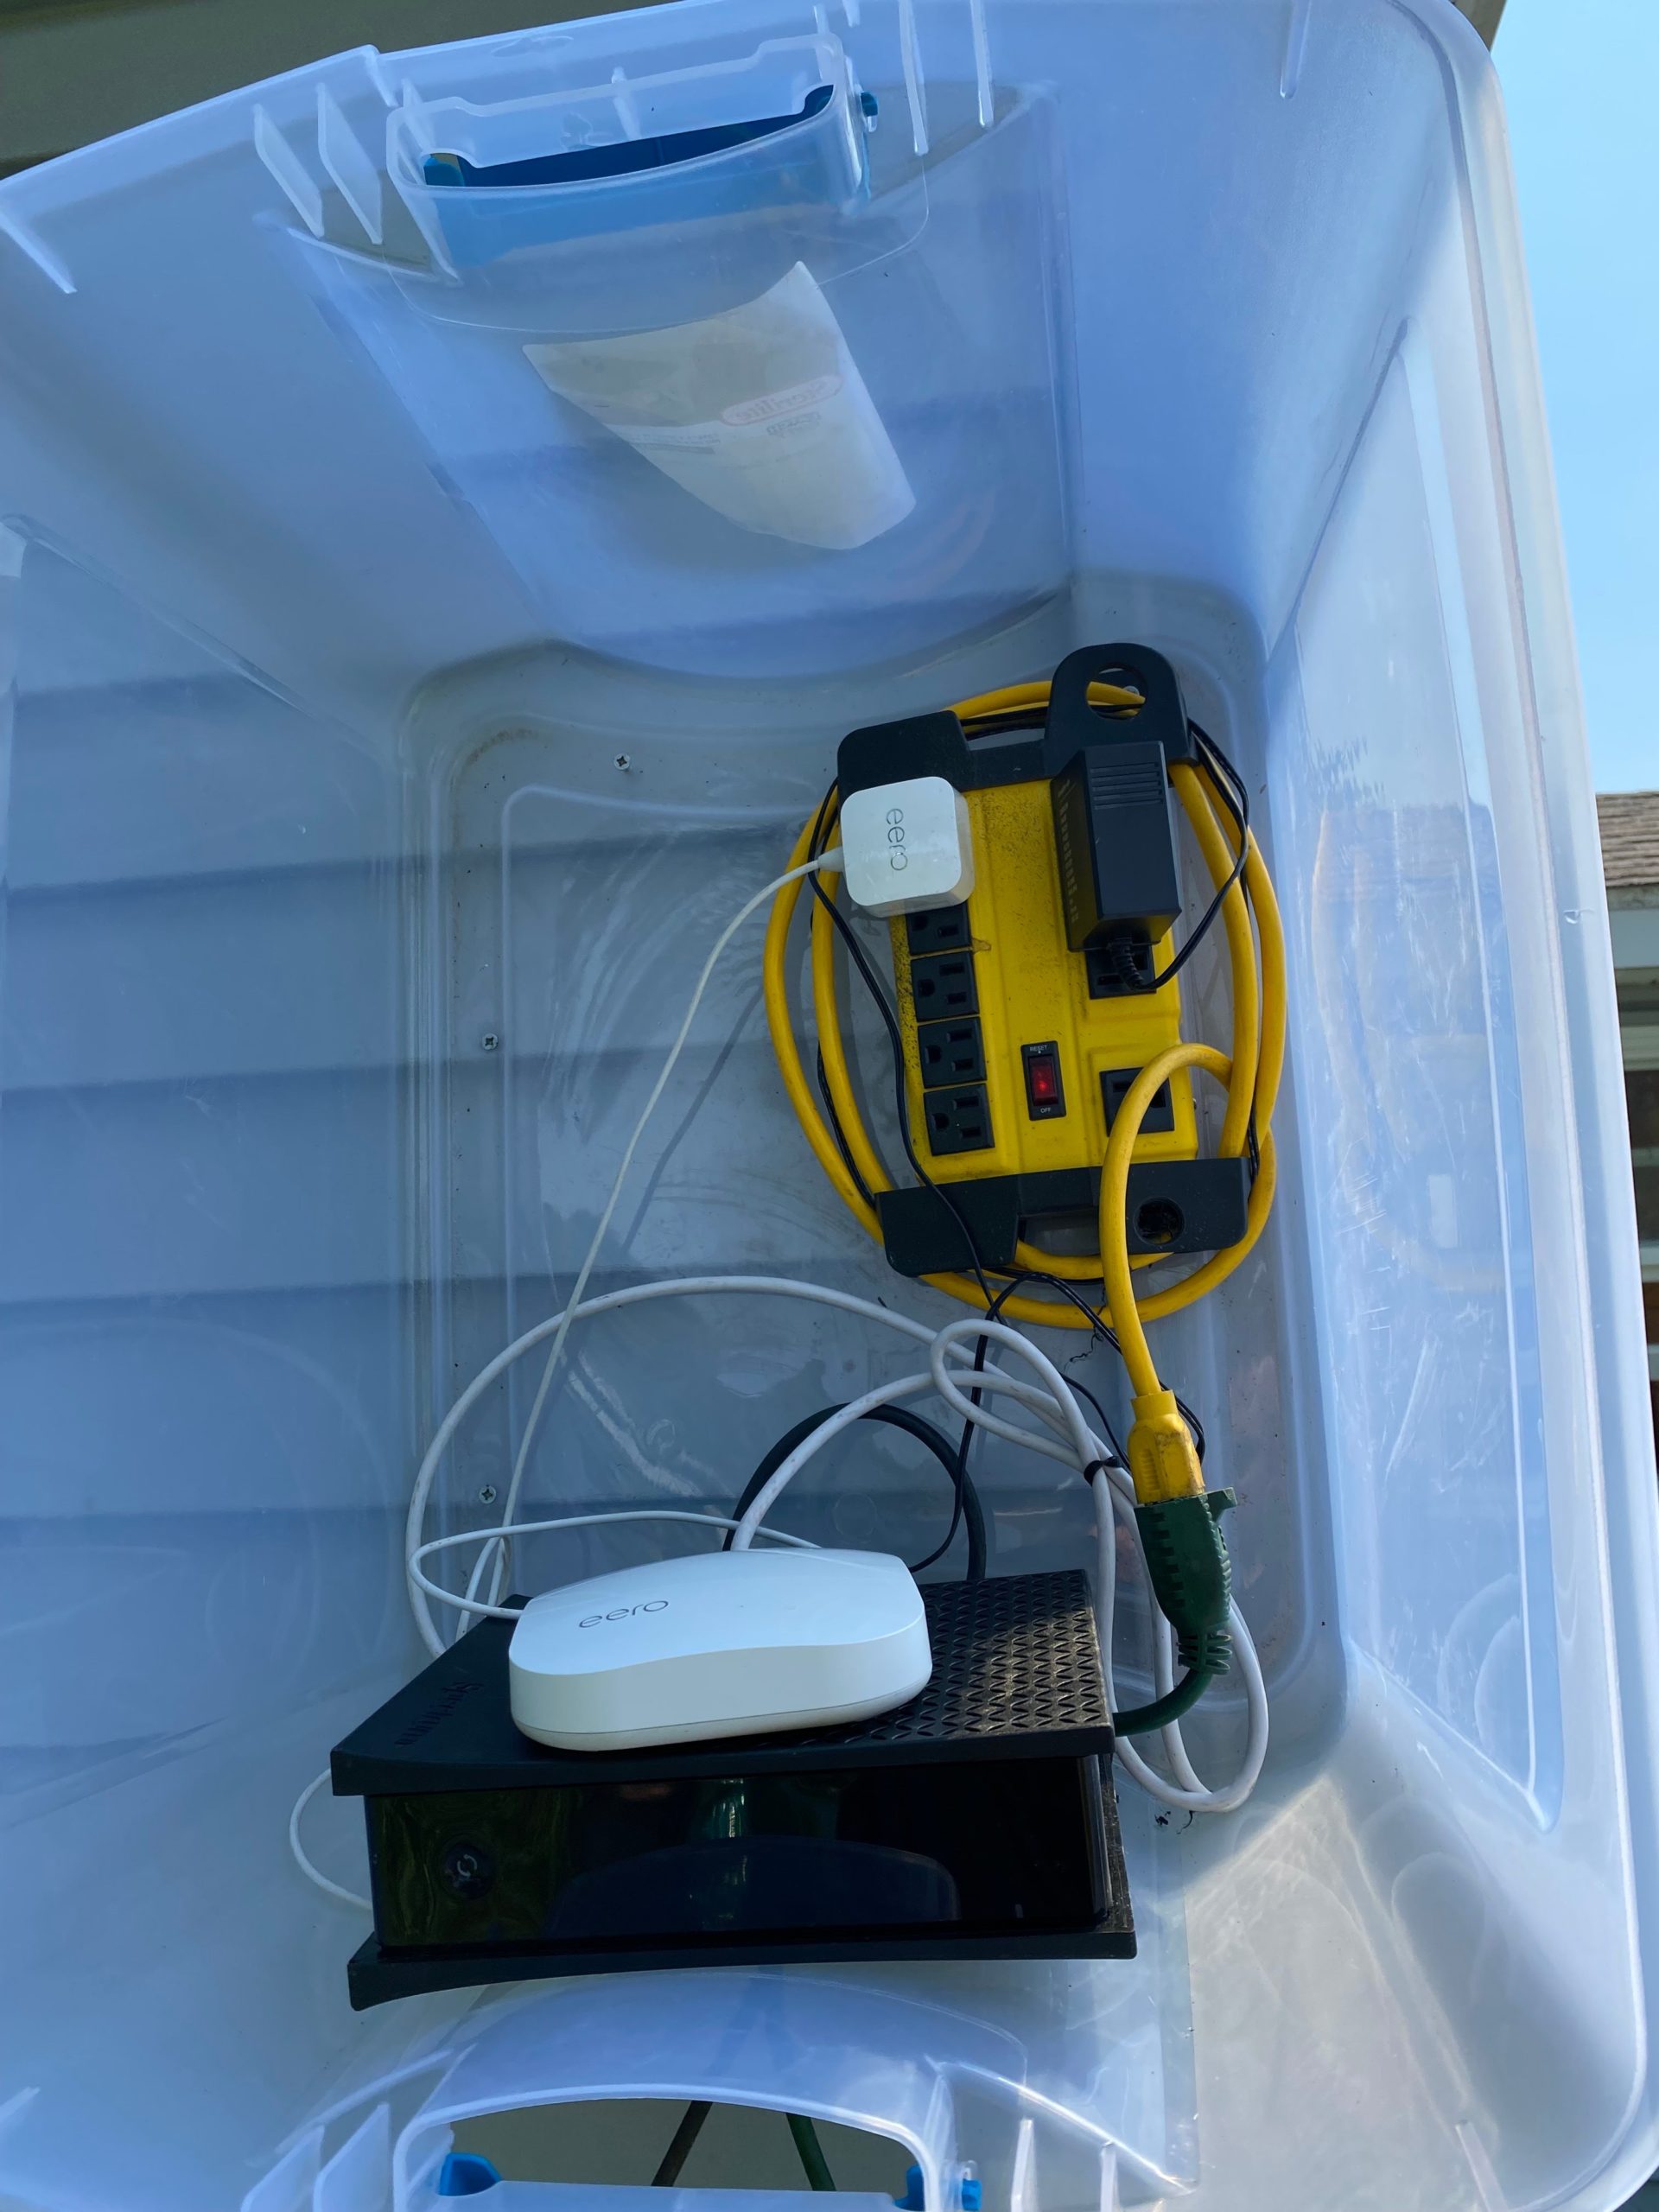
The siding on the house is headed to a recycler, so I didn’t think twice about grabbing a couple of deck screws and attaching a little bin to an exterior wall. I ran an extension cord and coax line through the floor of the bin, plugged everything into a power strip, and a few seconds later, connected my phone to my Eero router, which, unsurprisingly, worked. It’s a fine router, and it’s very easy to operate. I clicked the cover on the tote and dropped a few photos in the Jalopnik Slack to show off my handiwork. Raph said I should share the photos with the staff of Gizmodo, so I did.
Andrew Couts helpfully suggested that I add some holes to the bottom of the tote for cooling because modems and routers get hot. That seemed smart, and I already recognised that I’d need a way to seal the lid to keep out the rain, so I headed down to the hardware store to grab a few things.
I got:
-
A few different kinds of glue
-
Gorilla tape
-
Some elastic bungie cords
-
A few screw-in hooks/eyelets
-
Some mesh screen
-
A small fan
-
A small plastic adaptor for connecting a downspout to a gutter, which happened to be roughly the same diameter as the fan
My plan was to get back to work, then assemble version two of the contraption after logging off for the day. Unfortunately by the time I got back to my posting station, my internet was all but dead — a speed test revealed that I was well under 1 Mbps, which is too slow even for Jalopnik. So, I pulled the whole thing apart.
Rather than give up on what was clearly not a good way to solve this problem and taking a minute to think through whether or not this is actually what I needed to be doing, I began building a more complex version of the enclosure. I’d already bought all that stuff.
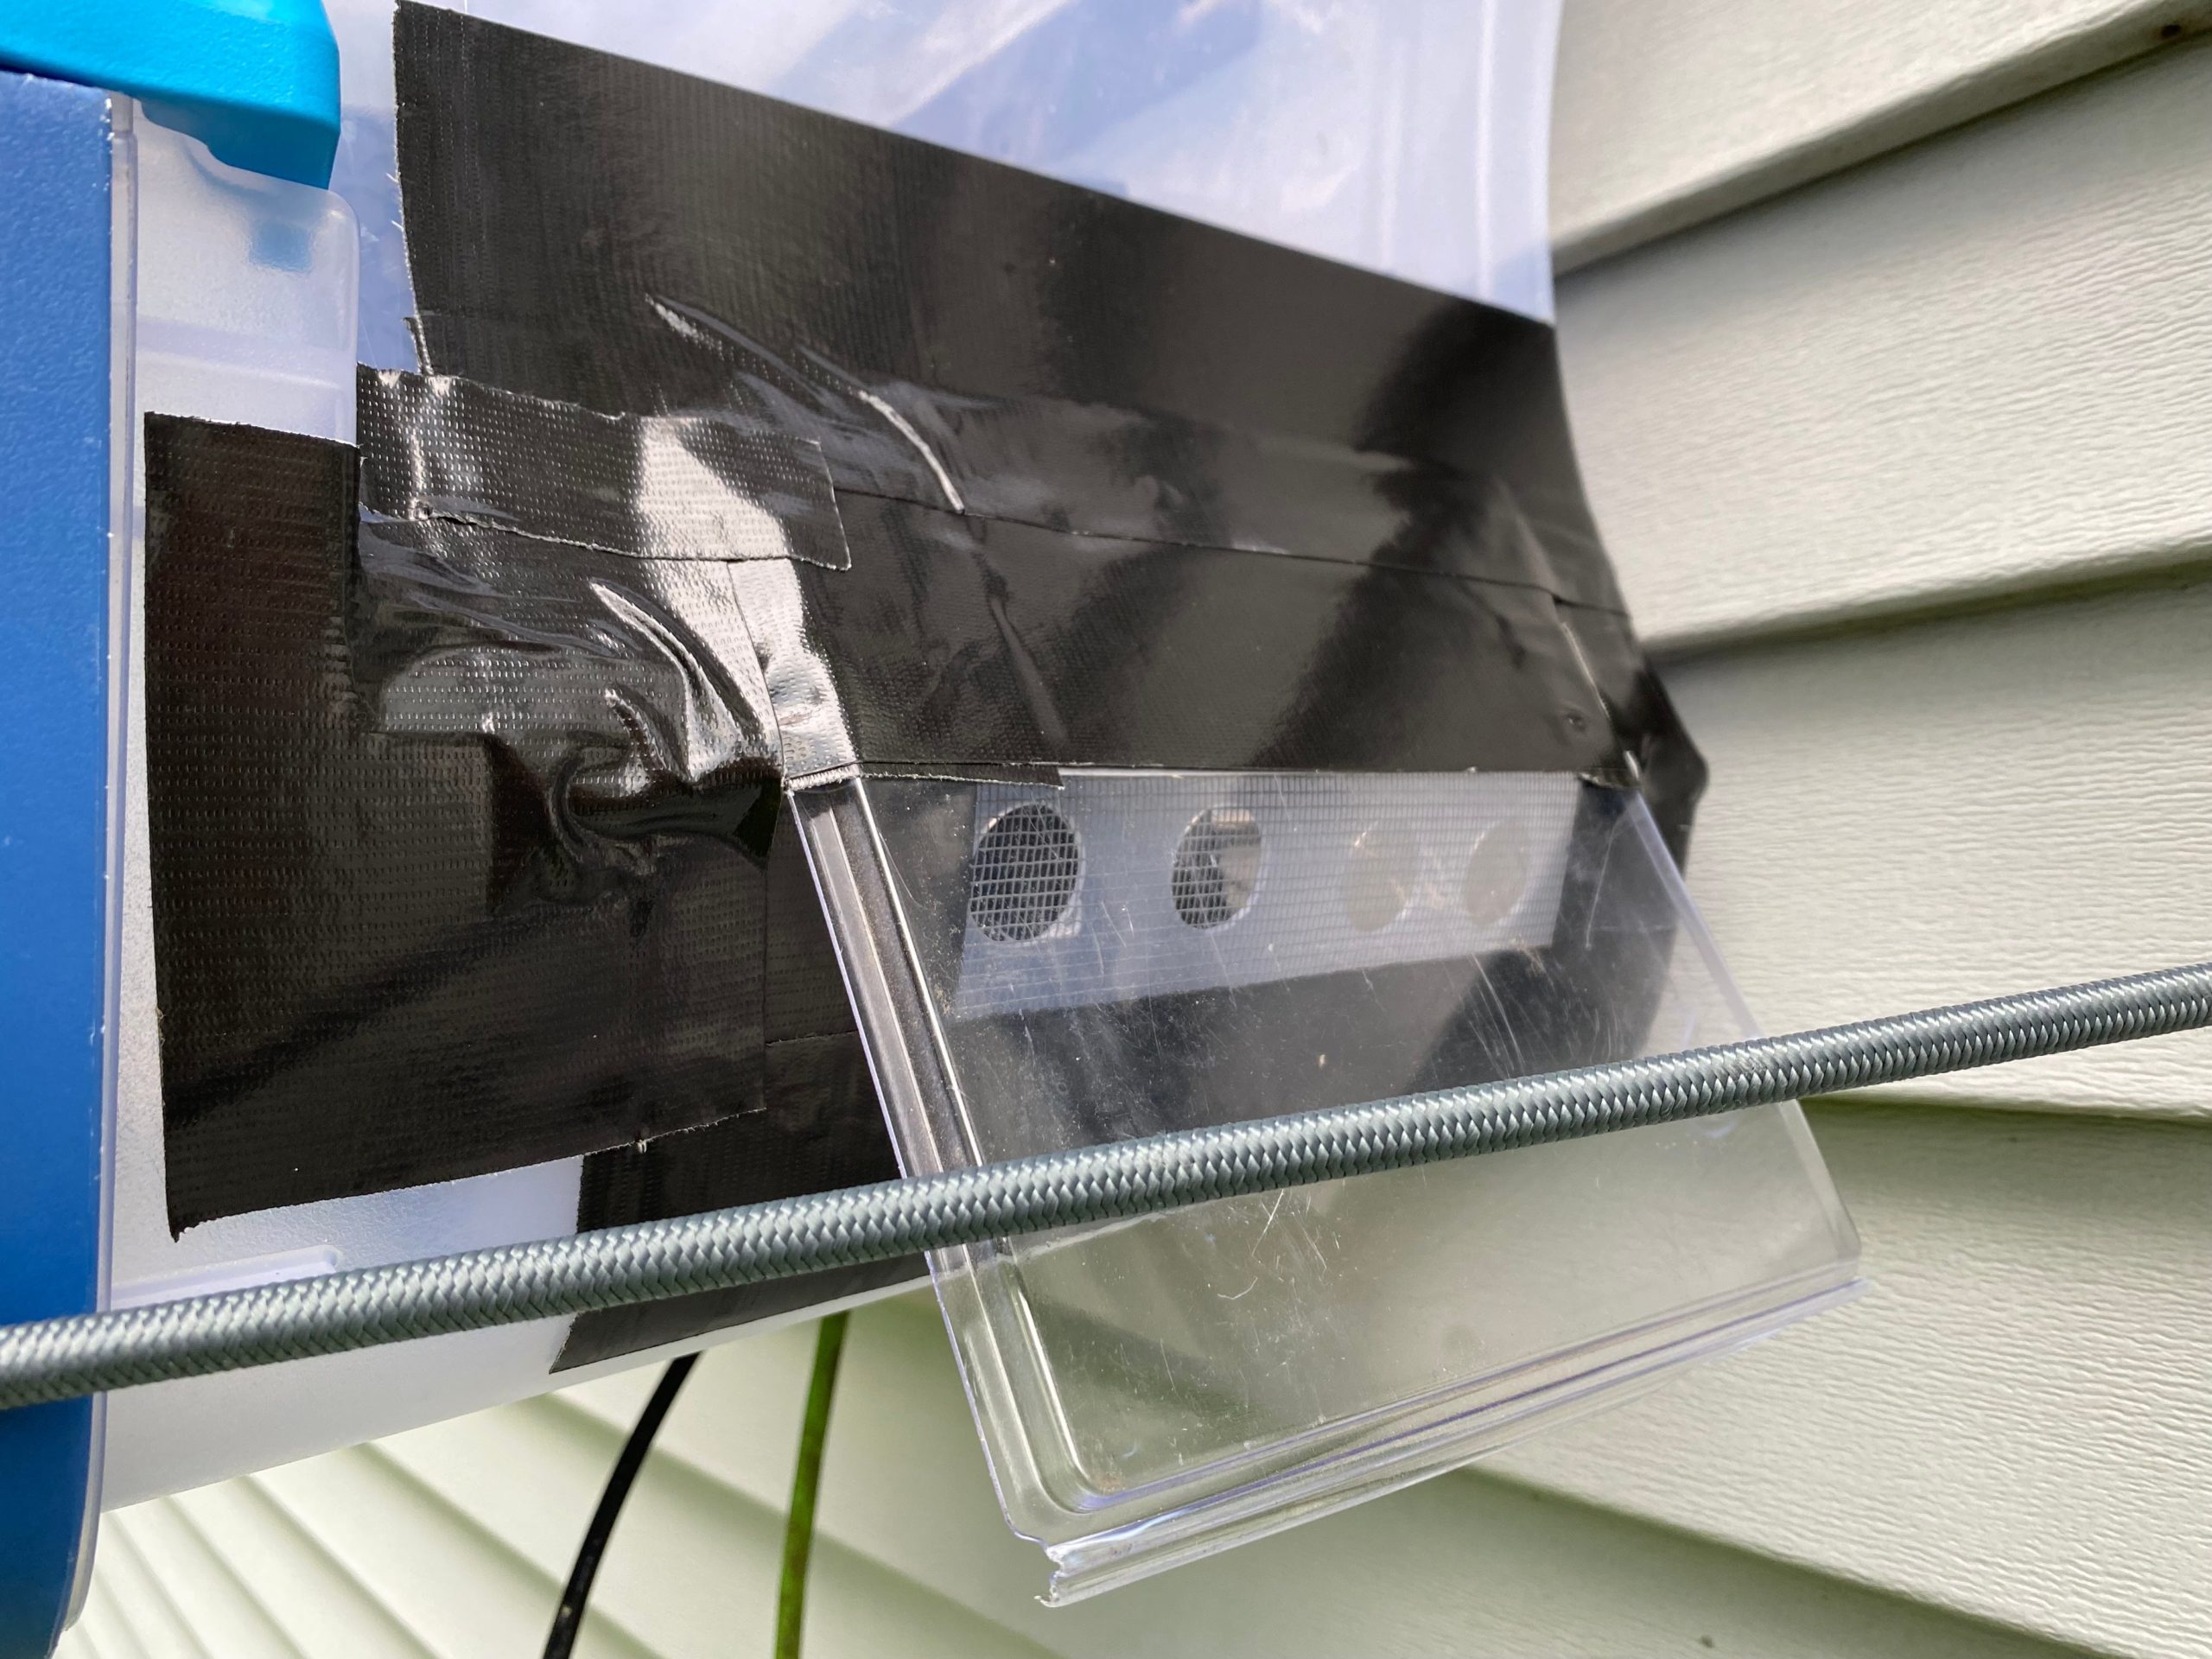
I don’t know if the drop in speed was caused by excessive heat, or if that’s even something that happens, but it was pretty hot in the box, and Andrew had mentioned venting it, so I’d decided I was going to add a fan. I cut a large, square hole in the tote for the gutter adaptor thing and taped it so that it faced toward the ground. Then I taped the fan on the end that would sit inside the box so that it would blow air downward and out. I affixed some mesh to the discharge end of the assembly to keep bugs from getting in.
On the other end of the box, I drilled some 1-inch holes, covered them with mesh, and made a little plastic shield to prevent rainwater from getting in. I used double-sided tape to fix the modem and router to the floor of the box between the fan and the intake holes and screwed the tote to the outside of the house. Once I plugged everything in and put the cover on, I could feel cool air flowing in and warm air flowing out. Finally, I added some weatherstripping to the lip of the box, ran a speed test, and waited for the rainstorm that was headed our way.
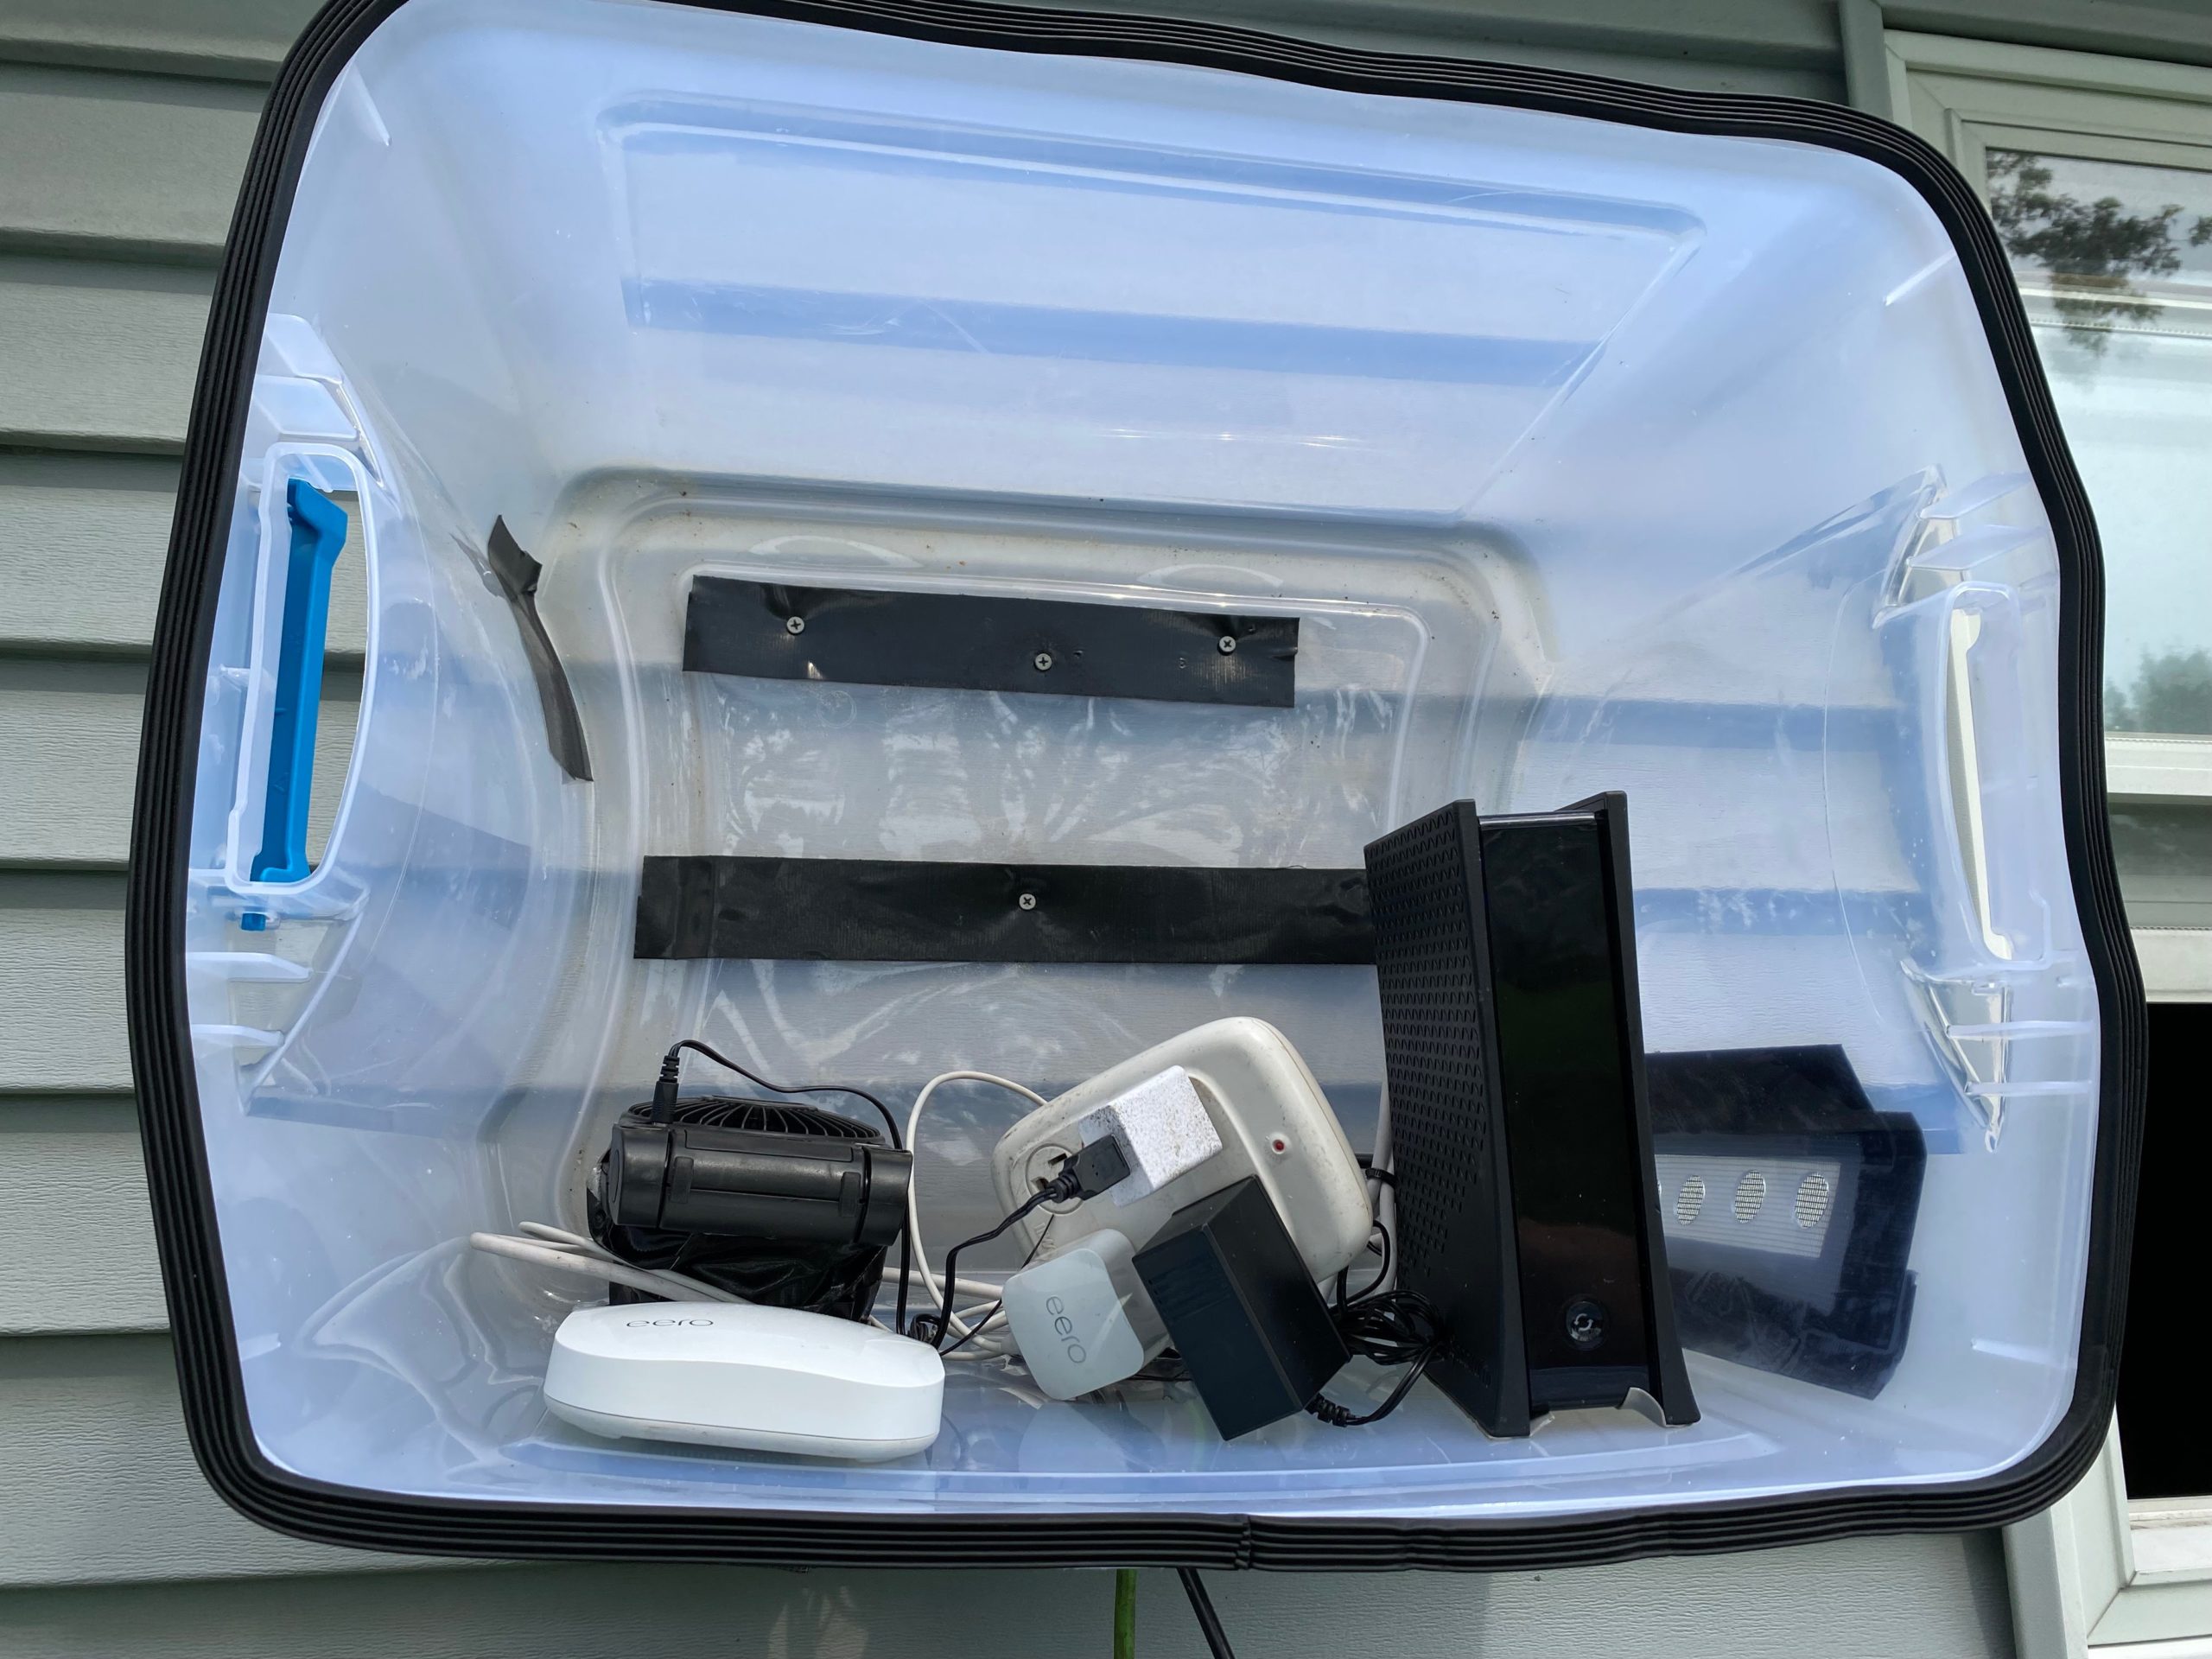
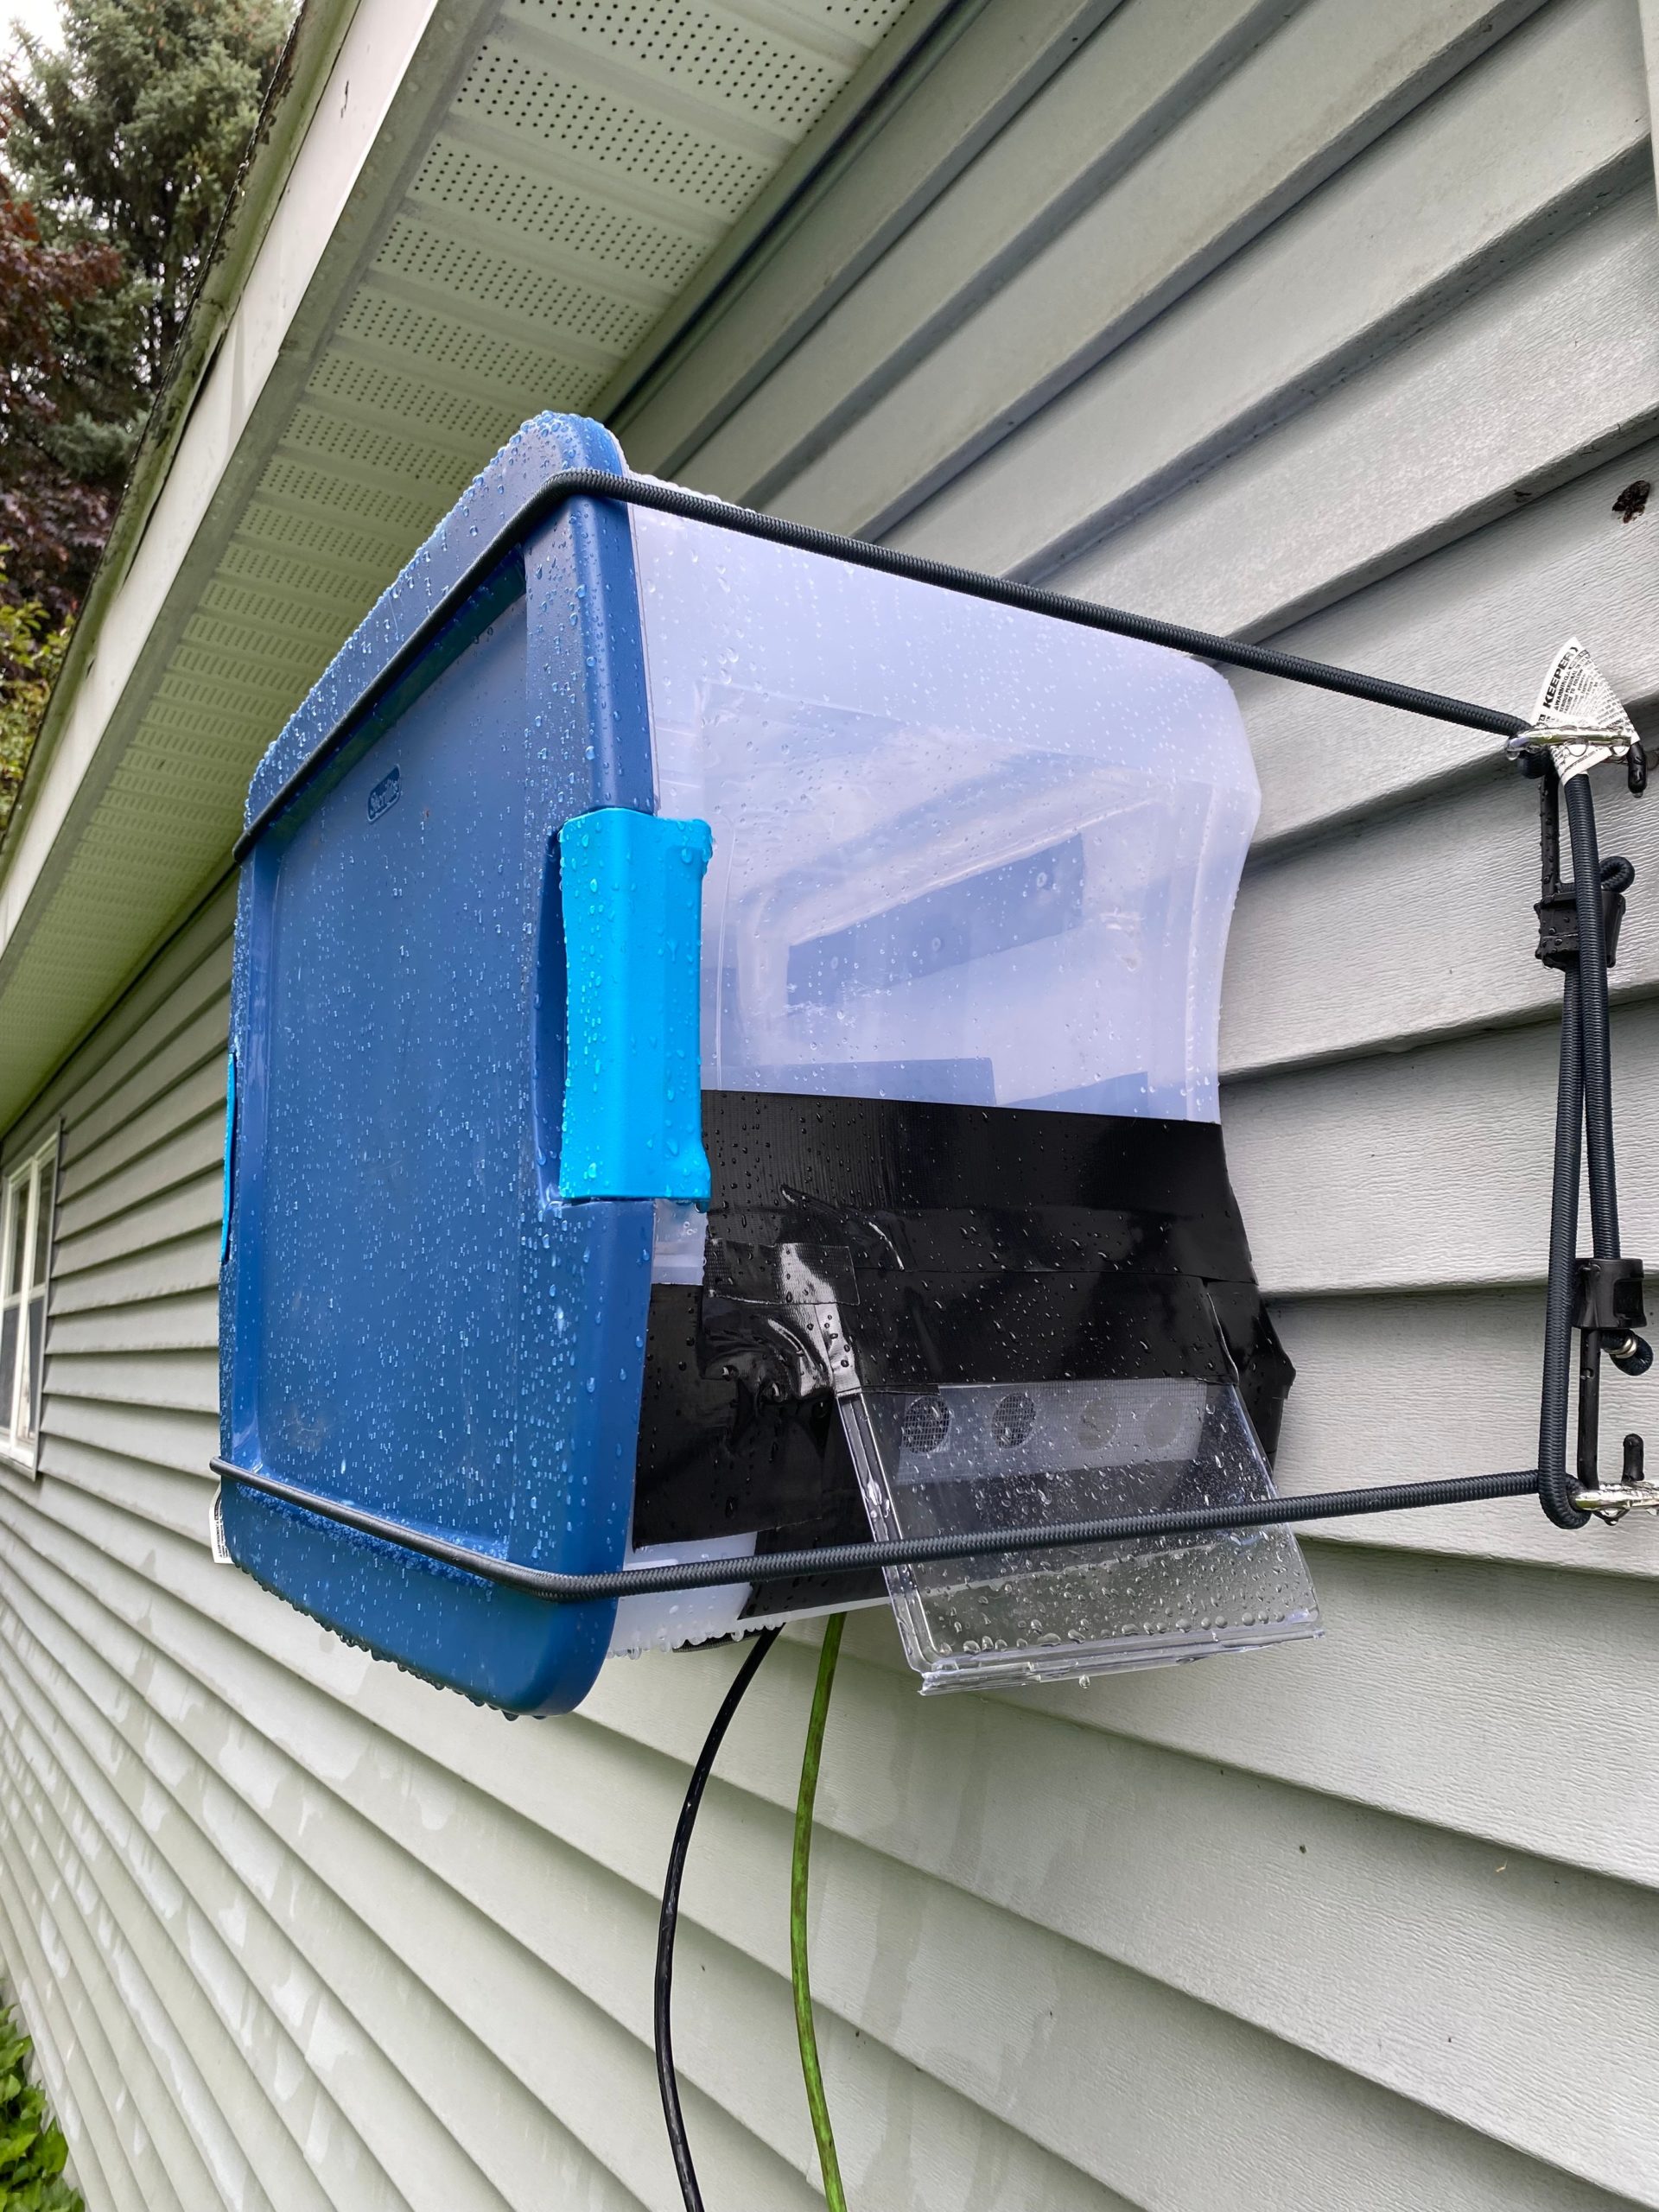
Once the rain stopped, I checked to see how I did. I found maybe a teaspoon of water on the lower edge of the box, away from the raised area where the electronics were sitting. I drilled a small drain hole below where the water had pooled and added a couple of elastic cords to strap the lid on, compressing the weatherstripping for a better seal.
I’ve been using this setup for about two weeks now. We’ve had some rain, including some biggish thunderstorms, and the box has remained dry. The fan is still running, there are no bugs inside, and my equipment is safe from the guys swinging sledgehammers in the house. Speeds are in the 120-130 Mbps range, which is more than acceptable.
I’ve built some things that I’m very proud of, and I’ve built some things that are ugly, temporary, and functional. This terrible wifi situation is obviously in the latter category, though I am sort of perversely proud of how janky it is. It’s a little like the 24 Hours of LeMons car I built with some friends in that sense — obviously awful, poorly considered, but funny and surprisingly reliable.
In a few months, the siding will start coming down. Hopefully by then we’ll have a finished room where I can set this stuff up correctly. If not, I’m sure I’ll be able to come up with something even worse.