Time is something that most of us want more of, and one way to reclaim some of the minutes in the day is enlist your computer to automatically take care of repetitive tasks like renaming files, resizing images, and launching apps. With the right software, this is doable, and we’re going to introduce you to some of our favourite tools for the job.
Besides the applications we’ve mentioned below, individual apps themselves often have features for recording automations or macros, which are combinations of actions that can be repeated again and again — whether that’s rotating a photo or saving a text document as a PDF. It’s worth digging into the software you use most often to see if those programs have some macro recording capabilities of their own.
In Microsoft Word, for example, open up the View tab on the ribbon menu, then choose Macros and Record Macro to get started. In Adobe Photoshop, you can click the Create new action button (a small plus icon in a box) at the bottom of the Actions dialog box (choose Window and then Actions if you can’t see it).
Windows
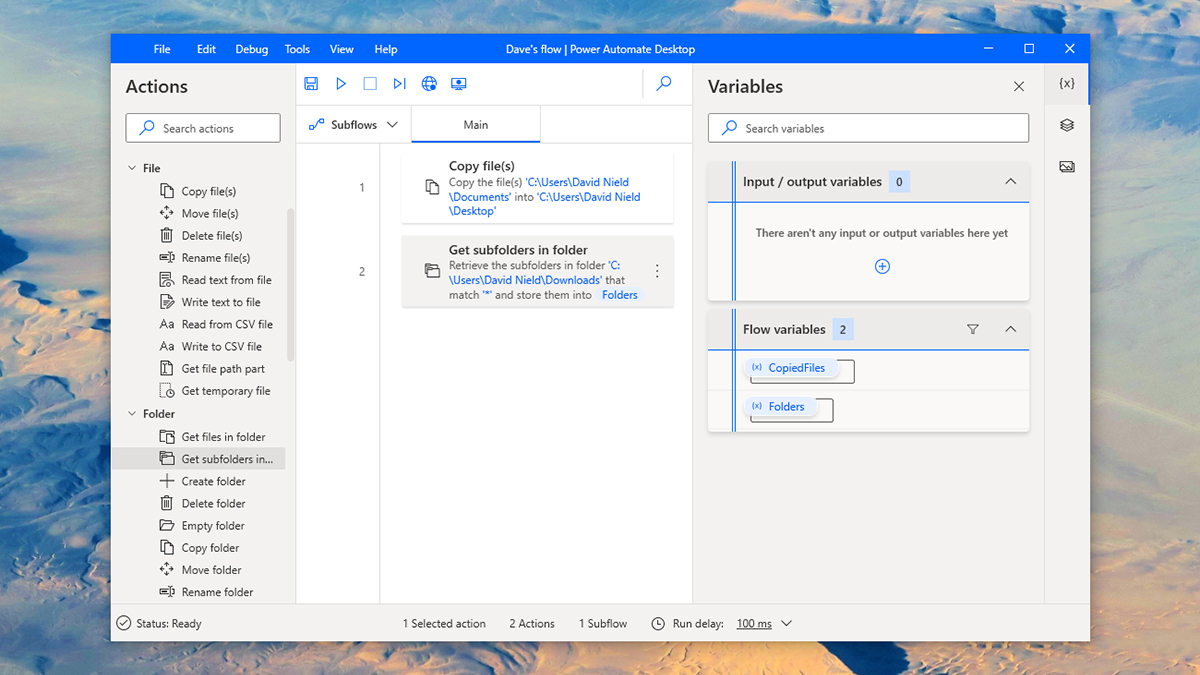
Windows doesn’t come with its own macro recorder, but Microsoft has now made Power Automate Desktop free for anyone to download and use. It’s an in-depth and complex piece of software, and it’s not necessarily the tool you’d turn to first, but it’s capable of automating a whole host of tasks across the operating system.
The good news is, there’s no coding required, so in that respect at least it’s suitable for anyone to just dive in and get going. Click New flow to begin building an automation (called a “flow” here, as you might have noticed), and from there you can go to the flow designer screen. You can drag and drop actions in from the list on the left, as well as just get the application to record your keyboard and mouse inputs.
Scroll through the list of actions in the left-hand pane to see how broad the reach of Power Automate Desktop actually is. You can manipulate files, folders, emails, clipboard contents, system actions, input devices, files on the web, and more. It’s not the simplest tool out there, but once you’ve mastered its ways you’ll find it very capable (for a more thorough guide from Microsoft, see here).
Of the third-party options out there — of which there are many — RoboTask is one of the most comprehensive and the most polished. For about $200 up front (and then $80 to renew every year), it’s also one of the most expensive, but you can try it for free for 30 days to see if it gives you the sort of functionality that you’d be willing to pay that amount for (you might well find it’s worth it for the time that you save by using the software). There’s also an older, stripped-down, freeware version of RoboTask that might suit you better.
Once you’ve got the program up and running, you can click the Create New Task button up in the top left corner to start building macros. Triggers can be anything from a keyboard shortcut to something pasted to the clipboard, while the associated actions cover file and folder manipulations, registry edits, system functions, and more. For some more inspiration, check out some example tasks.
The aptly named Macro Recorder is another option to consider: It’s more straightforward and user-friendly than the two options we’ve mentioned so far, and while you’ll need to pay $65 to own the software forever, you can try it out for free. It takes a slightly different approach to macro building by simply recording your mouse and keyboard actions and then repeating them — almost like a tape recorder for your computer.
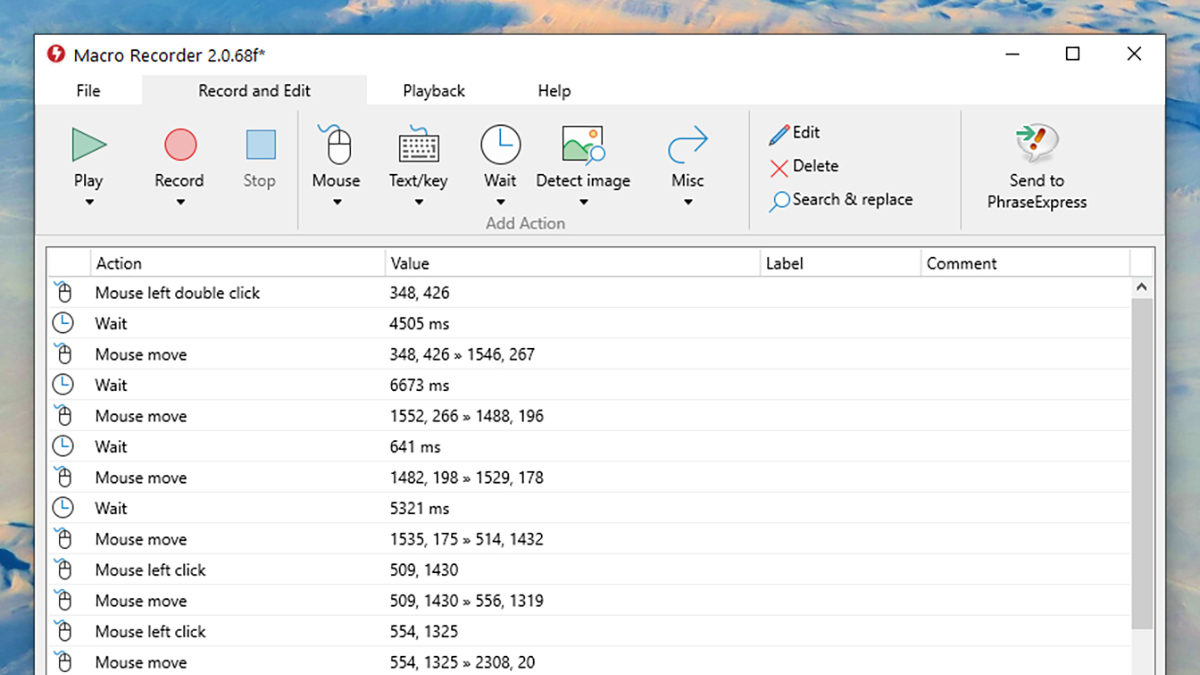
Click Record a new macro to get started, and you can then map out your actions using the mouse and the keyboard as needed. Automations can be edited after recording, so you can tweak them to do exactly what you need them to do, whether it’s opening up a bunch of images from a memory card or browsing to the same group of websites on demand.
One more tool that we recommend is Free Macro Recorder, which, as the name suggests, is free in its basic form. It works along similar lines as Macro Recorder: You start the recording, you go through the mouse movements and keyboard inputs that are needed to complete the task you want to automate, and then the program repeats the process whenever you need it to.
You don’t get much in the way of editing and configuration options (not without paying anyway), but for creating fast and simple macros, it gets the job done. The program does let you choose how fast your macros are repeated, and you can automatically launch applications at the same time, in case the automations depend on a certain piece of software being open.
macOS
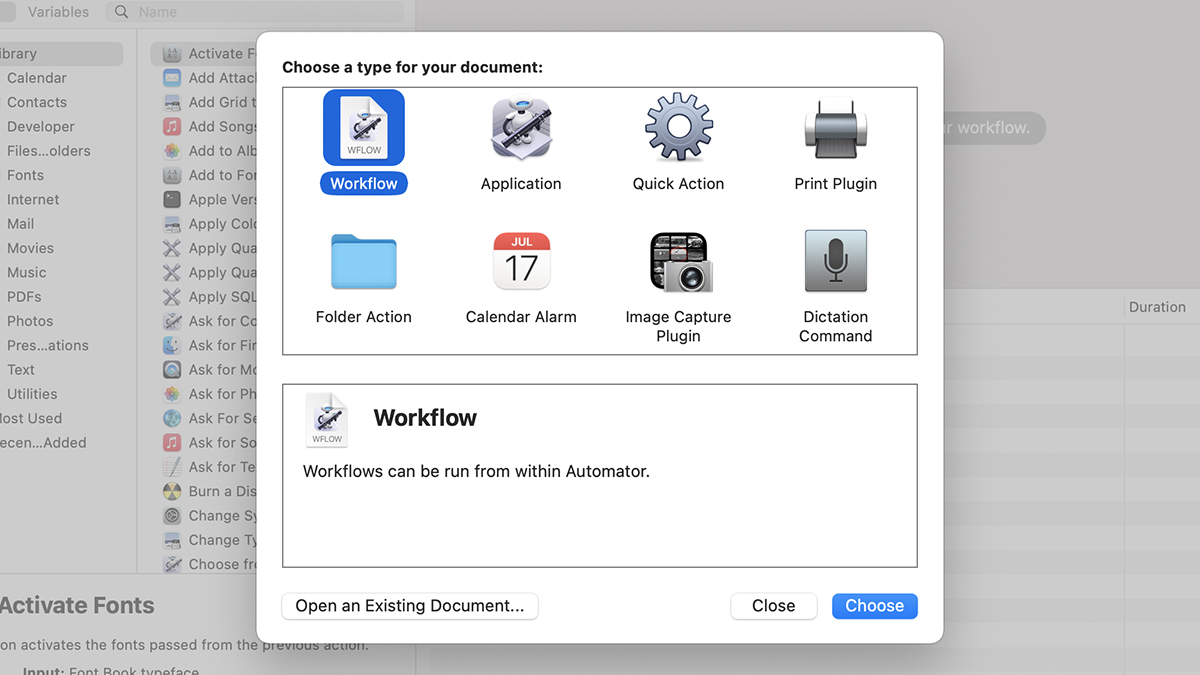
When it comes to built-in macOS tools, Automator is the one you want to fire up if you need the same repetitive task done over and over again. It can handle everything from file operations to image editing, and while it’s not the easiest tool for beginners to learn, there’s a lot that you can do with it.
After you’ve launched Automator, you’ll be asked to create a new automated task, which is known as a workflow. You’ve got several different types to choose from: Workflow is the default option (macros that run from inside Automator), but there’s also Application (standalone macros), Folder Action (macros applied as soon as a file is moved to a certain folder), and Calendar Alarm (macros run on a schedule), among others.
While we don’t have room here for a full and in-depth guide to Automator, Apple has a reasonably helpful tutorial here. The easiest way to get started is to build an automation from the default actions listed under the Library heading on the left: You can use them to do everything from finding specific songs in your music library to moving particular items in Finder to the Trash.
A quick web search will lead you to a whole host of potential uses for Automator which may give you some inspiration: renaming batches of files, pulling text out of a PDF, quitting all open applications at once, resizing large groups of images, turning the contents of the clipboard into a text file, and so on. Automator does take some time to learn, but you can start off small and work your way up as you get more comfortable with it.
In terms of third-party options, Keyboard Maestro is one of the most popular choices: It will set you back a hefty $50, but there is a free trial available so you can see for yourself whether it’s going to be worth the investment.
Keyboard Maestro is a little easier to get around than Automator, and the opening tutorial is useful for beginners if you’ve got no idea where to start. It also includes a manual record option, so if you want you can simply go through the actions of the macro you want to create on your Mac while the program logs every step.
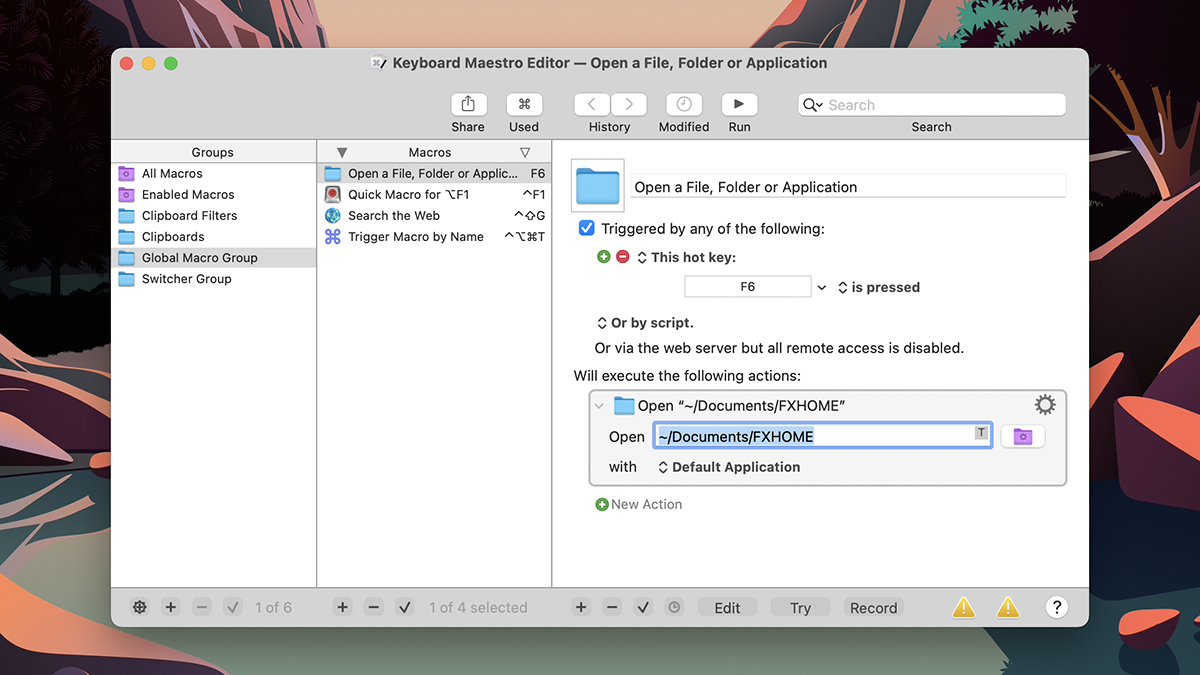
New automations can be created from the little + (plus) icon on the bar at the foot of the interface. You’ll then be asked to give your macro a name. Use New Trigger to decide how to launch the macro (with a keyboard shortcut, for example, or by the time of day), and then click New Action to decide what happens as a result. You can do everything from nudge up the system volume to copy a file somewhere.
Click around the lists of triggers and actions to get an idea of what’s possible with Keyboard Maestro. You can manage files, images, applications, the system clipboard, text input, music playback, system notifications, the default Safari web browser, and more. The All Actions category gives you everything together in one master list, and if there’s something you can do on your Mac, it’s highly likely that Keyboard Maestro is going to be able to automate it for you.
The Macro Recorder tool that we mentioned in the Windows section above can also be used on macOS, and you can test out a demo version for free to decide if you want to pay the full $65 asking price. It’s more straightforward than Automator and Keyboard Maestro, and easier to pick up right from the start, but you can still build some fairly complex macros with the software.