To screen protect or not to screen protect is a personal choice every smart device user must make. As someone who worked in an Apple Store for roughly four years, I’ve met people who swear by their screen protectors and others who are adamant they just are just a waste of $15. I sit somewhere in the middle.
Are screen protectors worth it?
No, they won’t save your phone after hurdling it across a room, but if you’re the type to sell or exchange your device for a newer model next year, it’s definitely a good idea to have one.
When customers used to ask me if it was worth it or not (a question I received 8,000 times on a good day), I would provide a personal analogy about my grandma’s expensive couch.
She keeps a plastic cover on at all times, as she doesn’t want general wear-and-tear to compromise its worth. It’s not as pretty or comfortable as it could be (it’s like she’s been saving it for someone else since the day she bought it) but it’s as good as new under and she could sell it on easily.
I would personally like to enjoy my couch. Similarly, I think light scratches and cracks are inevitable if you keep your device on you 24/7.
But if you would prefer to keep the resale value of a phone higher, maybe you’d wrap it in plastic, too.
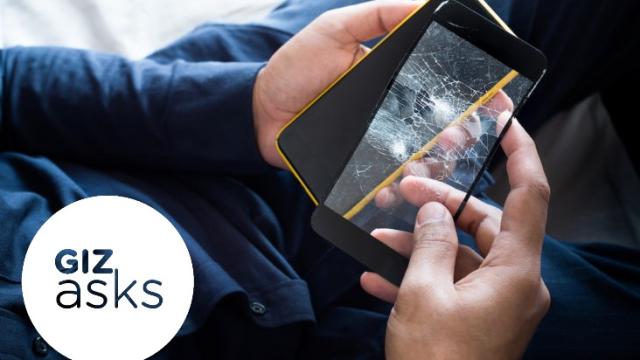
If you do decide to put one on, congratulations, you’ve come to the right place. Applying a screen protector correctly is risky business. One hiccup in the process can lead to things like air bubbles, and proper issues like blurring your camera or muting your speaker by accidentally covering it.
Below are some quick and dirty pre-screen protector tips.
Choosing an iPhone screen protector:
- If you do decide to put on one, do it as early as possible: I purchased a new iPhone two weeks ago, and my keys have already marked their territory while both were in my handbag.
- Get a screen protector made for your device exactly: No, the next closest model will not do. The shape, camera and speaker holes will not line up and you will have to buy a new one.
- Don’t just get the cheapest one: A $10-20 screen protector is a good price range. There are crappy quality ones out there that are no thicker than a sticker and are essentially useless.
Here are some options to get you started, all in 3 packs in case you screw it up:
Tech Armor Ballistic Glass Screen Protector for Apple iPhone 11 / iPhone Xr (3 Pack), $10.95
JETech Screen Protector for iPhone 11 Pro, iPhone Xs and iPhone X 5.8-Inch (3 Pack), $10.98
[related_content first=”1315720″]
Now to put one on. I’ve done it so many times, for myself and others, and still get nervous. It’s a lot of trust to put in someone. I felt like I was giving a haircut, except the customers didn’t pretend to like it when I messed up.
Putting it on:
-
- Dust is public enemy #1. Do anything you can to avoid it. Put your screen protector on a bathroom or kitchen as these are typically the most dust-free areas of your house. Wash your hands first and like we’re in the middle of a pandemic. Oh wait…
- Some screen protectors come with a micro fibre towel to wipe the dust off your phone before you put the screen on. The cruel irony here is that these can be of poor quality and leave little fibres on your screen, which is even worse than dust. You probably have a better one buried somewhere in your laundry – find it. Otherwise a little spray and wipe with a paper towel is fine if are careful. Don’t bother with a tea towel.
- Instructions will come with your iPhone screen protector. It’s usually involves simply peeling it off a piece of plastic. Easy, simple, next.
- Needless to say, don’t get your fingerprints on it once peeled. Hold it by the edges, like you would a CD or a vinyl back in the day. You don’t want your iPhone to look permanently dirty.
- Do this whole process quickly, there are dust particles flying around the air right now and they are looking to book a room between your device and screen protector with a late check out.
- You want to line up any holes for camera/speakers/ buttons/sensors/ perfectly. With iPhones (which are my personal speciality), everything is pretty symmetrical. I like to have the iPhone sitting horizontally and I curve the screen protector edges up so the centre touches the phone first. I then gently but quickly encourage the screen protector to fall onto the phone from the centre outwards. I can’t stress this enough: the quicker the process the better. Can you feel that adrenaline?
- Some of the more expensive screen protectors come with a squeegee to iron out any air bubbles. A bank card or licence will also do just fine. Do this gently and slowly, or they can look like popped pimples on your phone.
- Voila.
There you have it, iPhone screen = protected. The more you do this the easier it becomes, but obviously it’s not something you can practice on the daily unless you work in a phone shop.