
Lightroom might not have seeped into the common vernacular like Photoshop has, but in some ways it’s just as useful as the powerhouse image editor — and you get both as part of the $30 Creative Cloud Photography subscription and the deluxe CC package. Whether you’re just getting started with the software or you’re used to tweaking images with it, these tips should help you level up your Lightroom game.
If you have no clue what Lightroom is, think of it as an advanced image management tool with some of Photoshop’s most useful editing features thrown in. If you need to process a lot of images quickly, Lightroom is ideal; if you need the most advanced editing tools available, Photoshop is better suited to the job.
For the purposes of this guide we’ll be focusing on the more traditional Lightroom Classic, but consider using Lightroom CC as a bonus tip — it’s a newer, more streamlined version that might suit you better if you spend a lot of time jumping between devices and don’t need as much control over effects and edits (both new and old versions of the software are included in the CC Photography subscription).
1. Automatically apply presets
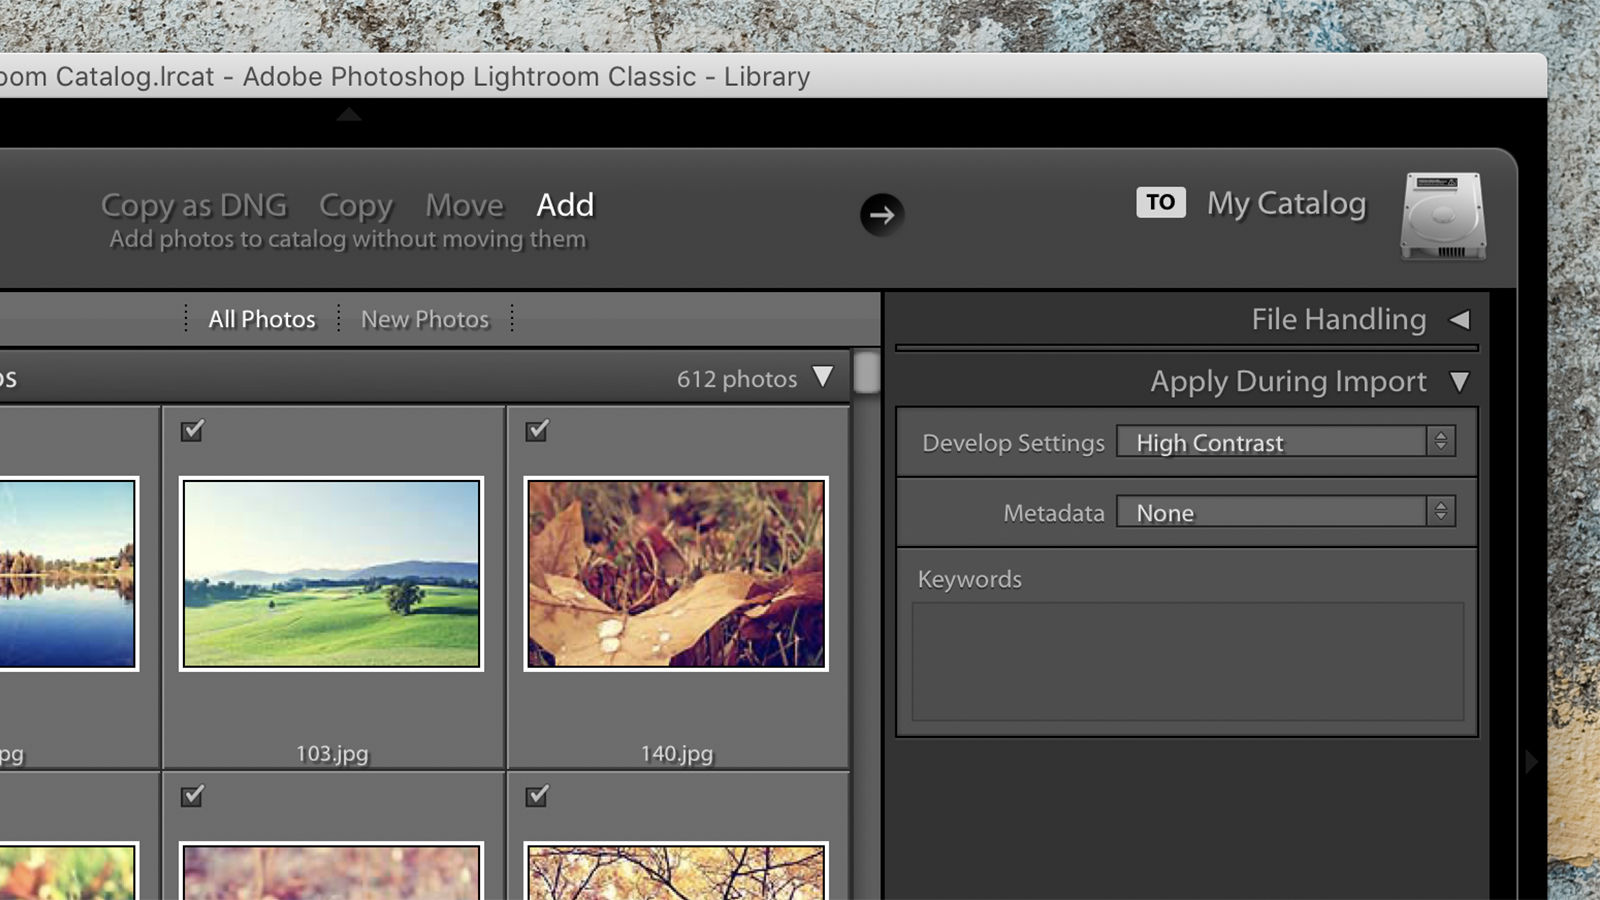
Lightroom excels at processing large batches of photos en masse, and if you’re just getting started with the software then you might not realise that you can apply preset effects and filters to your pictures as they’re loaded. The selection is available by clicking on the Develop Settings drop-down menu on the right as you’re choosing your images from disk.
Lightroom gives you a few presets to get started with, covering colours, curves, sharpening, and so on, but you can easily add your own as well. If you’ve never done this before, after you’ve made changes to an image, click the Plus button then Create Preset in the Presets panel on the left — you can then choose which adjustments are included in the preset.
2. Sync edits across images
Syncing edits across multiple images is easy once you know how, but it might not be obvious if you’re just getting started. There are a few ways to do this, but here’s one: Make changes to your first image, then select multiple images in the bottom panel (with Ctrl+click on Windows or Cmd+click on macOS), then click the Sync button on the right.
You then get a dialog box asking you which adjustments you want to sync and which you don’t, so you could sync exposure but leave contrast alone, for instance. Alternatively, use Auto-Sync to apply the changes across multiple images as you make them: Select the relevant images first, then click the little switch next to Sync to turn it into Auto Sync.
3. Show the original image
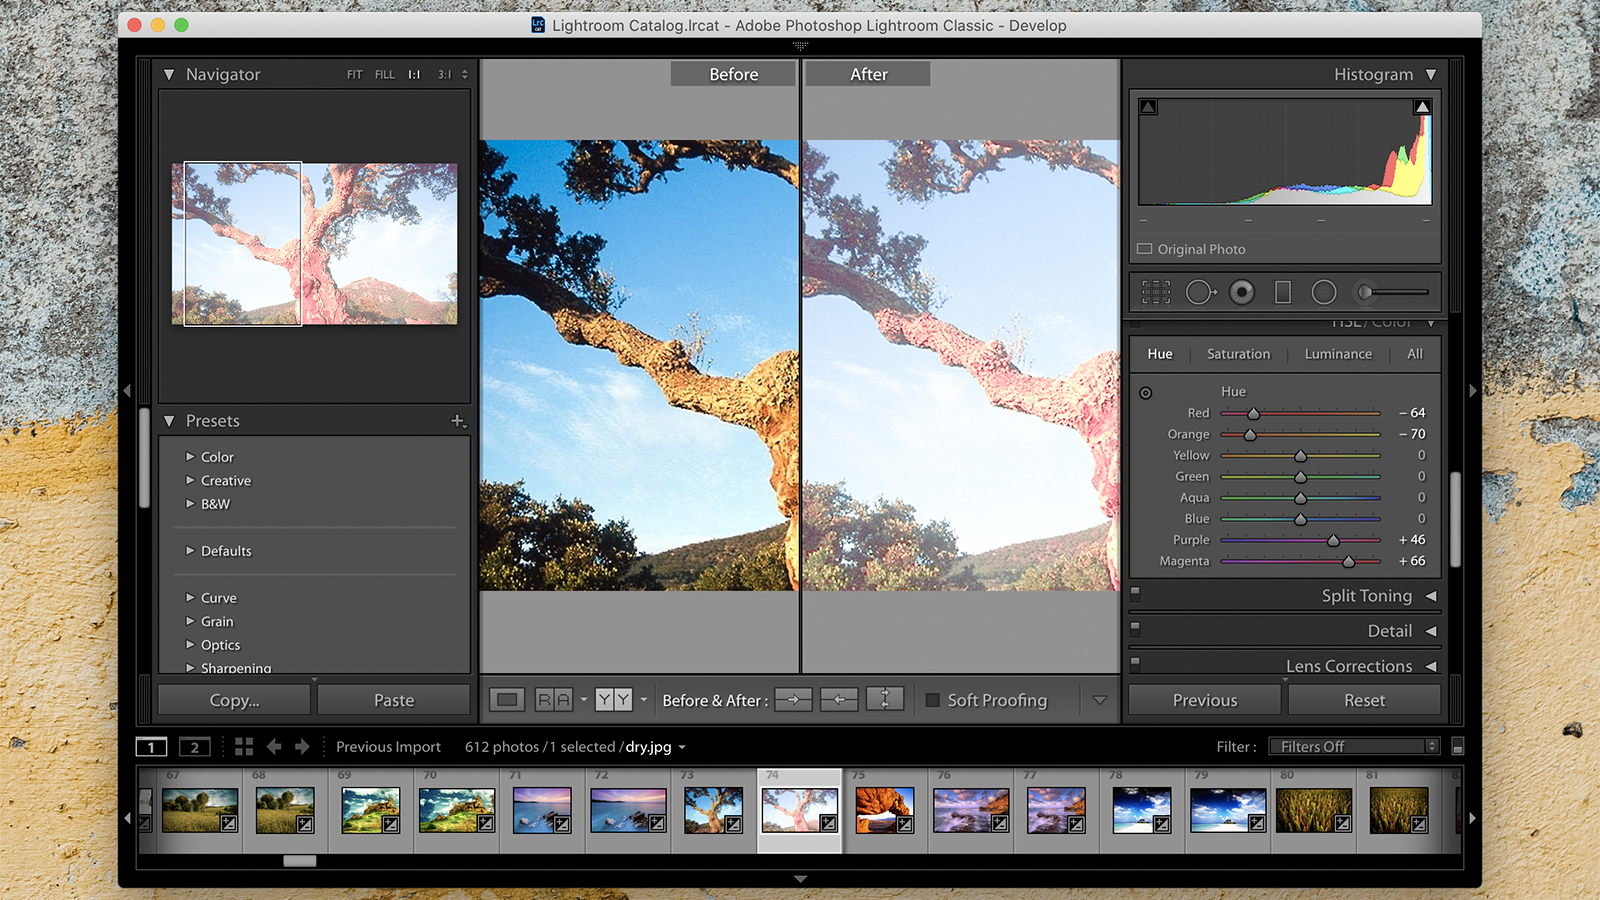
Referring back to the original image, before you started messing around with it, is a helpful way of deciding if you’ve gone too far or not far enough with your changes. There are a couple of ways to do this in Lightroom: The first is to click the YY button underneath the image in Develop mode, which shows the before and after images alongside each other.
Keep clicking on the YY button to cycle through the various layout options, and on the square button to the left to return to the normal view. You can also quickly bring up the original image in the same place as the current image by pressing the button. Remember edits in Lightroom are non-destructive, so you can always go back to the beginning.
4. Spirit level straightening
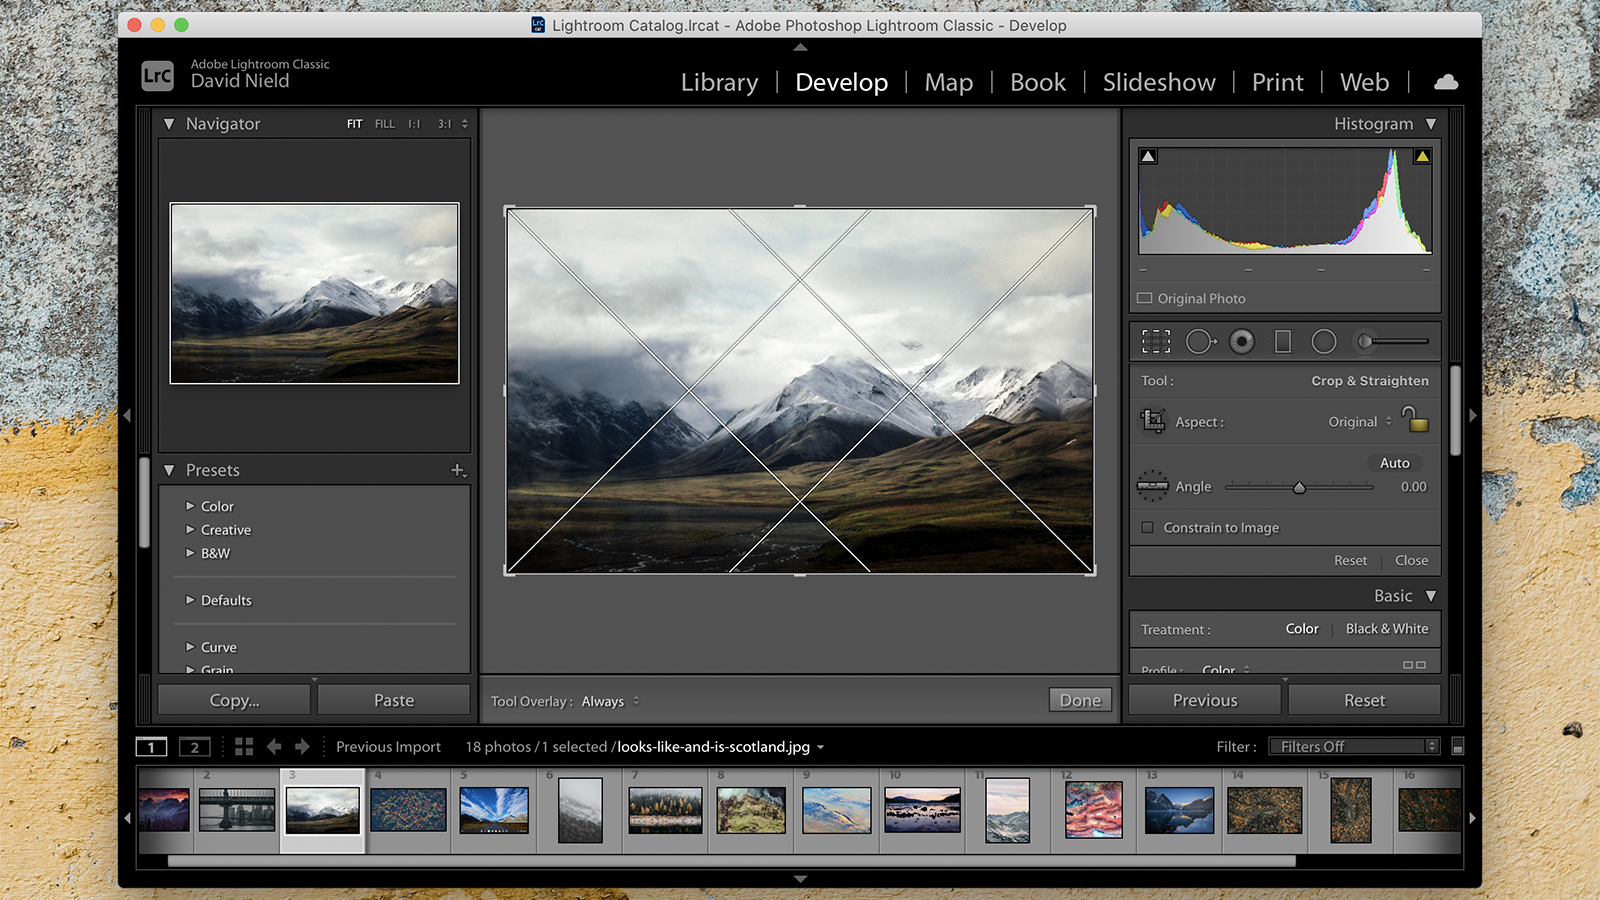
If you need to get a horizon or a building or an object perfectly straight, then it’s easy to do without having to try and guess the angle you need to rotate your picture. Click the Crop Overlay button on the right, and you’ll see a spirit or bubble level icon next to Angle — click this to use the feature on your image. Photoshop and Lightroom both do this.
All you need to do then is click and drag along the horizon or whatever it is that you’re using as your guide, and the image automatically rotates to match (you’ll see the selected angle listed on the right: Hit the Enter button to apply the crop. There’s also an Auto button on the same panel if you want to take Lightroom’s best guess at an angle instead.
5. Make the most of the thumbnail grid
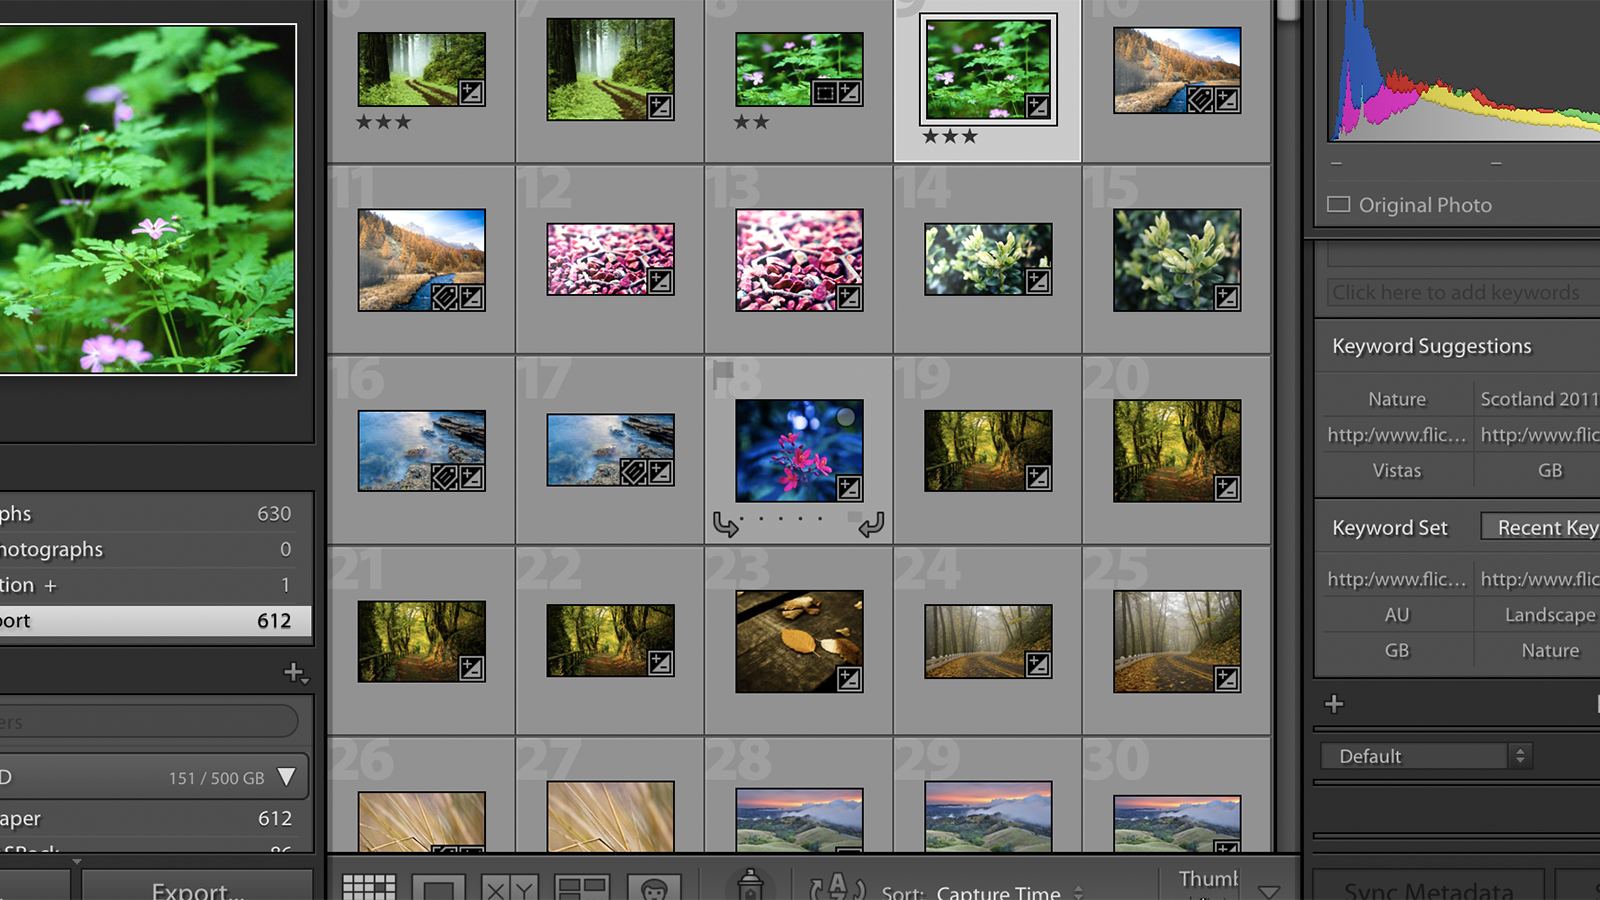
The thumbnail grid is more useful than you might think from a quick glance — it’s not just a way of scrolling through your photos. You can quickly rotate images using the buttons in the lower left and right corners of the thumbnails, for example, or apply a star rating using the dots underneath (just select multiple images to change them all in one go).
There are also some handy keyboard shortcuts, too. Press J on your keyboard to change the information that’s shown on screen, the Z key to take a closer look at the currently selected picture, and the + and – keys to change the zoom level of the grid (which you can get to from anywhere in Lightroom by tapping on the G key).
6. Merge multiple photos together
Understanding how to merge photos is an important stepping up point as you move from being a Lightroom beginner to a more advanced user. Its primary use is to experiment with HDR (High Dynamic Range) — making sure that the lightest and darkest parts of a picture are kept clean and in view by combining snaps with different exposure levels.
Select multiple photographs in the Library mode (RAW images work best), then right-click on them and choose Photo Merge and HDR (note that the same tool can also be used to create panoramas). The subsequent dialog box lets you tweak the merge in various ways, and can also auto-align the shots if some of them have slightly different perspectives.
7. Get on the grid
Lightroom comes with a variety of grid overlays to help you figure out where your crops and other adjustments should happen — not just the classic rule of thirds grid, but also the golden spiral, guides for photo print sizes, and more. To find them, open the Crop tool by pressing R, or by choosing it from the toolbar, or by selecting Crop from the Tools menu.
Next, press O (or choose Tools then Crop Guide Overlay) to cycle through the available options and to figure out which ones work with your image. Press Shift+O (or open the Crop Guide Overlay menu) to change the grid orientation. You can even restrict the number of grid options, again via Crop Guide Overlay, if you only ever use a few of them.
8. Take more control over sliders
The sliders that line the right side of the Lightroom interface are key to making a lot of image edits in the application, so you want to make sure that you’re being as accurate as possible with your tweaks. There’s an easy way to add more control: Drag out the right-hand pane from its left-hand edge with the cursor, and the sliders grow in size.
Here’s another option: Hover over a particular slider with the mouse (or trackpad), then use the cursor keys to adjust the slider in one direction or another. Finally, you can also click and drag on the numbers on the right-hand side of the sliders to make very precise adjustments with them, and to make sure you’re getting the exact effect you’re going for.
9. Turn the lights out

Here’s a simple interface trick that you might not have learned yet, but which is really handy: If you hit L on your keyboard then the Lightroom background dims, helping you better focus on the photo you’re currently editing. Hit the L key again, and the background goes completely black, and another tap on L brings back the normal interface again.
You can actually adjust how much everything except the photo dims when you hit L the first time — go to Lightroom Classic, Preferences and Interface, and under the Lights Out heading you’re able to set the dim percentage level, and the colour that Lightroom uses to fade the interface (if you’re not keen on black, you can choose white or grey instead).
10. Tweak local adjustments together
Here’s a little tip to make the most of the local adjustment tools, which are the Graduated Filter, the Radial Filter, and the Adjustment Brush you can access in the main toolbar on the right. Once you’ve applied one of these adjustments, a little black circular pin icon is left behind, which you can click and drag around to change the positioning of the effect.
There’s another hidden option behind this pin: Hold down Alt (Windows) or Option (macOS), and you can then click and drag left or right on the pin to ‘scrub’ through the various adjustments you’ve made. If you keep your eye on the sliders on the right, you’ll see that they all move in unison, either lessening or increasing the strength of the effect.