Blackmagic isn’t a household name like Canon or Sony, but it’s well-established within the film community. It’s long had a reputation for making cinema cameras built to compete with cameras that cost tens of thousands of dollars at a far more approachable price-point. Its latest, the Pocket Cinema Camera 4K, comes gunning for the indie filmmaker working on a shoestring budget, and ultimately its footage really delivers—but only if you know what you’re doing.
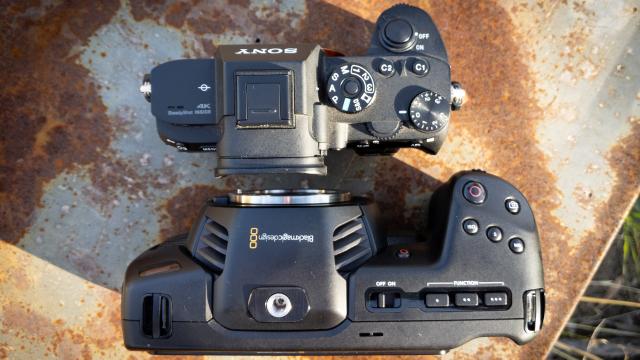
The body of the camera is a large and bulbous 7 x 3.8 x 3.4 inches. It’s a good deal wider and thicker than your standard full-frame cameras from Sony and Nikon, but it’s still light at 1kg. It almost looks like an inflated kids-camera. While it can take stills, this is essentially a video-only camera, so it’s curious that it retains the shape of a still shooter. The body feels stronger than it looks, though there are some plastic components that seem a bit flimsy, like the port covers.
The back of the camera is dominated by a huge 13cm touchscreen. It’s reasonably bright, but in direct sunlight, I really struggled to see anything at all. That’s when I turn to my viewfinder on my Sony A7R III, and it’s a shame that this camera doesn’t have one. There are options for connecting external displays, though, which would help, but that adds to the cost.
I will say that navigating the menu system with the touchscreen is pure joy, which is something I don’t think I’ve ever said about a camera. Everything is intuitively laid out and there aren’t an overwhelming number of options. There are also some hardware buttons for settings like white balance, shutter speed, auto exposure, and auto focus, as well as three customisable function buttons which you can set to do pretty much anything you want.
I had one set to be a LUT preview. The footage this camera shoots is pretty grey as is (if you shoot in the flat Film colour space, as I’d recommend), but a look up table (LUT) is essentially a colour recipe that you would apply in post. You can load LUTs onto the camera itself to preview what the shot will look like, and you can do it without actually applying the LUT to the shot, in case you change your mind later.
While the ports on the left of the camera are a bit fiddly to get to, the ports themselves are very handy indeed. You’ve got a full-sized HDMI out for 4K monitoring. In addition to standard 3.5mm mic and headphone jacks, there’s also a mini XLR input with phantom power, so you can power a mic and get high-quality audio directly into the camera. It has a locking DC power port, which will run the camera and charge the battery simultaneously, but it’s a pain in the arse to disconnect.
Those batteries (LP-E6 type batteries which are basically Canon’s standard DSLR batteries) don’t last particularly long, especially at high resolution/high frame-rate modes. Luckily, you can also charge the battery on the go via the USB-C port, which also enables you to easily record straight to an SSD.
Recording to an SSD may be your best bet, in fact, because while it can record to both SD/UHS-II or CFast 2.0 cards, holy crap the files this thing creates are massive! If you’re shooting uncompressed RAW DNG video, you’re looking at tearing through one gigabyte of data in just under four seconds. You read that right. That means a 64GB card will only hold about four minutes of video. It’s bonkers. Shooting in a compressed RAW 3:1 drops the bitrate from 255MB/sec to 122MB/sec, and the drop in quality is almost undetectable unless you’re on an extremely high-end monitor.
It can also shoot in Apple’s ProRes codec, which gets you down to 74MB/sec for ProRes 422, and 51MB/sec for ProRes 422 LT, and again, you probably won’t see the difference between those two. It’s worth noting that Blackmagic will be bringing its proprietary Blackmagic RAW codec to this camera, which is also found on its higher-end URSA Mini. That format shoots at roughly RAW 3:1 quality but at ProRes 422 LT file sizes.
It’s honestly kind of a game-changer, but unfortunately, it hasn’t yet rolled out to this camera.
So, what do you get for those humongous file sizes? Holy crap the colours! The depth and subtlety of the colours that come out of this camera are simply unparalleled in this price range. Coming out of the camera the footage looks very flat and washed out, but don’t be fooled because there is a ton of information stored in there, you just have to know how to tweak it to bring the colour out. Blackmagic’s own Davinci Resolve 15 editing software (free) is arguably the best out there for colour grading (and it’s currently the only way to work with the RAW DNG footage this camera shoots), but you can do more or less the same thing in Adobe Premiere or Apple’s Final Cut, assuming it’s a file type those editors can read (like ProRes).
I highly recommend watching the above video at this point, because words can only do so much here. Simply put, the footage this thing produces is incredibly flexible, and it gives you a ton of control over how you want it to look. Want it to look like old film stock, or flashy new HDR video or a Wes Anderson flick? You can do all of that in post, and the footage is so malleable that it doesn’t put up any kind of fight. Now, this means that you (or your editor) has to at least kind of know what you’re doing when it comes to colour grading.
Footage that comes directly out of the camera isn’t really usable. You can’t just shoot something and throw it right on the ‘gram. It takes some finessing. That said, this is admittedly not my area of expertise, but I was able to do a halfway decent job after just a couple hours of watching training videos on YouTube and downloading some free LUTs.
Now, the footage you’re going to get isn’t going to be as bright as the stuff that comes out of a full frame camera like the Sony A7 III. That comes down to the fact that that the BMPCC4K has a micro 4/3 image sensor, which is roughly a quarter the size of a full-frame sensor. There’s a lot less surface area for gathering light. On the other hand, the Sony is limited to 8-bit video, whereas the Blackmagic can shoot in 10 or 12-bit. Let’s talk about that real quick.
In this context, bit refers to the colour depth. 8-bit can display roughly 16.7 million colours. 10-bit can display just over a billion. 12-bit? More than 68 billion. Sounds like a no-brainer, right? Except that the human eye can only discern about 10 million distinct colours. So, what’s the point of going beyond 8-bit? The answer lies in the editing. Footage shot at a higher bit depth is going to be more flexible. You have more leeway in the highlights and shadows, and there will be more subtlety and less blockiness in the gradations.
The cost, however, is far larger file sizes, and editing them is going to be way more processor-intensive. In my opinion, in the majority of cases 8-bit is good enough, but if you want to make your cinematic opus, or if you’re going to do serious green screening or special effects, then it’s probably worth it to shoot 10 or 12-bit.
Something that’s worth mentioning is because this camera has a small sensor and needs a lot of light, you’re going to want to have some very fast lenses, and that will add to your cost. Micro 4/3 lenses do tend to be cheaper than full-frame lenses, though. The BMPCC 4K uses an MFT mount system, so it can use lenses from companies like Sigma, Panasonic, Olympus, and Tamron natively, with autofocus. You can use glass from Canon, Nikon, or Sony with an adaptor, but you’ll be pulling focus manually. I shot everything with a Sigma 30mm f/1.4, which I found to be very sharp and produced nice bokeh.
Let’s talk about who this camera is actually for because it occupies a weird space. Aside from the fact that you need to be willing and able to grade the footage properly, you really need to know how to shoot. This camera has no in-body stabilisation like the new Sonys do, and as a result, you will see every tiny shake if you’re shooting hand-held. It also doesn’t have a continuous autofocus mode, which is essentially standard in consumer mirrorless and DSLRs now.
That means it won’t auto adjust the focus while you’re shooting and it certainly can’t track focus on moving objects. You can tap to focus on a subject, but that causes the camera to hunt for the focus (over and under correcting) until it thinks it nails it, which it only does three out of four times. It’s slow, and it will ruin a take if you try to do that mid-shot. In other words, this camera needs to be on a tripod or a gimbal, and it needs somebody who knows what they’re doing operating it. Pulling focus is not easy, and the best DPs spend their careers mastering the skill.
Because of this, I’d say it’s not right for run and gun style shooting, and I definitely wouldn’t recommend it for vloggers or travel bloggers. I can see a case being made for wedding videographers for daytime shoots, but wedding receptions are often very dark, and the dark is where this camera will start to struggle. It has a dual native ISO of 400 and 3200, and at 3200 the image is fairly clean. At ISO 6400 there’s a good deal more noise, where my Sony A7R III (which itself isn’t the best in low light) looks a lot better. Anything higher than that and I don’t think the footage is going to be usable.
I feel like the best fit for this camera is the aspiring indie filmmaker. Maybe someone in, or fresh out of, film school, so they know what they’re doing, but they’re light on funds. When the lighting is good, this camera can produce footage approaching the quality of cameras that cost ten times as much, and that’s the real selling point here. When the Blackmagic RAW codec hits it, it will become even more of a powerhouse. I don’t love the ergonomics, but the look of the footage is just stunning.
[Origially we’d planned to upload to RAW DNG footage, so you could download it and play with it, but the files are far too large to be practical. We’ve uploaded some ProRes 422 files for your perusal. If you were hoping to see the footage compared to a Panasonic GH5 and some other popular cameras, I’d recommend taking a look at this video, which is very thorough.]