Image: IFTTT
You’ve probably got enough on your plate without wasting time on phone chores that could be running automatically — like clearing out old photos, muting and unmuting your handset, posting to all of your social media accounts at once, and so on. Here are five automations you can set up quickly and for free as soon as you get a new iPhone or Android device (or apply whenever you like to an old one).
Brought to you by Mustang. We’ve all had tech related regrets. Betamax, backing the Zune against the iPod, letting that precious vinyl collection go. No one likes living with regrets, so don’t add what you drive to that list. Stop thinking about it and just book a Mustang test drive already.
1) Back up your photos and videos, and clear up the space
You don’t have any pictures or videos on a brand new phone. But give it a few days — or weeks, and soon you’ll have lots of them. Putting a relatively easy and robust backup solution in place can automatically save you the hassle of running into those “out of storage” messages further down the line.
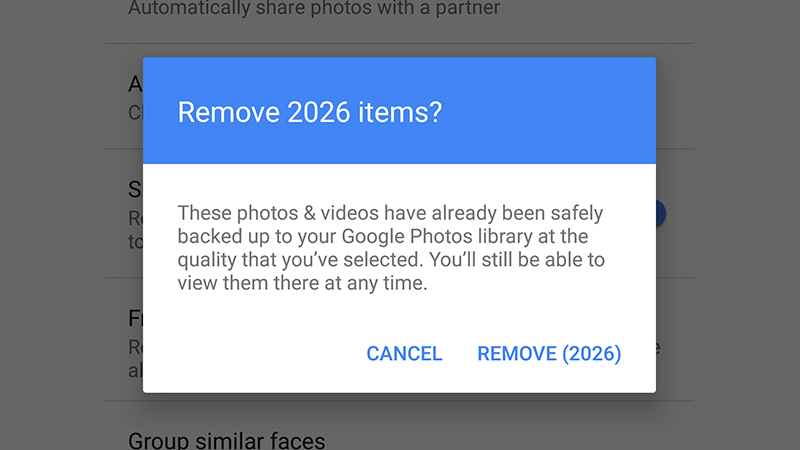
Image: Screenshot
In the last couple of years Apple and Google have finally got around to putting in a photo and video management solution that’s actually easy to use and understand. If you’re on an iPhone, it’s well worth ponying up a little change each month to expand your iCloud storage, then have all your photos and videos backed up to it.
Open up Photos from Settings, make sure the iCloud Photo Library option is toggled to On, and select the Optimise iPhone Storage option while you’re there — this means local copies of your pictures and videos will get erased as soon as they’re safely in the cloud (you can sync them back whenever you need them).
You might disagree, but we think Google Photos does the job even better. It’s installed by default on Android and is also available for iOS, and if you’re happy to have your photos resized down to a maximum of 16MP and your videos down to a maximum of 1080p, it will even store everything for free. Otherwise, a monthly charge applies.
Open up the app menu and pick Settings to make sure all your pictures and videos are getting backed up. This is also a good time to choose the resolutions your images and videos are saved in. Now select Free up space from the app menu and Google Photos can delete all the local copies of the pictures and videos it’s already transferred to the web.
2) Unlock your phone when you get home (Android only)
Setting up some kind of lock on your phone is an essential part of keeping your data secure, but when you’re at home you might feel the extra security isn’t worth the inconvenience of unlocking your phone every time you need to look at something.
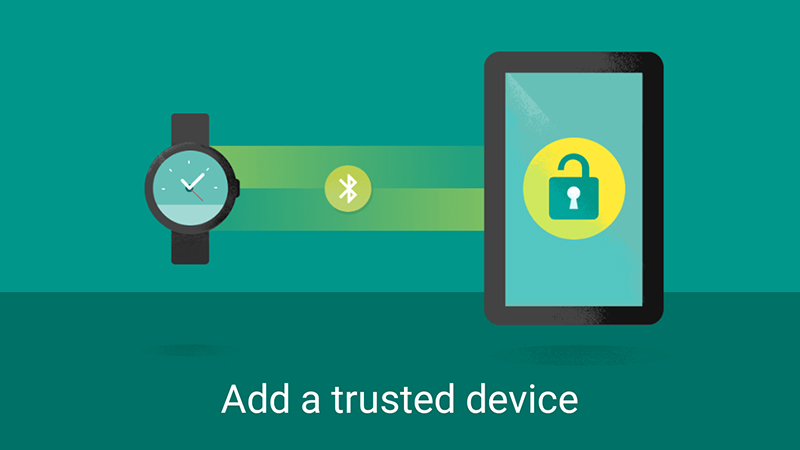
Image: Screenshot
Android now includes built-in tools to handle this automatically: Open Settings and tap Security, and then Smart Lock, to see the options available. These include on-body detection, which we wouldn’t really recommend, and trusted face and trusted voice recognition. By far the most useful are trusted places and trusted devices.
Tap Trusted Places and you can specify a particular area on a map where your phone automatically disables the screen lock — home is the obvious one, but you could also set an office perimeter if you wanted. As soon as your phone goes outside these areas, the lock is enabled again. Choose Trusted devices, meanwhile, and you can use a Bluetooth connection to something like your Echo at home or your car stereo to do the same job.
3) Set up your Do Not Disturb times
You’ve got no excuse for your phone going off in a meeting, or at 2am in the morning, because both iOS and Android include built-in tools for managing Do Not Disturb times automatically — notifications and calls still come through, but they’re completely silent. That means there’s not even the hum of a vibration ringer left on.

Image: Screenshot
On iOS, open up Settings then tap Do Not Disturb. Turn on the feature with the toggle switch at the top, then tap the Scheduled toggle right underneath — if you tap the actual schedule underneath you can set your quiet hours. Unfortunately you only get one block of time, and it repeats every day, so adjust the hours accordingly.
Via the options underneath the schedule you can opt to have the automated mute function kick in completely, or only when the phone is locked. There’s also the option to allow audible calls from particular groups of contacts in your address book.
Over on Android, the options are more comprehensive — to get started, launch Settings then tap Sound and Do not disturb. The top option on the subsequent menu lets you pick what type of notifications get muted, the bottom option lets you block visual disturbances (like the screen lighting up as well as sounds), and the middle option lets you set some pretty detailed rules for your Do Not Disturb times.
You get Weekend, Weeknight, and Event settings by default, but you can add your own custom rules or edit any of the ones Android has provided. Tap Weeknight, for example, to set the start time, end time, and days of the week when you want the automated silencer to kick in. If you want, you can also exclude alarms from the Do Not Disturb rules to make sure you still wake up in the morning.
4) Post to all your social media accounts at once
If you have the time to post all your random thoughts and favourite links to all of your social networks separately, then hats off to you. If you’d rather automate the process and post to some or all of them at once, then a number of third-party tools will do the job, and Buffer is just about the best we’ve come across.
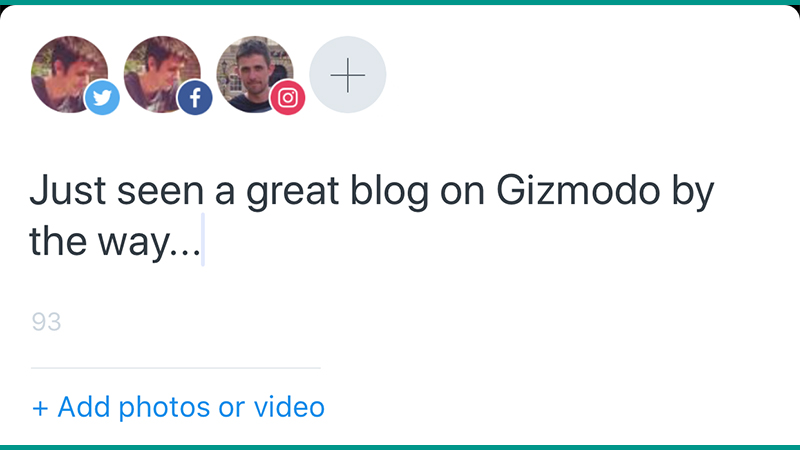
A very good blog. (Image: Screenshot)
Get the app for Android or iOS installed on your device, connect your Facebook, Twitter, and Instagram accounts, and you’re ready to start cross-posting like all of those brand-managing professionals you see out on the web. Buffer handles all of the image embeds for you, and if you want to limit some posts to just Facebook, or just Twitter and Instagram, you can do that when you compose the message.
Increasing Buffer’s usefulness as far as automation goes, you can also queue up posts in advance (hence the name) — posts can be added to the general queue or set to go out at a particular time. With a free Buffer plan you can connect one account and queue up 10 posts on each of the social networks covered.
5) Get home with the press of a button
Naturally you know where you live, and in an ideal world you know exactly how to get home from any place in your city. But the real world is not ideal and sometimes, when you’ve maybe had a few too many drinks and need to direct a cab driver, or when you’re pressed for time because the parking lot attendant is glaring at you, you need directions fast. So get this automated trick set up before you leave then house, and then you can call on it whenever you need it.

Image: Screenshot
For iOS, you need to download and install Workflow, which Apple acquired this year. Once you’re inside the app and past the intro, tap Create Workflow and choose a Today Widget (for easy access); then, tap Actions, drag in Street Address, and fill out your home address details. With that done, tap Actions again, drag in Show Directions, and choose your favourite mapping app and mode of transportation. Then tap Done to finish and rename your new workflow. Whenever you tap the widget, you get instant directions home.
It’s a little bit easier in Android. Tap and hold on any blank spot on your home screen, choose Widgets, then find Directions under the (Google) Maps heading — drag this icon to a blank part of one of your home screens, enter your home address as the destination and your preferred mode of transport, then tap Save to finish. There you have it — a one-tap route back home.
Alright that’s enough tech talk. Put down the device, step away from the screen. It’s time to stop thinking and start driving. Book your Mustang test drive today.