Action cameras seem simple enough. Strap it to your head, hit record and go, right? While that’s essentially true, your video may not turn out like the ones you see the pros making. So we wrangled up some of them up at the X Games, and got some simple, easy to incorporate tips that will kick your next video up a notch or two.
Note: For these interviews GoPro hooked us up with some of their sponsored riders and production crew, so while they all say “GoPro”, know that most of these tips apply to whatever action camera you use. The exceptions would be some of the higher frame rates and resolutions mentioned which are only available on the Hero 3 Black edition at present.
Meet the Pros
Torstein Hormgo just won gold at the X Games Big Air in snowboarding. That jump speaks for itself. He’s also one of the dudes behind the very entertaining Shredbots website, so he knows a thing or two about filming. Eric Willett is a pro boarder, and former X Games medalist. Shredding hard is what he does. Zak Shelhamer was a pro boarder through 2011, when he took a gig as GoPro’s Media Team Leader. Abe Kislevitz was just a guy on the USC ski team who made awesome action cam videos. They were so good that GoPro offered him a job.
Loving That Pole
All the riders we spoke to are big fans of the pole cam. The key is its versatility. Strapping a bit of rubber for grip let’s you do a lot. Put your hand out in front of you, and you’ve got your mug, a good chunk of your body and the slope you just blasted down. Stick it off to the side, so you can watch your blades carve into the snow. Throw your arm back behind you, and you get a really cool follow shot of you’re approach and surroundings.
Put it on an extendable pole and those angles are even more exaggerated, including much more of yourself and whatever terrain you’re traversing. Stuff the pole in a backpack and have it shoot straight down at you for a very unique angle.
The one caveat here is that you probably want to be at least an intermediate boarder or skier before you try this because it’s just one more thing to think about. When it’s mounted on your head, you can just hit record and forget it’s there. Hand-holding is going to require at least a little bit of your focus.
Check Your Angle
As Hormgo notes in the above video, when you’re shooting your friends, aim lower than you think you need to. This is somewhat counter-intuitive for videographers, who would normally never want to cut off a subject’s head. Thing is, if you cut your friend off at the knees, then you can’t really see what they’re doing. Are they boarding? Skiing? Ice skating down that mountain? It’s just a floating torso. Get the feet in there, and you’ve got yourself some killer shots of whoever it is that’s jamming down the mountain.
When you’re mounting the camera on your noggin, however, it’s tough to find the middle ground. Angle it too high and it looks like you’re on a roller-coaster, with no sense of what you’re actually doing to make those turns happen. Angle it too low, and you can see the tips of your skis or board, but you lose all perspective. You can’t really tell what the terrain is like, and you lose the beauty of the environment. Generally, you want something in the middle angling it just slightly lower than your eyes when you look straight ahead. Since your head will move a lot, you’ll have a nice mix of footage.
We should also mention the under-utilised chest mount. It’s typically more stable than the head mount, since you aren’t looking around with your chest. Because of its lower positioning you can capture a bit of your skis/board but still have it angled high enough to see the environment. Bonus if you’re a skier, you get your hands/poles in the shot, which adds to the action.
Be Narrow-Minded
This one is GoPro-specific, but no less awesome or useful. When shooting at 1080p/30fps, the Hero 3 Black has the options of wide, medium, and narrow fields of view. We typically always use wide because we figured that captured the most action, and because we didn’t want to lose video resolution when you crop in. Turns out, that’s not the case. Action cams generally have a very wide angle lens — typically 170 degrees. While that’s great for getting a lot into your shot, there is a lot of lens distortion around the edges, you know, that weird curvature around the edges. Well, the Hero 3 Black is capable of shooting at higher resolutions than 1080p and when it crops in for a medium or narrow angle, it basically just doesn’t use the sides of the image sensor. The result is an image that is still 1080p — without any pixel degradation — and has virtually no image distortion. It looks almost like it was shot with a dSLR, and it looks great for POV footage. The one tradeoff is that obviously it will have a narrower field of view but that’s sort of the point.
Settings

Again, this is somewhat (though not entirely) GoPro specific, but there are a ton of settings on that thing, and it’s really easy to feel overwhelmed by the choices. Abe Kislevitz put together this awesome breakdown of the different modes on his blog, but here are the three modes the pros gravitated to the most:
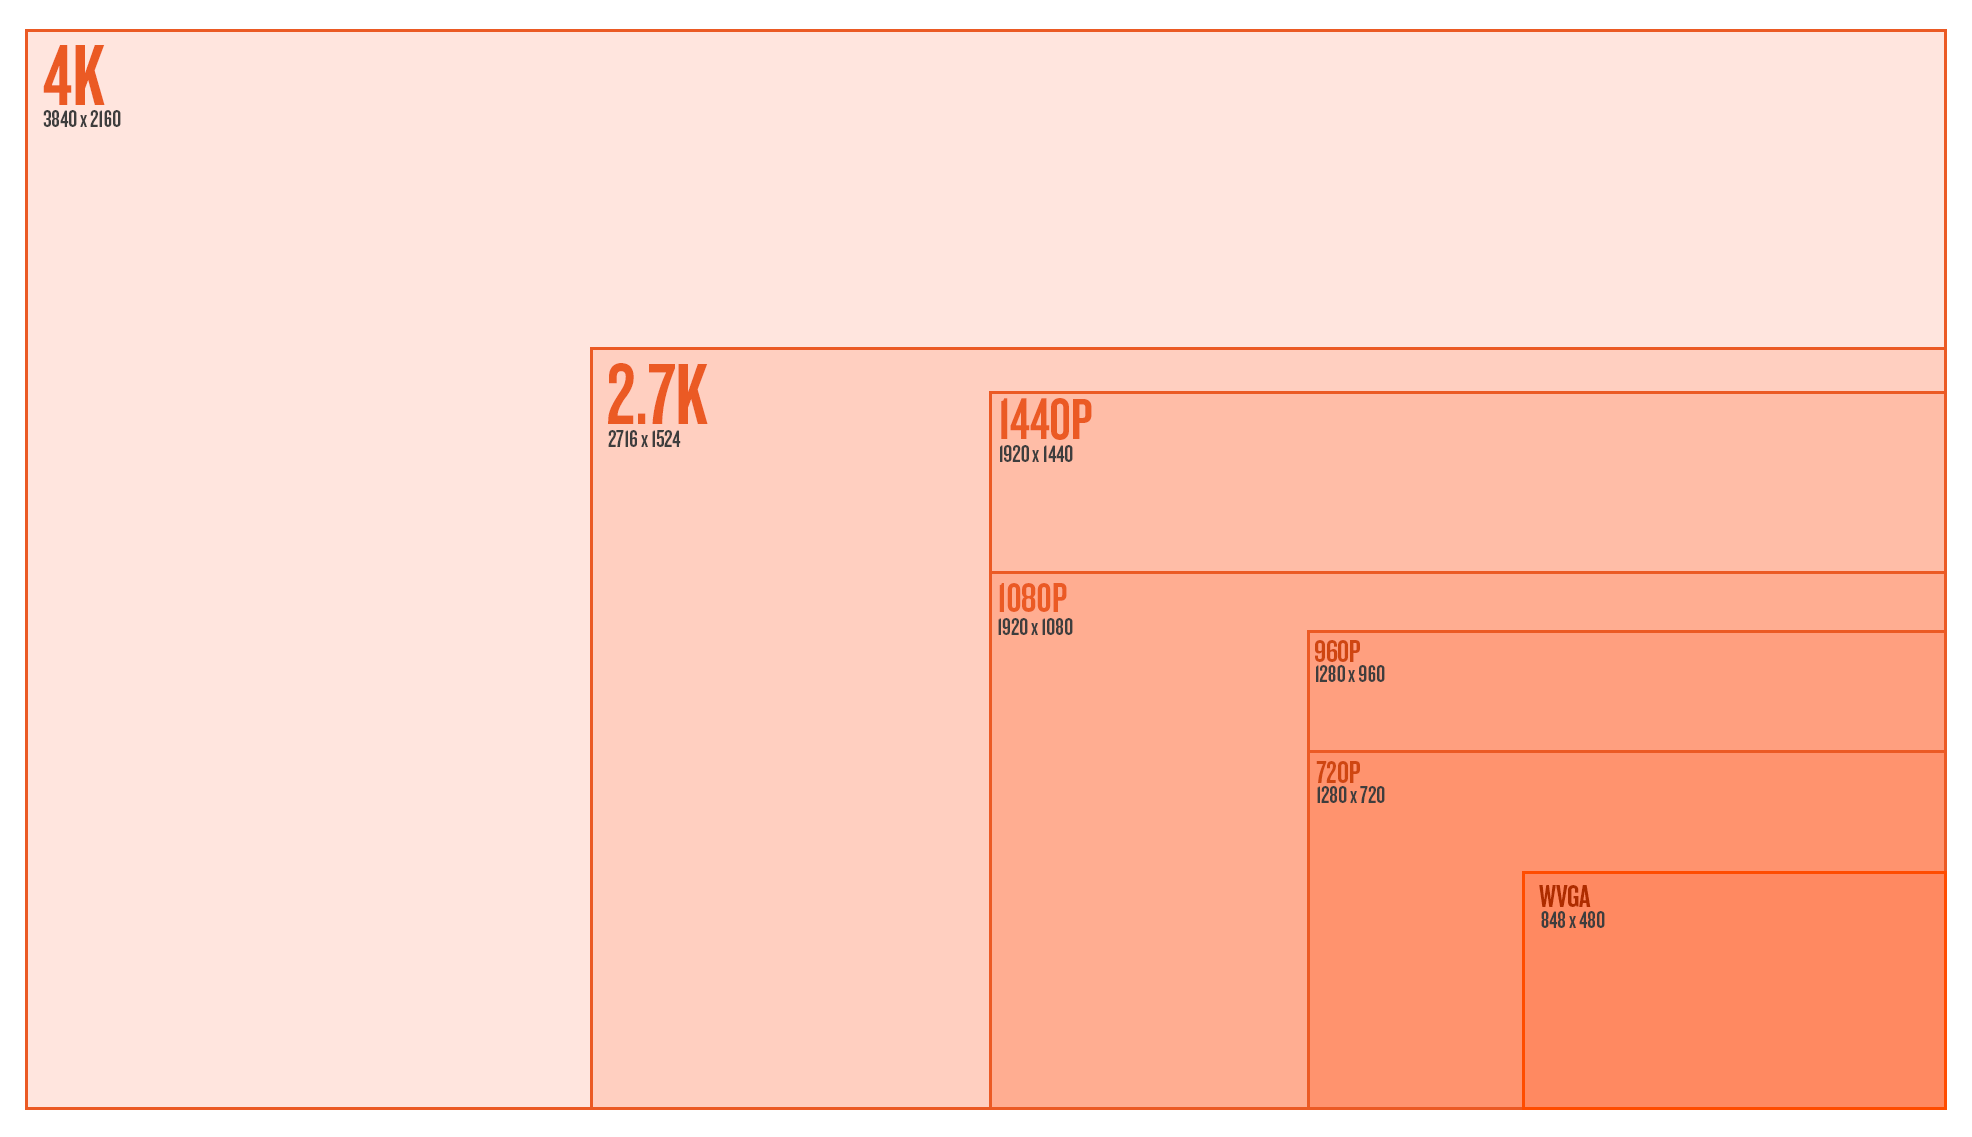
- 2.7K 30fps Wide: Basically it’s super high res, but still the standard 30 frames per second. This means that you can selectively crop footage down to 1080 to really pull in on something (even more so if you’re exporting to 720). Because the frame is so big at 2.7K you can still scale down to 1080p for lossless, stabilised video. A lot of image stabilisation software trims off the edges of the video anyway. It’s also supposedly the best for low light. File sizes tend to be larger at this setting so make sure you’ve got something to accommodate that, but as long as you’ve got a big enough card, this should probably be your go-to mode for POV shooting.
- 1080p 60fps Medium: It’s super sharp, it’s slow-mo (if you slow it down to 30fps in post), there’s very little lens distortion, and there’s no rolling-shutter jell-o effect because of the higher frame rate. It’s kind of the goldilocks mode, and it’s great for shooting others. If you’re head-mounting you probably want to switch to wide mode, though, which is still super clean.
- 720p 120fps Narrow: This is your slo-mo money mode. 120 frames per second gets you 4x slow motion when played back at 30fps (or 5x if you go to 24fps), and the narrow field of view basically eliminates the lens distortion. You’re left with super clean slooooo-mo. Now, it’s 720p, so if you want your whole sequence to be full HD then you’ll have to scale up, and the image will be noticeably soft. But you’re probably exporting to 720p so it shouldn’t matter as much and it’ll still look great on YouTube/Vimeo/etc.
Get Hacking
Because action cameras are so light and tiny, it’s really easy to hack together an enclosure. Duct tape is your best friend and not an uncommon tool when fashioning a DIY mount. One of the coolest looks as of late has to be the 360-degree shot. Attach the swivel mount to your helmet it can capture you from any angle (and it always points back at you). It’s easy to build, and the footage it awesome, just make sure the mount isn’t too stiff in case you take a tumble, it’s preferred that it snap off and not, you know, your neck.
Well, that’s it for this edition of Protips. If you’ve got some advice of your own regarding mounts, settings, or editing, please share it with the community in the comments below. Shred the gnar, dude and dudettes.
