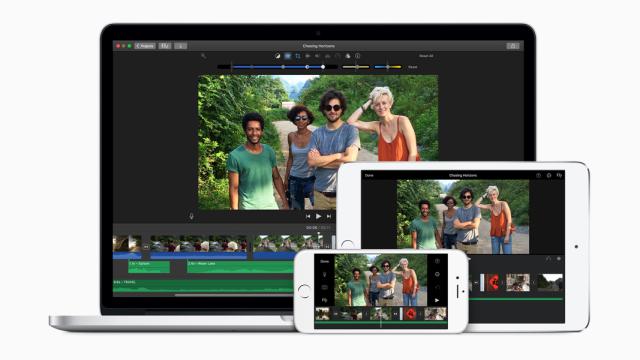
If you’ve got an iOS or OS X device in your possession, then you can also get iMovie, Apple’s user-friendly video editor that’s simple enough for beginners to understand while offering a handful of features to tempt more professional users, too. Whether you’ve spent years working with iMovie or have yet to try out the desktop and mobile apps, here are ten expert tips for making the most of the software.
1. Match the look of two clips
If two clips have been taken under different lighting or with different cameras, it can make the switch between them jarring even if they’re from the same event and the same time of day. iMovie includes a tool designed to help minimise this kind of problem and it’s called Match Colour.
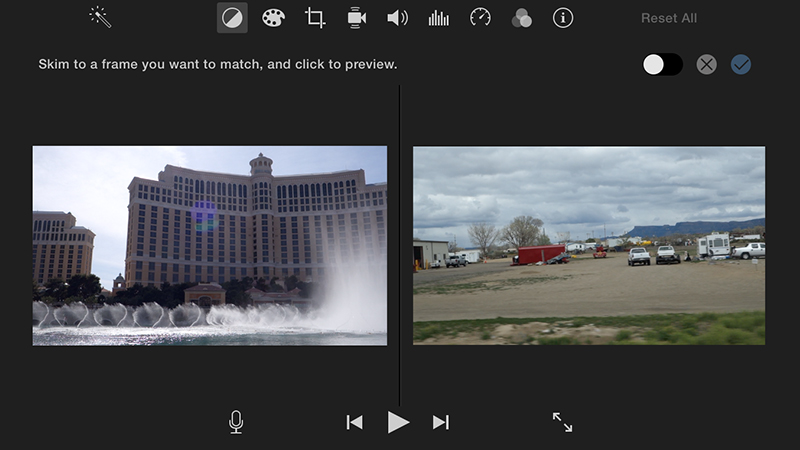
Select any clip in the timeline then open up the Colour balance panel using the icon on the preview window pane. Select Match Colour and the app invites you to click on another frame in your project to duplicate the colour palette — you can see a preview as you go and click the tick button to confirm.
2. Add a picture-in-picture effect
Putting one video clip on top of another is relatively simple to do in iMovie. Drag your clip of choice to the row above the main timeline, make sure it’s selected, and then choose Picture in Picture from the drop down menu above the preview window. You can then resize the clip as required.
A bunch of additional options appear to enable you to tweak the end result — it’s possible to set a border style and shadow, to dissolve or zoom the embedded video, or even swap the new clip with the existing one (so your main footage is the video track used for the picture-in-picture effect).
3. Stabilise your footage
Unless you’ve taken a tripod out with your smartphone, chances are there’s a little bit of shake affecting your videos once they’re imported, but iMovie can take care of that. Select your clip on the timeline, click the Stabilisation button above the preview window, and enable Stabilise Shaky Video.
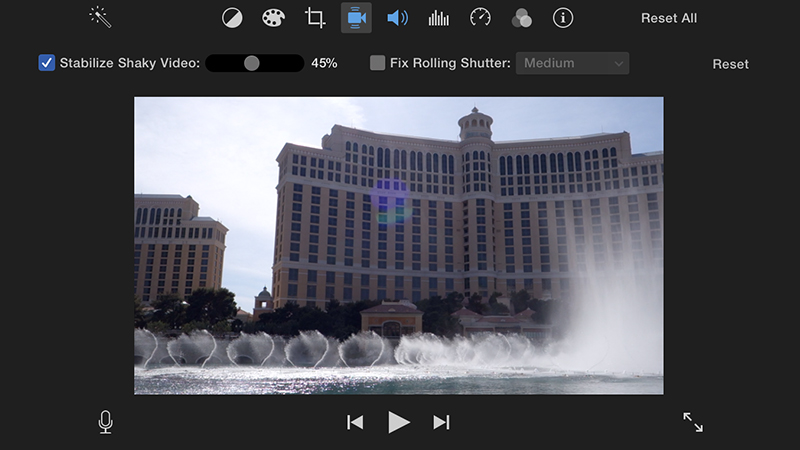
You can adjust the level of stabilisation if required — iMovie fixes camera shake by zooming in on your frames, so increasing the steadiness of the shot results in less of the clip being visible. Fix Rolling Shutter, meanwhile, helps to minimise the visible artifacts from fast-panning shots.
4. Get precise with your edits
iMovie is designed to make video editing as straightforward as possible, but you can access a handful of more advanced tools if you need them, one of which is the Precision Editor. Double-click on the edge of any clip on the timeline or select a clip edge, then choose Show Precision Editor from the Window menu.
The Precision Editor view lets you more accurately tweak the start and end points of video and audio clips and manipulate them independently if required. Unused portions of clips are shown as dimmed and you can use the same view to edit incoming and outgoing points for titles and transitions, too.
5. Tweak the workspace layout
You definitely don’t have to accept the iMovie interface layout that Apple gives you — if you want to customise it to suit your needs better or want to bring back the look of past iMovie versions, there are various ways to do it. Use the Windows menu to set which interface components are shown.
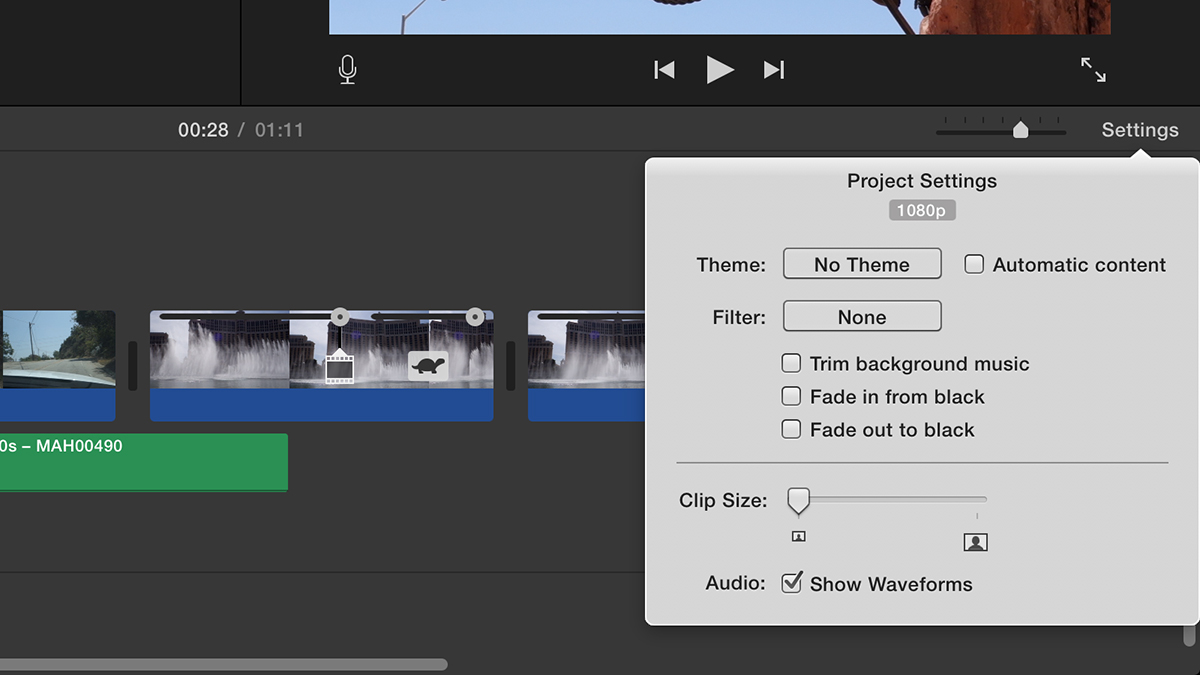
Click on the Settings button to the right of the timeline pane and you can alter the size of your clips on screen and show or hide the audio waveforms with each clip. Use the slider to the left of Settings to adjust zoom levels, and click and drag the timeline border to change its relative size on screen.
6. Quickly add an instant replay
One of the newest features to make its way into iMovie is an Instant Replay tool. It duplicates an existing clip, plays it at a slower speed, and adds an “Instant Replay” banner (which you can edit or remove). First of all, click on the video clip you want to see an instant replay of in the main timeline.
Choose Modify and Instant Replay and you can then choose the playback speed for the duplicated footage (from 10 to 100 per cent). By clicking and dragging on the small slider button on the top right corner of the new clip you can stretch out or shrink the time the instant replay is shown for.
7. Detach audio from a clip
You don’t necessarily always want your audio to marry up with your video. For example, you might want the audio from a talking head clip to appear before the actual interviewee does. To achieve something like this, select a clip in your timeline, then choose Detach Audio from the Modify menu.
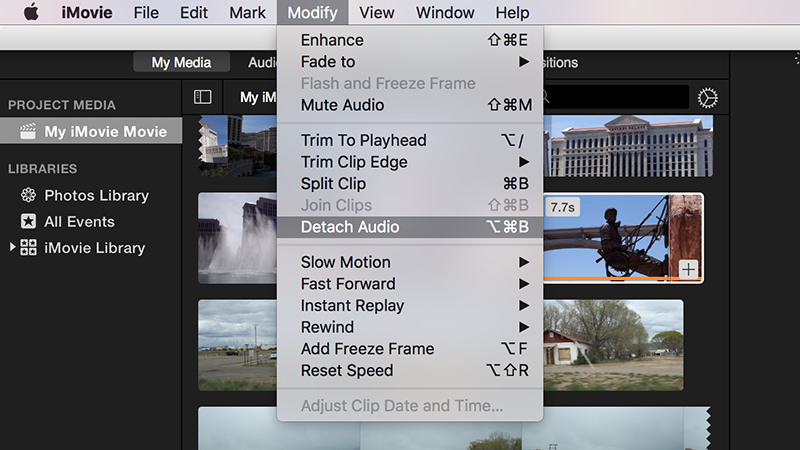
The associated audio track can then be moved around and trimmed independently. Of course, you can also use the same technique to remove the audio from a clip completely (just tap the Delete key). Both the audio detaching and muting options can also be accessed via a right-click.
8. Switch from iOS
Apple has been pushing seamless switching from OS X to iOS for a while now, and iMovie is definitely part of the Cupertino company’s grand plan to let you jump from mobile to desktop (and back again) with ease. Install iMovie on an iPad or iPhone and you can start work there before switching to a Mac.
Going from mobile to desktop is a lot easier than going the other way (because of the cut-down features in iMovie for iOS), and there are a number of ways to do it once you hit the export button — primarily iCloud Drive and AirDrop. Use iMovie Theatre if all you want to do is view the finished video.
9. Pinch to crop video
As we’ve mentioned, the mobile version of iOS isn’t as advanced as the desktop one, so if you are using both then you’re probably going to want to start projects on the former and finish them on the latter. One neat option in the mobile iMovie is the pinch-to-crop.
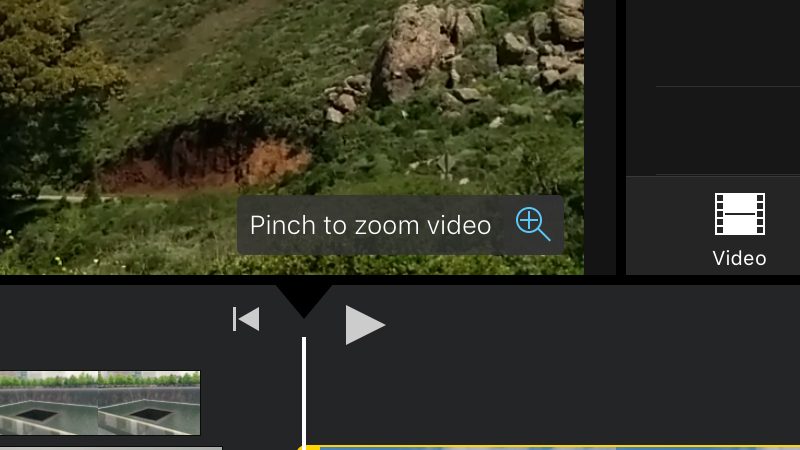
Tap once on a clip in the timeline, and a magnifying glass appears — tap this to pinch and pan around the clip until it’s framed as desired. Of course with 4K video recording now available on the newest iPhones, you’ve got a lot more pixels to play around with if you need to cut frames down.
10. Use iMovie as an extension
App extensions were introduced way back in iOS 8 but Apple itself remains the developer that’s made the most of them so far. If you have iMovie installed on your mobile iOS device, then you can get at it right from the Photos app and make changes there without launching iMovie proper.
Open the Photos app, choose a video, tap Edit and the standard editing interface appears. If you then tap the small circular icon to the right of the video thumbnails, you can select iMovie from the list to see a few of the app’s tools (titles, clip splitting, colour adjustment) appear on screen.