
If you spend any time around young children you’ll know what a soothing and calming influence a tablet can be, but it’s potentially a pretty dangerous one too — there’s plenty of unwholesome content out there on the internet and app store for your little friend to accidentally stumble across. Here are the best ways to make an iPad kid-proof before you hand it over.
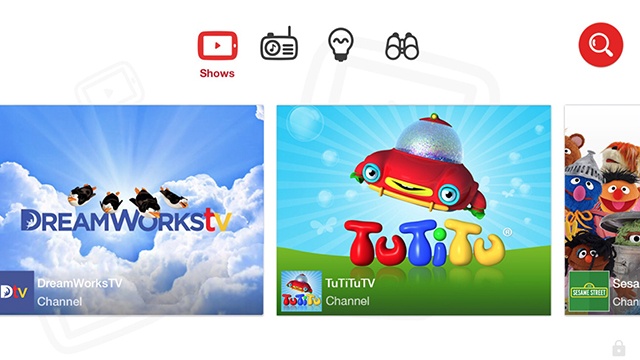
YouTube Kids
All the best and worst of humanity can be found on Google’s video-sharing site within about two seconds, and you want any young relatives who seize your iPad to be safe while they’re browsing around.
The main YouTube app doesn’t have much in the way of kid-friendly protections beyond a ‘safe’ search option. Knowing how popular YouTube is with the youngsters, Google has released YouTube Kids to make life much easier for parents with a tablet: It uses an algorithm rather than a team of human beings to work out what’s family friendly, so you might want to keep an eye on what’s happening just in case.
Turn on Restrictions
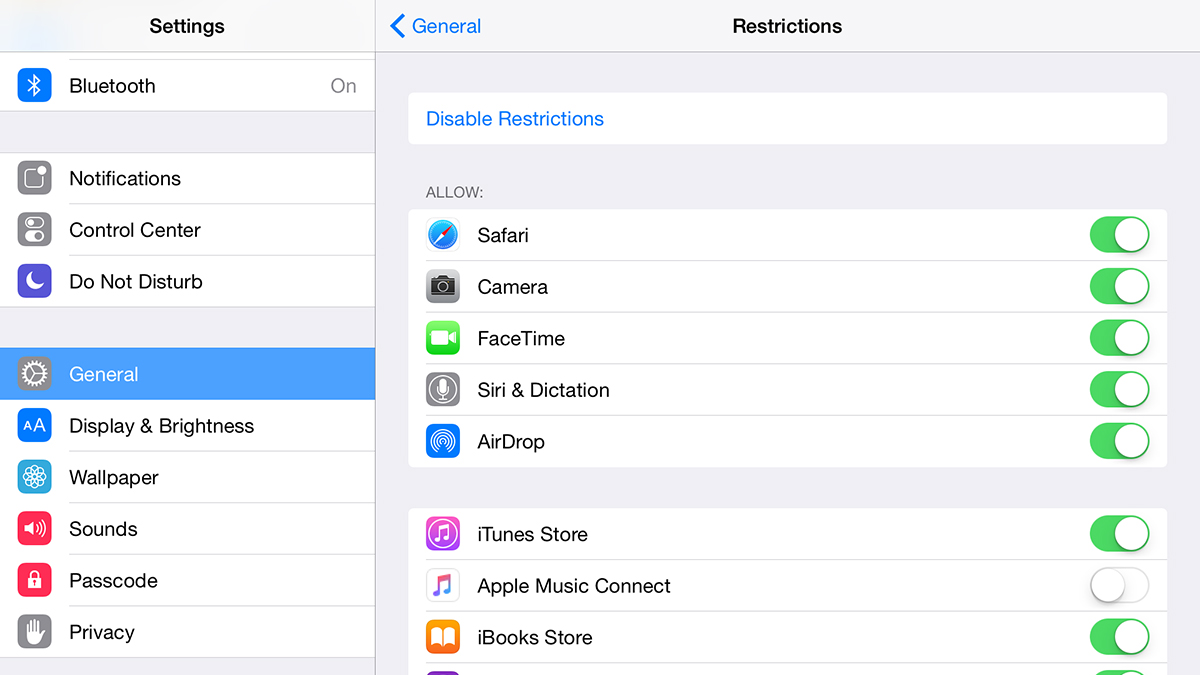
You may already know about the restrictions you can apply to iOS, and they’re worth revisiting if you’re handing over your slate to someone else. From the Settings app open up the General pane and tap on Restrictions — you’ll be asked to enter or configure a PIN code to get started.
You can switch off access to particular apps such as Safari and FaceTime if you want to, and disable in-app purchases (very useful for those freemium games). Further down there are options for stopping app installs and uninstalls, and you can lock the iPad’s volume level too.
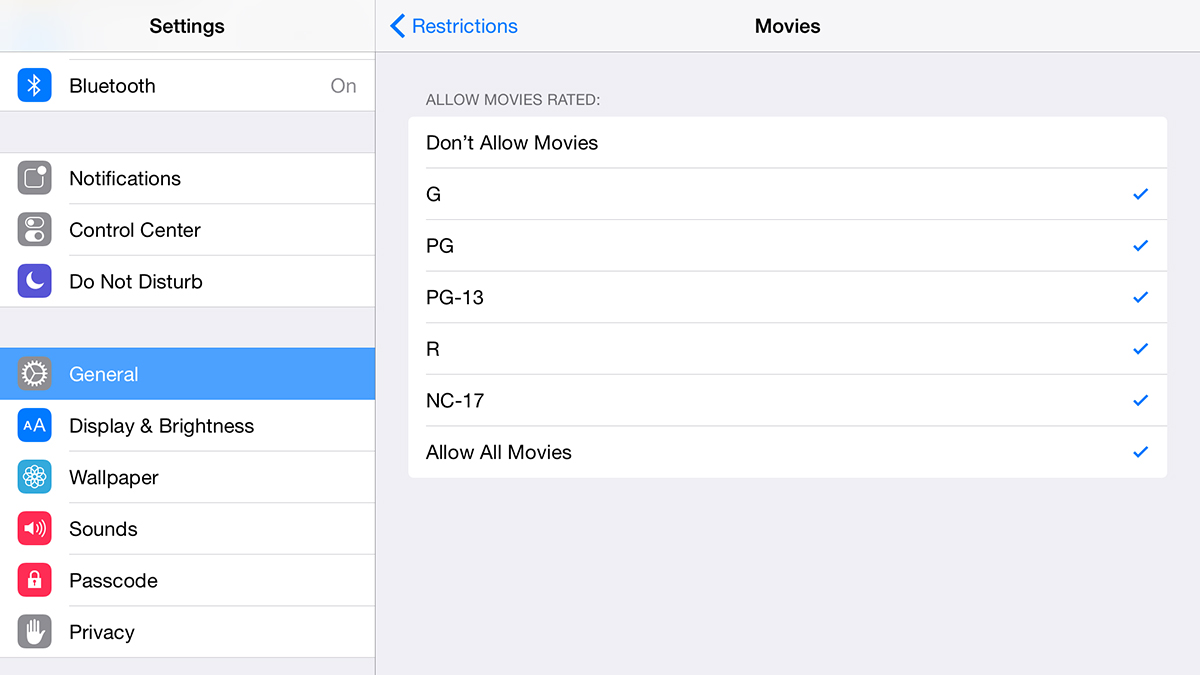
Set Age Limits
Continuing with the same Restrictions screen mentioned above, a more discreet way of limiting what children can do on your iPad is by setting age limits within apps. It’s less foolproof than blocking apps, and relies on content being correctly labelled, but it does give you more granular control over the apps installed on your device.
Music, podcasts, movies, television shows, books, apps and even websites are all covered by the age restriction options, though some give you more choices than others, and these settings largely only apply to iTunes content. It’s another good option to consider making use of though.
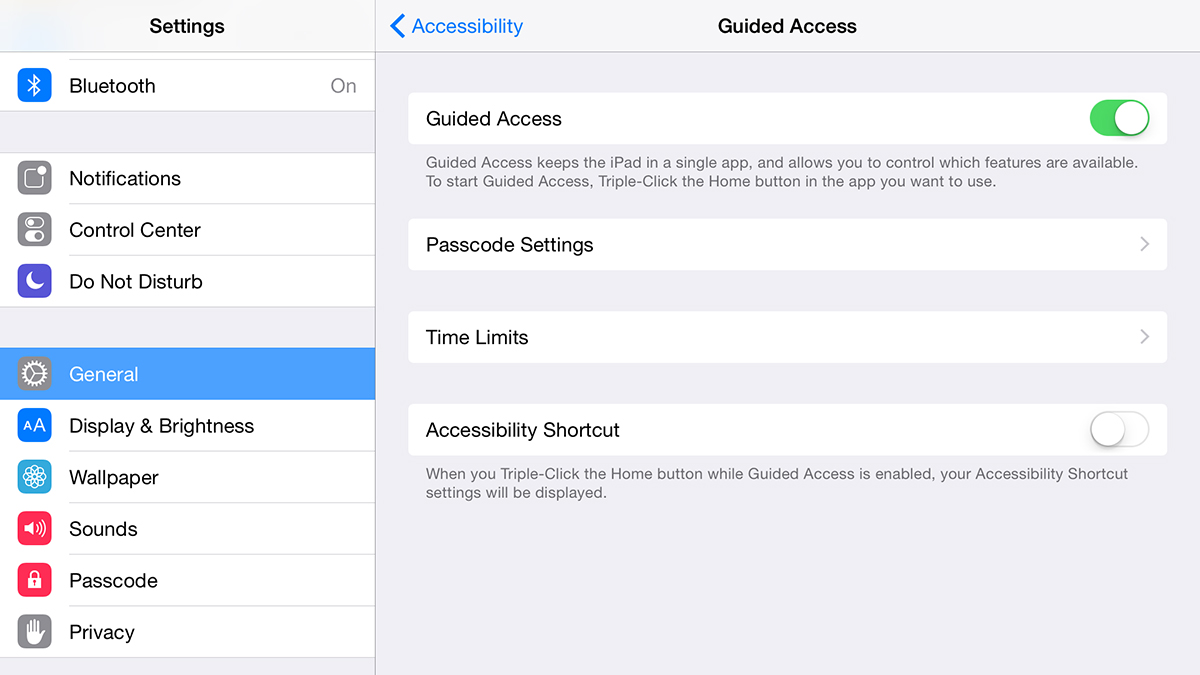
Stick to a Single App
If you want to make sure that your iPad-toting kid sticks to one app and one app only, such as a game or an educational app of some kind, you can set this up through the iOS accessibility options — from the General screen inside Settings, tap Accessibility and then choose Guided Access from the list of options.
When you’re in whatever app you want to lock, triple-tap the Home button on your iPad, choose Guided Access from the menu (if one appears), and then configure the feature as required — it lets you control which parts of the app are available, disable touch input (e.g. for movies) and even set time limits.
Check in-app settings
As well as the system-wide settings we’ve spoken about, it’s also worth diving into the options for a few of your kids’ favourite apps — some of them, especially those that deal with media content, may well let you set restrictions on the type of material that can be shown on screen.
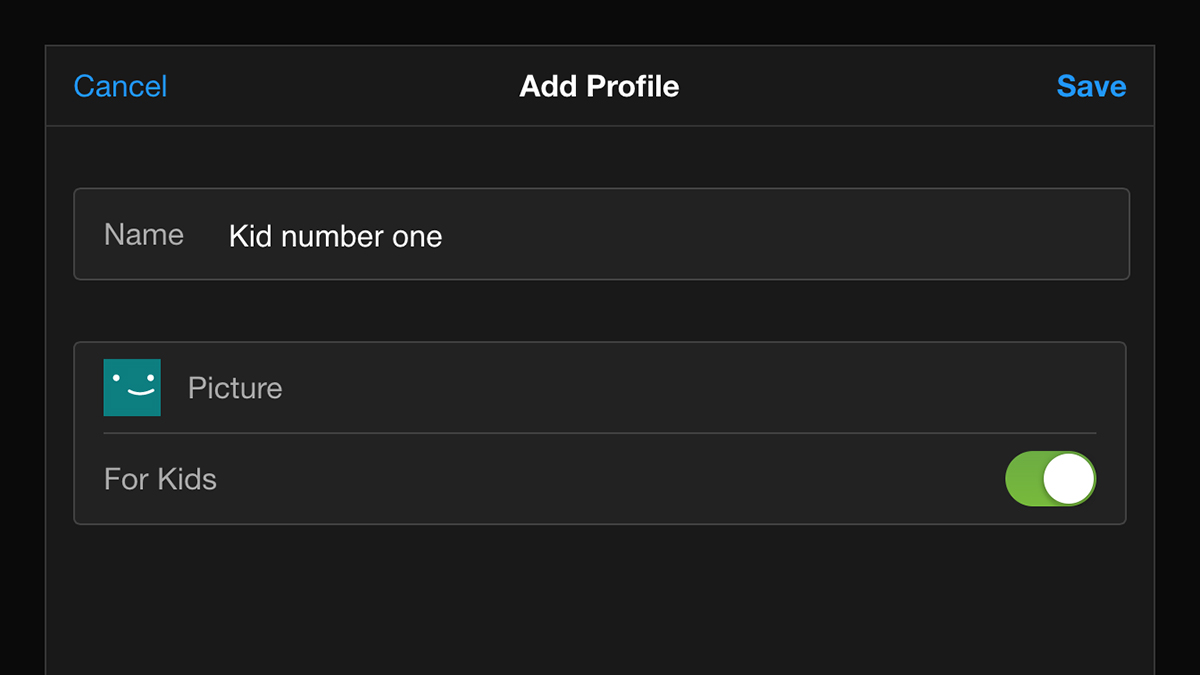
Netflix, for example, lets you set up extra user profiles that are marked as for kids, thus limiting the sort of shows and movies that can be streamed through the app to your device. There are also specific third-party apps to give you even more control over a device. Oh, and you might want to invest in a rugged case as well…
Picture: Alena Ozerova/Shutterstock.com