Apple’s iMessage is an all-in-one messaging solution that stays with you across mobile devices and laptops — assuming they’re all made by Apple of course. Even if you rely on the service every day, you may not know about some of the features and tricks you can take advantage of, so we’re here to help put that right.
1. Snooze individual conversations
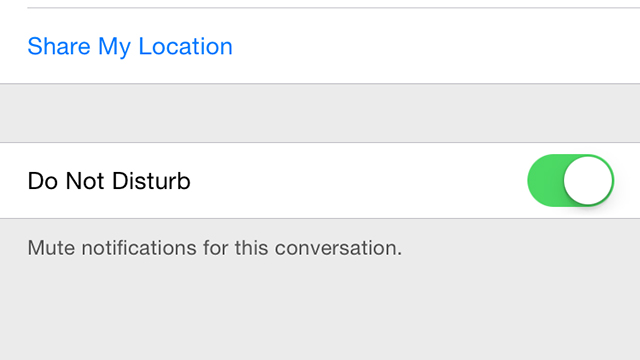
If there’s one particular thread that you’re not all that interested in hearing from for the foreseeable future, you can mute it — it could be someone you’d rather ignore for a few hours or a group chat that isn’t particularly relevant right now. Tap the conversation, tap Details and choose Do Not Disturb to switch off notifications for it indefinitely. Thank you, iOS 8.
2. Filter out unknown contacts
A recently introduced feature in iMessage lets you filter out people who are actually in your contacts list from people who’ve just got hold of your iMessage email address and decided to ping you through it. From the Messages entry in the Settings app you can activate Filter Unknown Senders to keep these individuals in a separate column in iMessage (appropriately enough labelled Unknown Senders).
3. Create custom vibrations
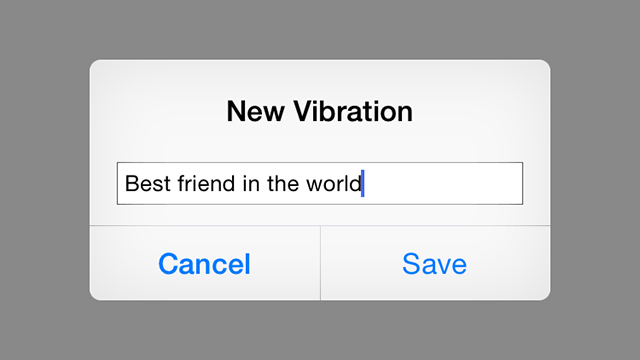
Nothing says you love someone like giving them a customised vibration alert on your iPhone. You need to head into the Contacts app for this one — tap a contact, then choose Edit and Vibration. Select Create New Vibration and you can tap out your own series of buzzes and give them a name. Custom ringtones are available too if you need them, but the vibration option is a more discreet way of distinguishing between contacts that no one else will ever notice.
4. Text from your iPad
In the midst of all the excitement about texting from your Mac you might have missed the news that you can text from your iPad too thanks to the magic of iMessage. As soon as you sign into the same Apple account on your iPad you should see a prompt asking if you want to turn on the feature, and you’ll then have to confirm this with a code on your iPhone. Head to Messages in the Settings app on your phone to disable the feature.
5. Reply from the lock screen
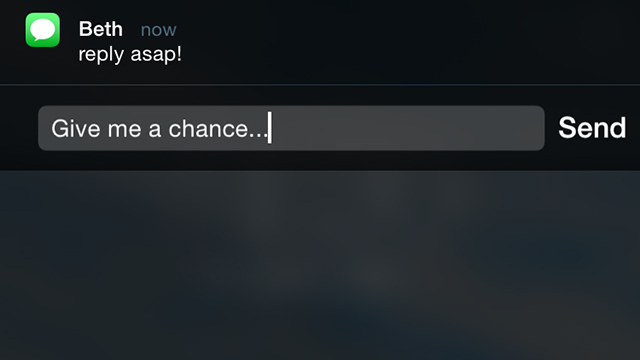
You’ve probably been able to work this one out yourself, but just in case: If you get an iMessage alert on your iPhone’s lock screen, you can swipe left-to-right to open Messages and see it, or you can swipe right-to-left and tap Reply without needing to open up the app itself. Ushered in with iOS 8, it makes it much easier to respond. If the notification appears while your phone is unlocked just pull down on the alert to reply.
6. Keep your audio and video messages
Recently introduced for the iMessage platform are options for adding audio and video clips to your conversation threads, but by default iOS will delete this files after a certain period of time in order to save space on your device. If you want to keep these clips indefinitely (to look back on whenever you want), head to the Messages part of the Settings app and change the Expire option from After 2 Minutes to Never.
7. Share your location
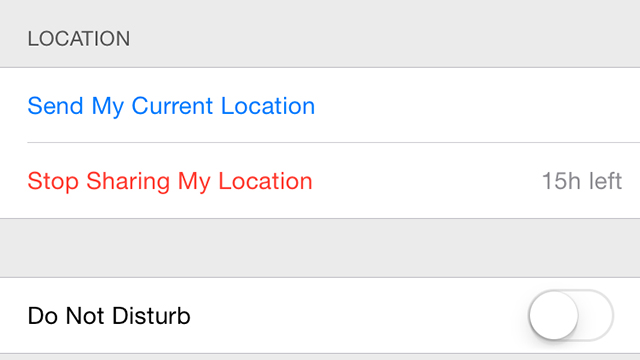
If you’re trying to organise an afternoon picnic or an all-night rave then you need to know where your friends are. Since iOS 8 appeared on the scene, iMessage makes this very straightforward: tap Details inside a conversation then Share My Location — it will be available to the participants through the same screen. Alternatively tap Send My Current Location to show a map of where you are now.
8. Add a “now typing” indicator on Mac OS X
Knowing when you’re about to receive a message is useful in all kinds of ways (closing down for the day and so on) and you can extend this functionality to the iMessage app on Mac OS X through a couple of utilities that don’t take long to install — you’ll then see the familiar three dots show up in the menu bar. Head to Lifehacker for details of the tools you need and a link to the step-by-step instructions for the hack.
9. Turn on two-step verification
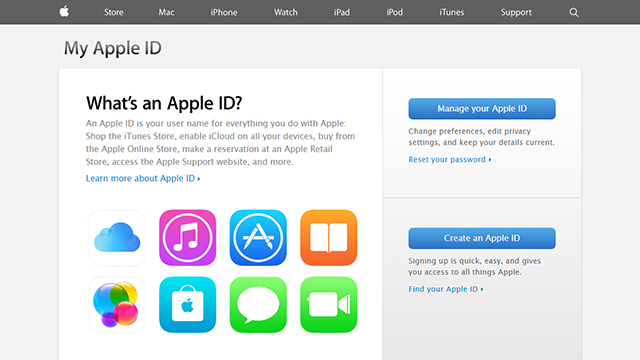
Apple added two-step verification to iMessage (and FaceTime) earlier this year so get it switched on if you don’t already. You need to activate the feature from the My Apple ID portal on the web — head to the Password and Security page and then choose Get started under the Two-Step Verification heading. When you add a new device to iMessage, you’ll then need an authorization code as well as your password.
10. Create custom shortcuts
Keyboard shortcuts (small abbreviations that stand in for full phrases) are available throughout iOS but they’re particularly helpful when you’re sending messages with a limited amount of time or elbow room. To set up a shortcut — like “ti5m” for “there in five minutes” — head to the General section in the Settings app. Tap Keyboard then Shortcuts to set up your own list of customised quick-fire messages.