Canning is a method of preserving food by processing (read: bathing it in boiling water for a set amount of time) and sealing fresh foods in an airtight container. By cooking the food in a sealed glass jar, canning effectively sterilises the bacteria that cause spoilage, which allows you to store the food for up to five years — far longer than it would keep in the fridge. Here’s how to put the fruits of your home garden’s labours into delicious stasis.
The two primary means of canning foods at home involve either boiling the preserved food, or boiling it under pressure, respectively known as the Water Bath and Pressure methods.
Water Bath
This method simply involves boiling, or “processing”, the jars for a set period of time after they’ve been filled to kill off any bacteria present. For all high-acid foods — tomatoes, salsa, jellies, jams, fruits, anything with a pH below 4.6 — a Water Bath will suffice, as the natural presence of acids help prevent bacterial growth.
Pressure
For low-acid foods like meats, vegetables (at least the one’s you aren’t pickling) and chilli, you’ve got to make absolutely sure that all the bacteria are dead because botulism is only funny until it kills you. To do so, a pressure cooker will be needed to ensure the canned goods are properly sterilised.
About pickling: It’s a subset of the Water Bath method that preserves food using a brine to anaerobically ferment the preserved food — this produces lactic acid which prevents spoilage — then storing it in acetic acid, better known as vinegar. Pickling is to canning as squares are to rectangles.
Hot vs Cold Packing
Many fresh fruits and vegetables contain up to 30 per cent air. This can complicate the canning process, because the air trapped in sealed canning jars causes discolouration within two to three months, weakens the seal and takes up valuable jar space. For pickles and canning candidates of similar acidic intensity, the older cold-pack (or raw-pack) method — wherein the food is packed into the jars to be processed without being precooked — is sufficient. But with fruit and any acidic food not being stored in vinegar, you’re going to want to use the hot-pack method.
Hot-packing is really just precooking the food — bring to a boil, simmer for 2-5 minutes — then dumping it into a canning jar for processing. Boiling the food allows the gasses trapped in it to escape, which is what you want. This shrinks the food’s volume (requiring fewer jars), extends its shelf-life, prevents discolouration, and preserves the fresh taste.
If it sounds complicated, it’s not so bad. The general rule of thumb is that any food that’s processed by a Water Bath gets hot-packed. No pressure, no precooking.
Here are a couple of basic recipes to get you started. The underlying principles can be applied to pretty much anything you put in your mouth.
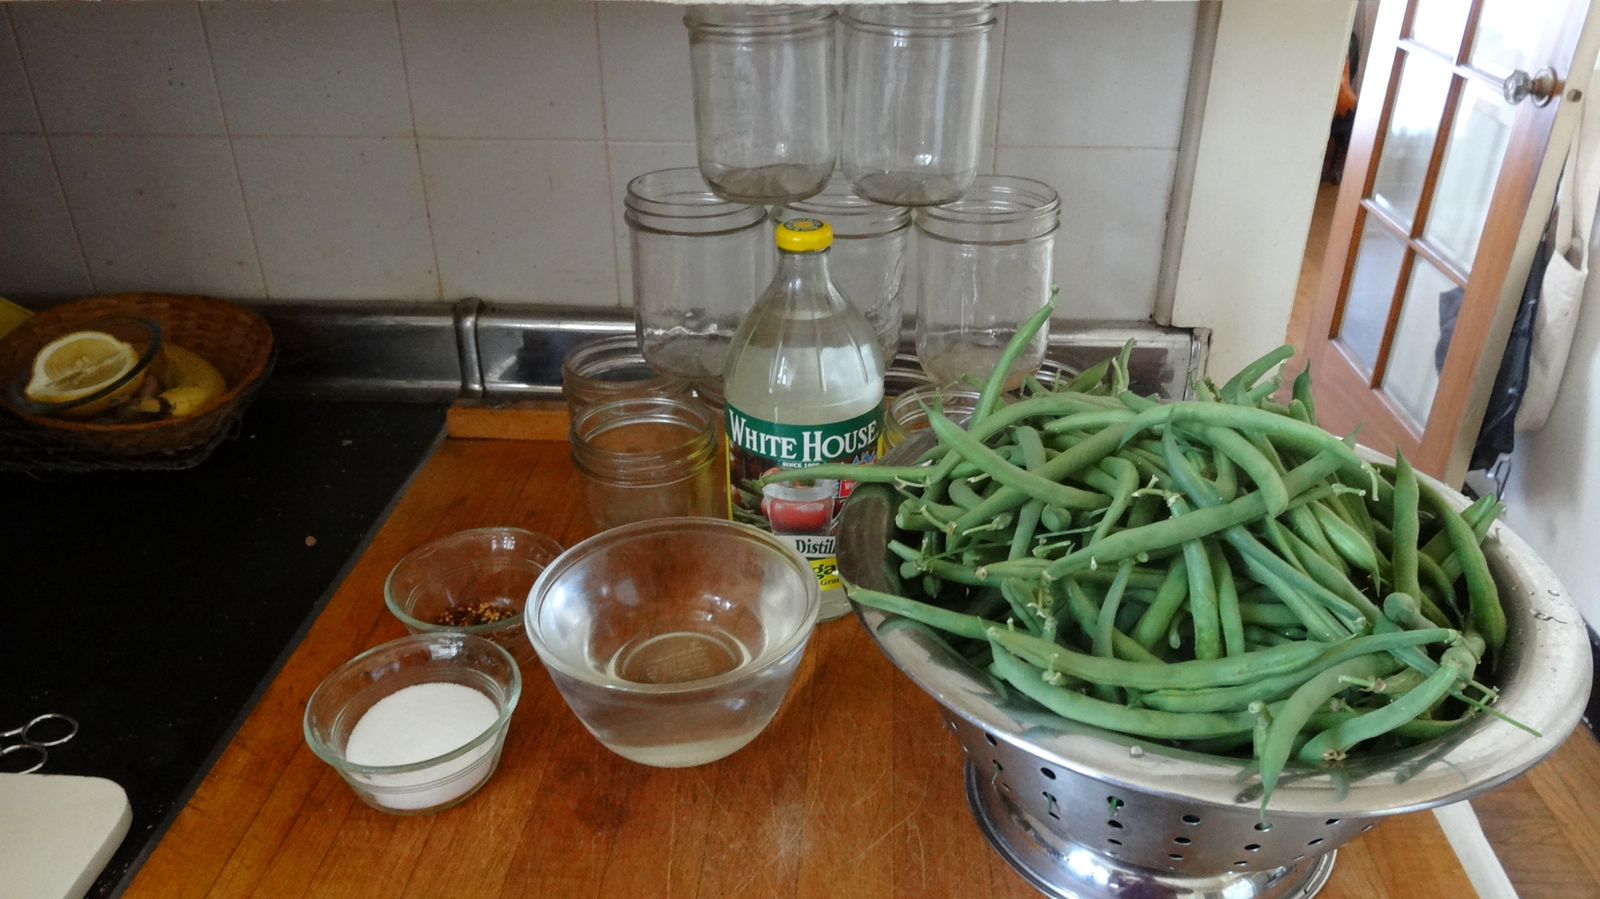
Tools:
- A canning pot (I use Granite Ware but Ball makes a solid pot as well) or pressure cooker
- A dozen mason jars, lids and bands (either pints or quarts depending on the recipe)
- jar lifters or a wire canning rack if not included with your pot
- measuring cups and spoons
- mixing bowls of various sizes
- a medium saucepan
- a cutting board
- Flatware: kitchen knives, a ladle, potato masher, a large wooden spoon, a non-metallic spatula
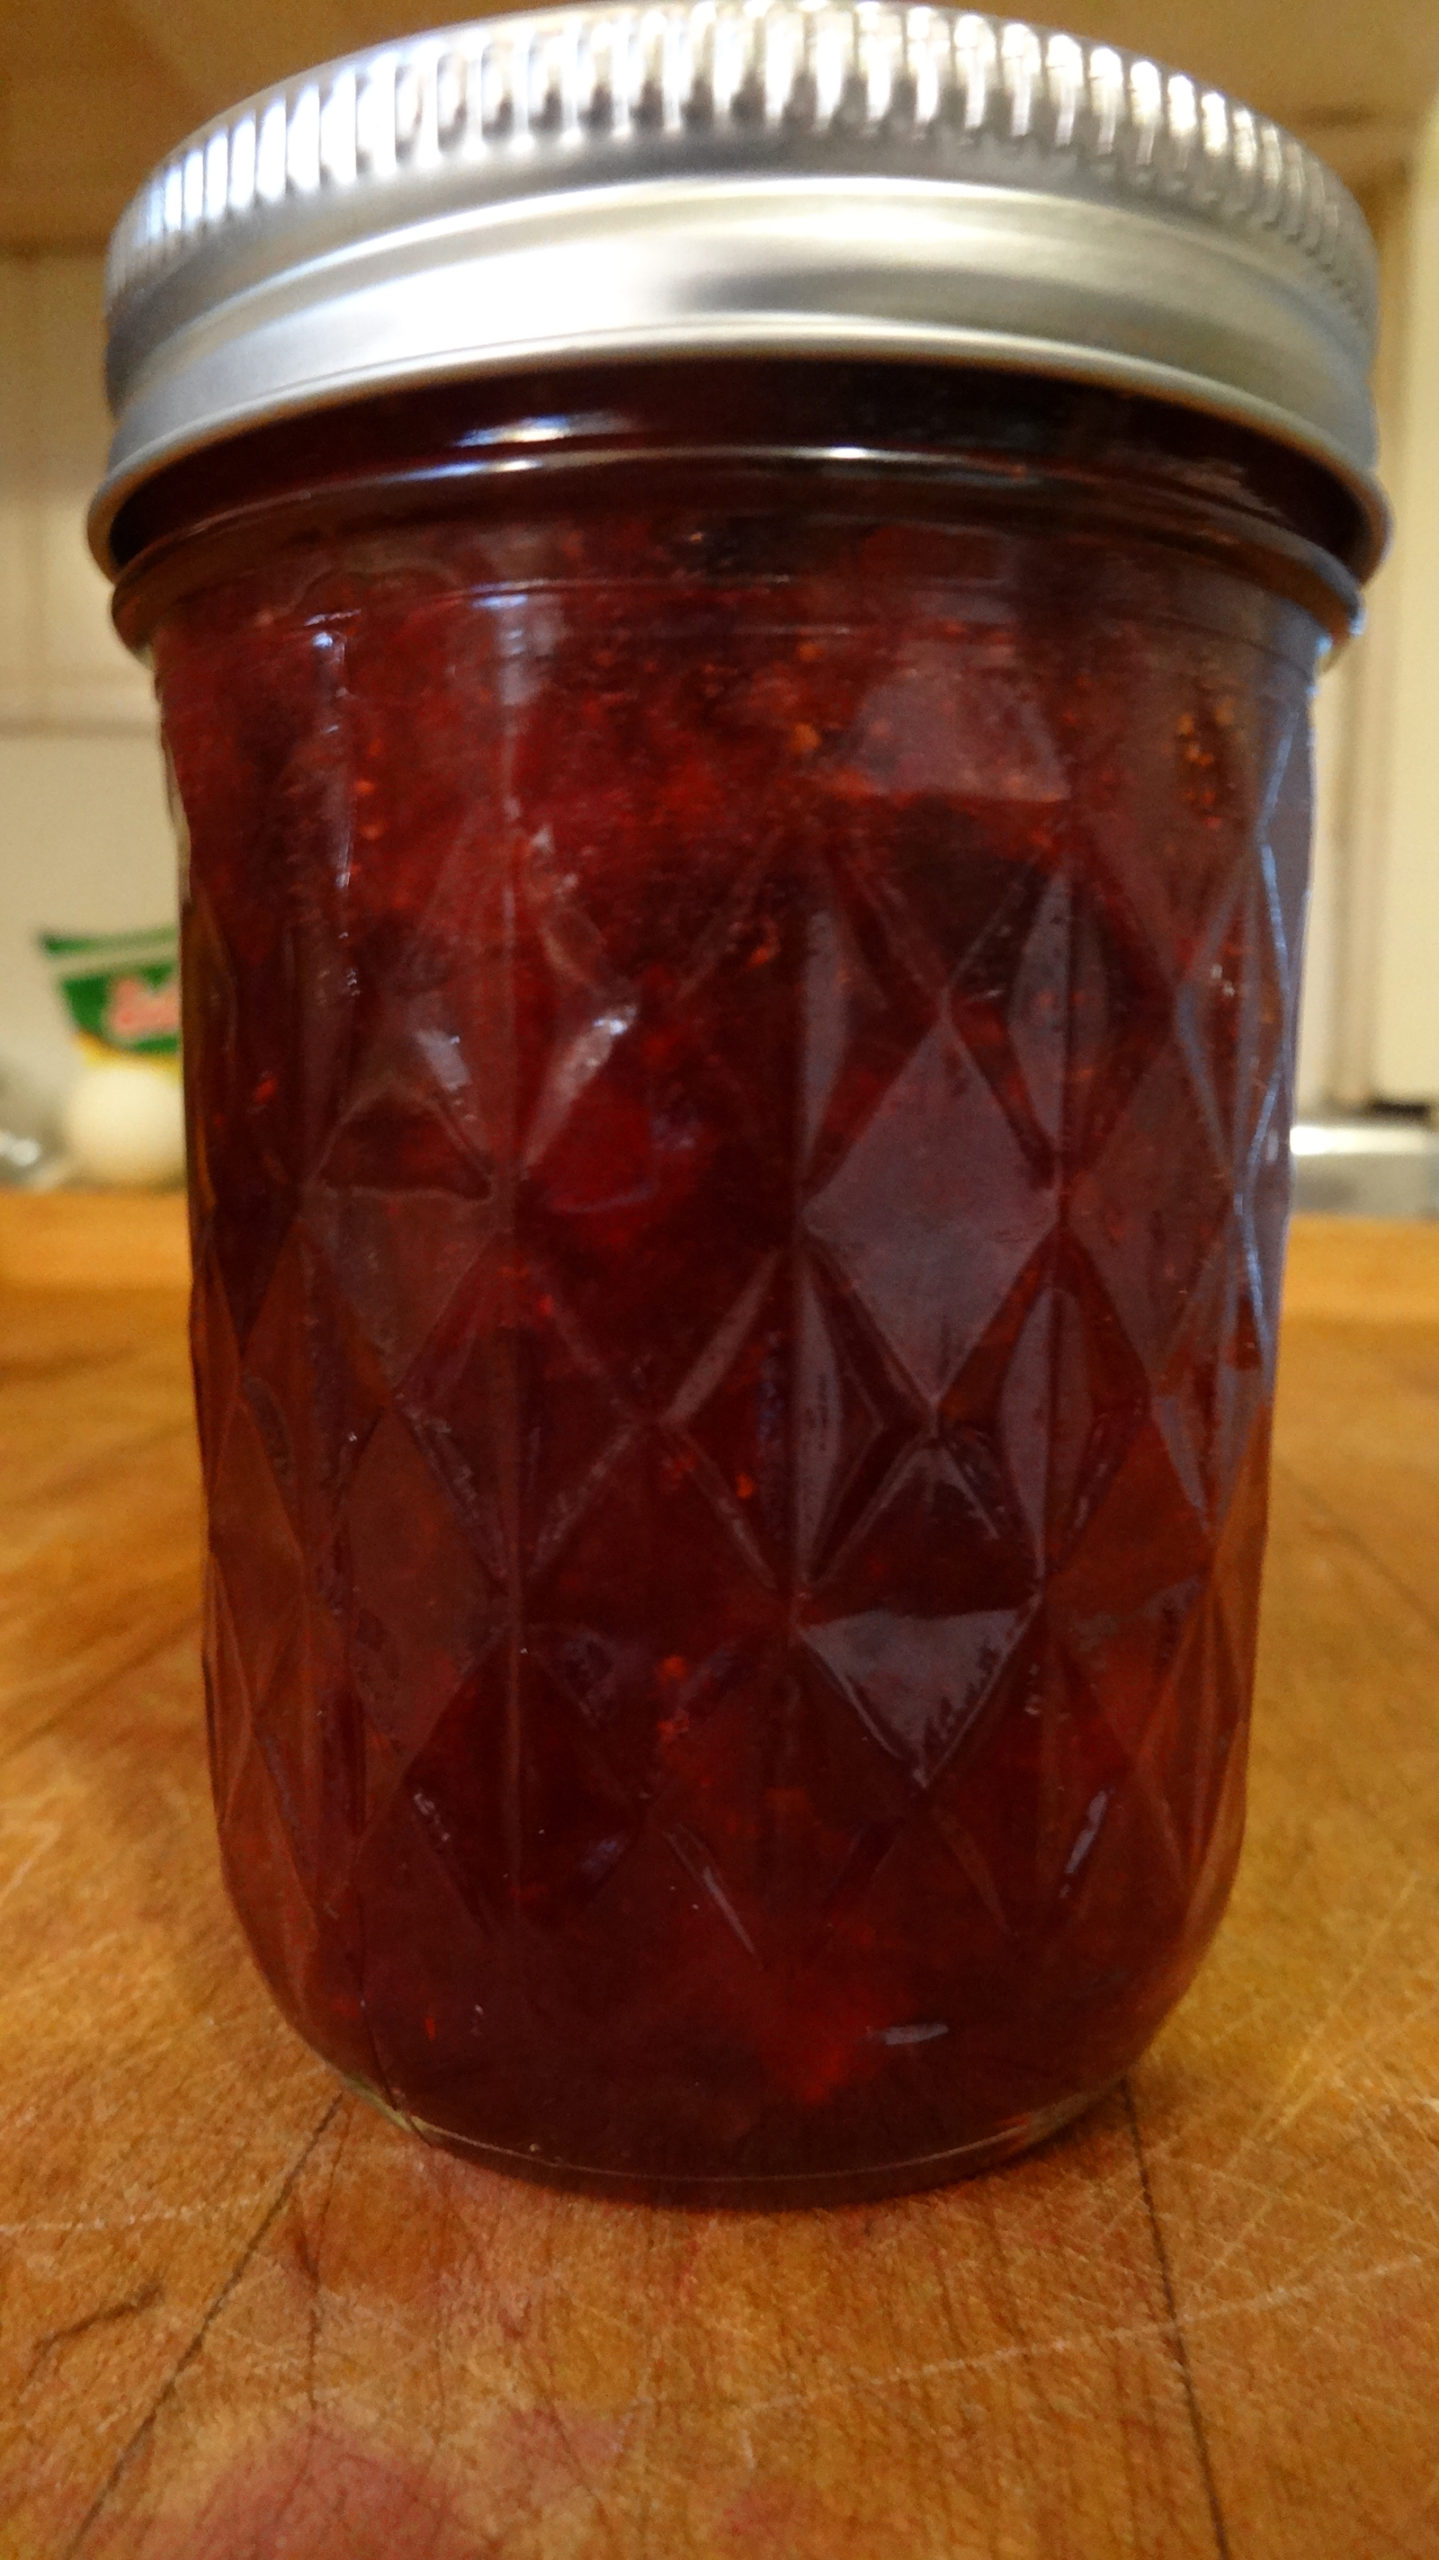
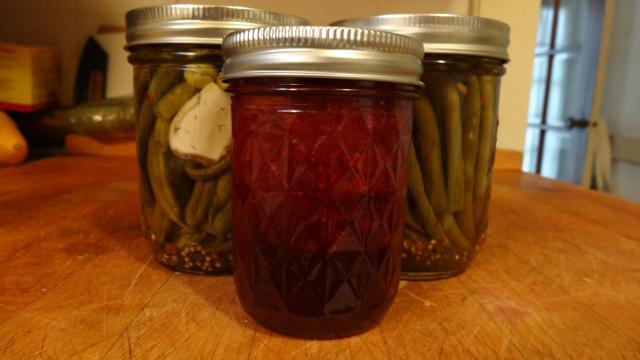
How to Make Strawberry Jam
Were making strawberry jam any easier, it’d come with training wheels. This two-stage canning process requires all of four ingredients be boiled together, then boiled again in their jars. I personally prefer the recipe from the Ball Complete Book of Home Preserving, but there are plenty of variations on the internet available as well.
Things You’ll Need
- 5 cups crushed strawberries (about 8 cups of whole berries)
- 1/4 cup lemon juice
- 6 tbsp Pectin
- 7 cups granulated sugar
- 8 250mL glass mason jars with lids and bands
What to Do
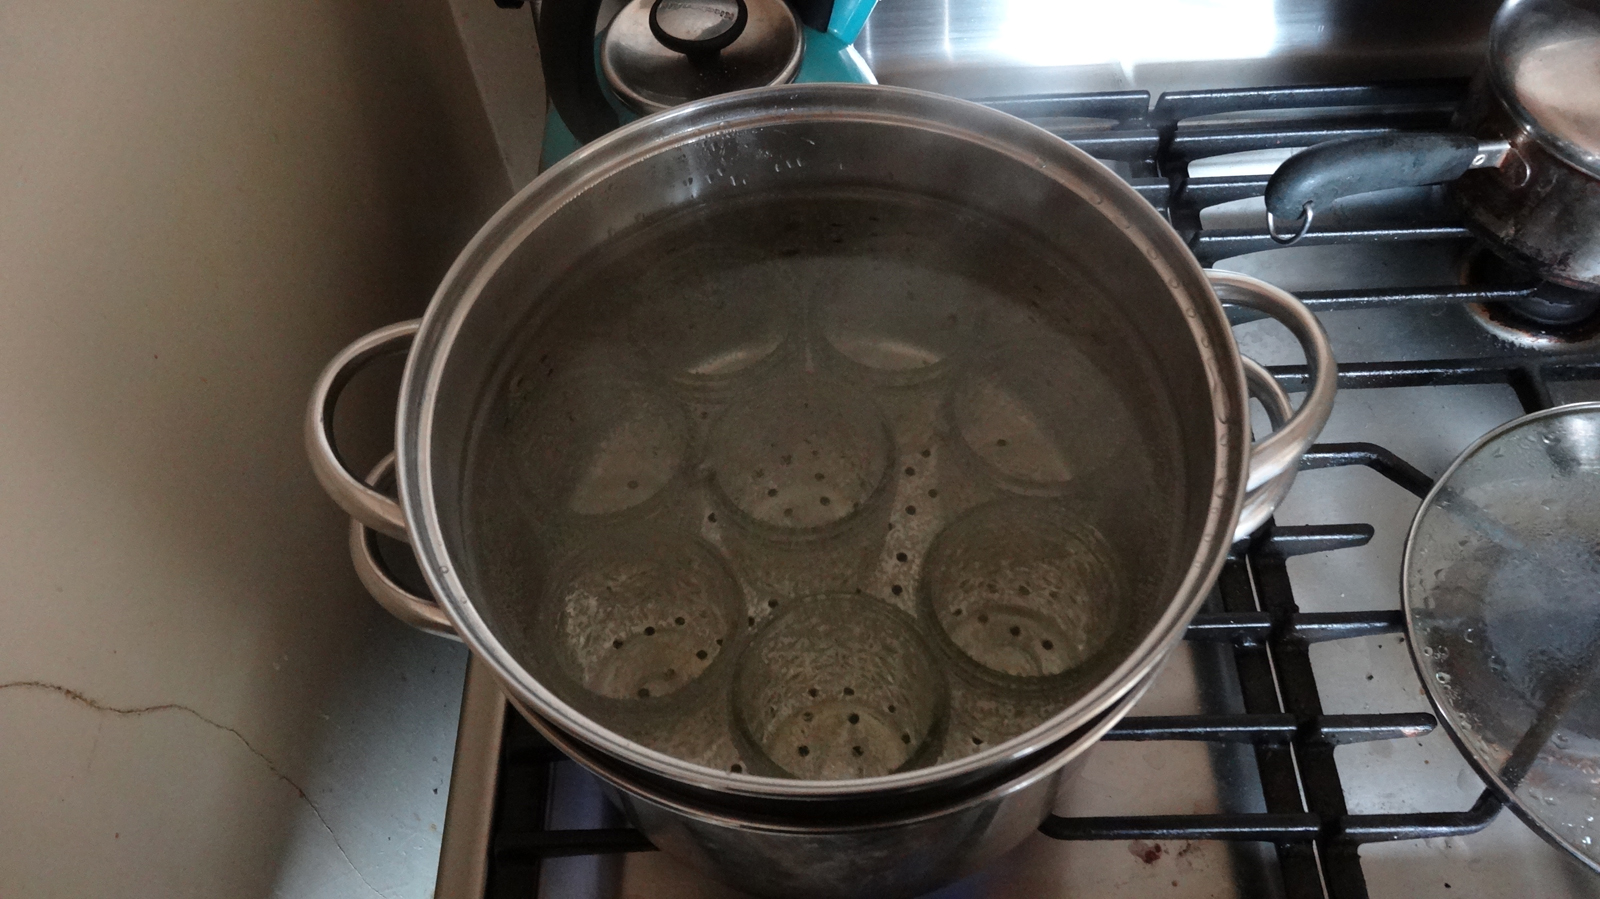
- Wash the jars, lids and bands in hot, soapy water and rinse them all really well (you don’t want soapy jam). Place the bands and lids in a small saucepan, cover them with cool water and set them to simmering, covered, on the stove.
- Place the jars on the canning rack, place that in the canning pot, fill the whole thing with cool water so that it completely covers the jars and set them to simmering as well. Don’t boil them, just keep them hot until you’re ready to use them.
- Pro Tip: If you try to pour boiling hot strawberry jam into a cold glass jar, guess what’s going to shatter all over your kitchen counter.
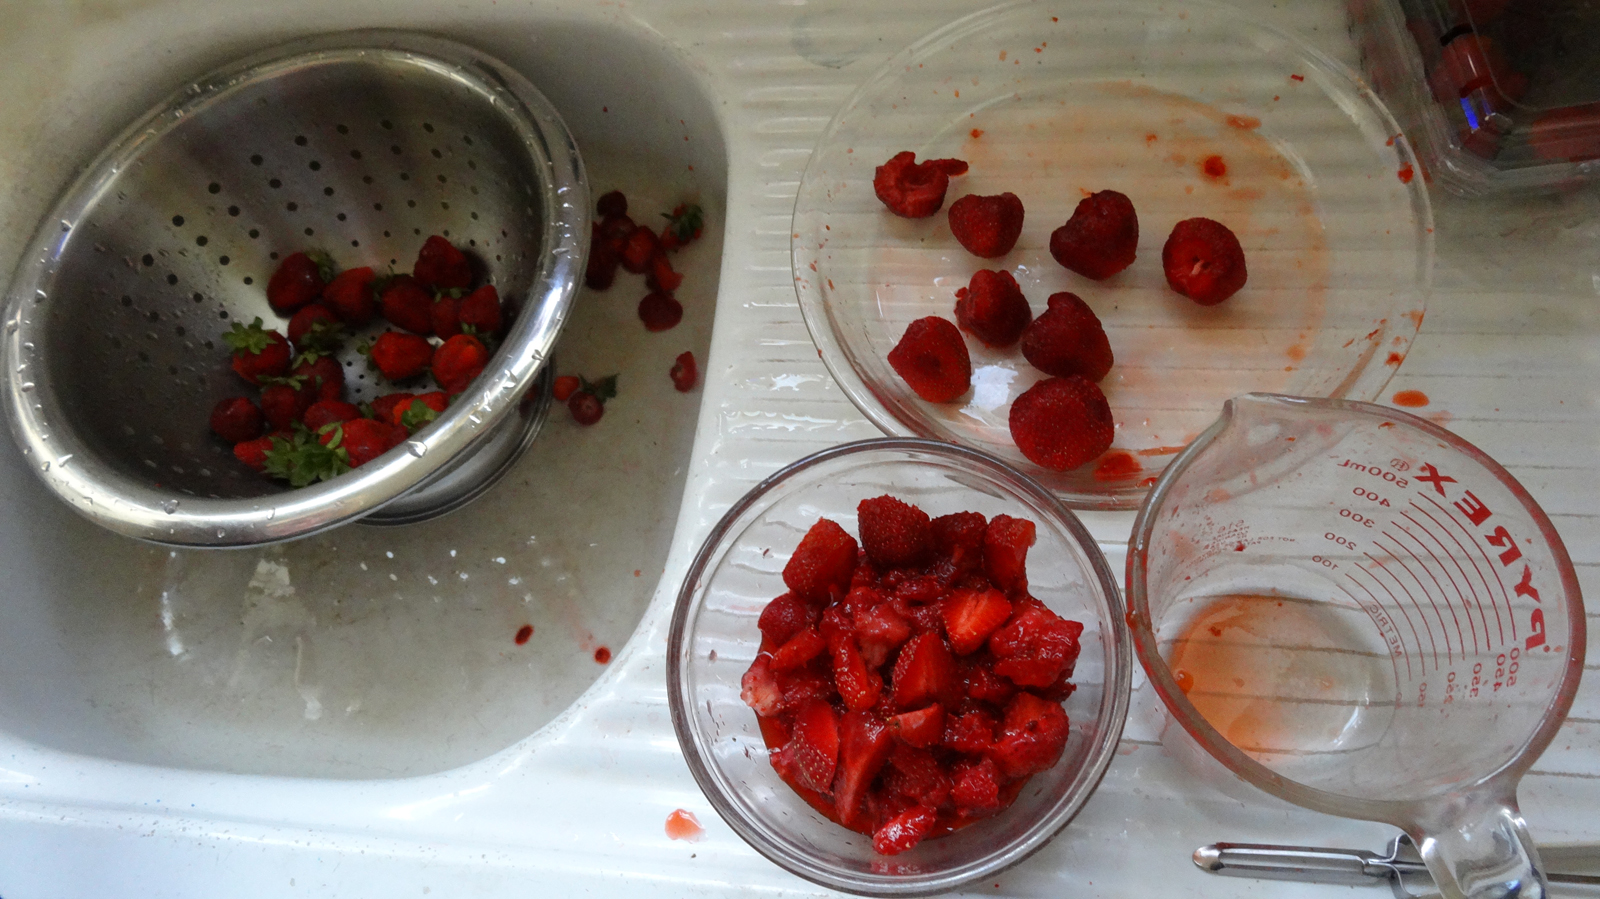
- Measure out your 7 cups of sugar and set it aside. Wash, core and slice your strawberries, then set them in a shallow bowl or glass pie plate and go to town on them with the potato masher. It helps to do it in batches. Smash up the strawberries into a pulp with large chunks and transfer them to a deep stainless steel saucepan.
- Add the lemon juice to the crushed strawberries and stir in the Pectin, which acts as a gelling agent, while heating the strawberries over medium heat.
- Bring the mixture to a full rolling boil, then STIRRING CONSTANTLY, add all the sugar at once. Keep stirring until the mixture returns to a full rolling boil. Boil it hard for a full minute, still stirring, before removing from heat and skimming off the foam that formed during boiling.
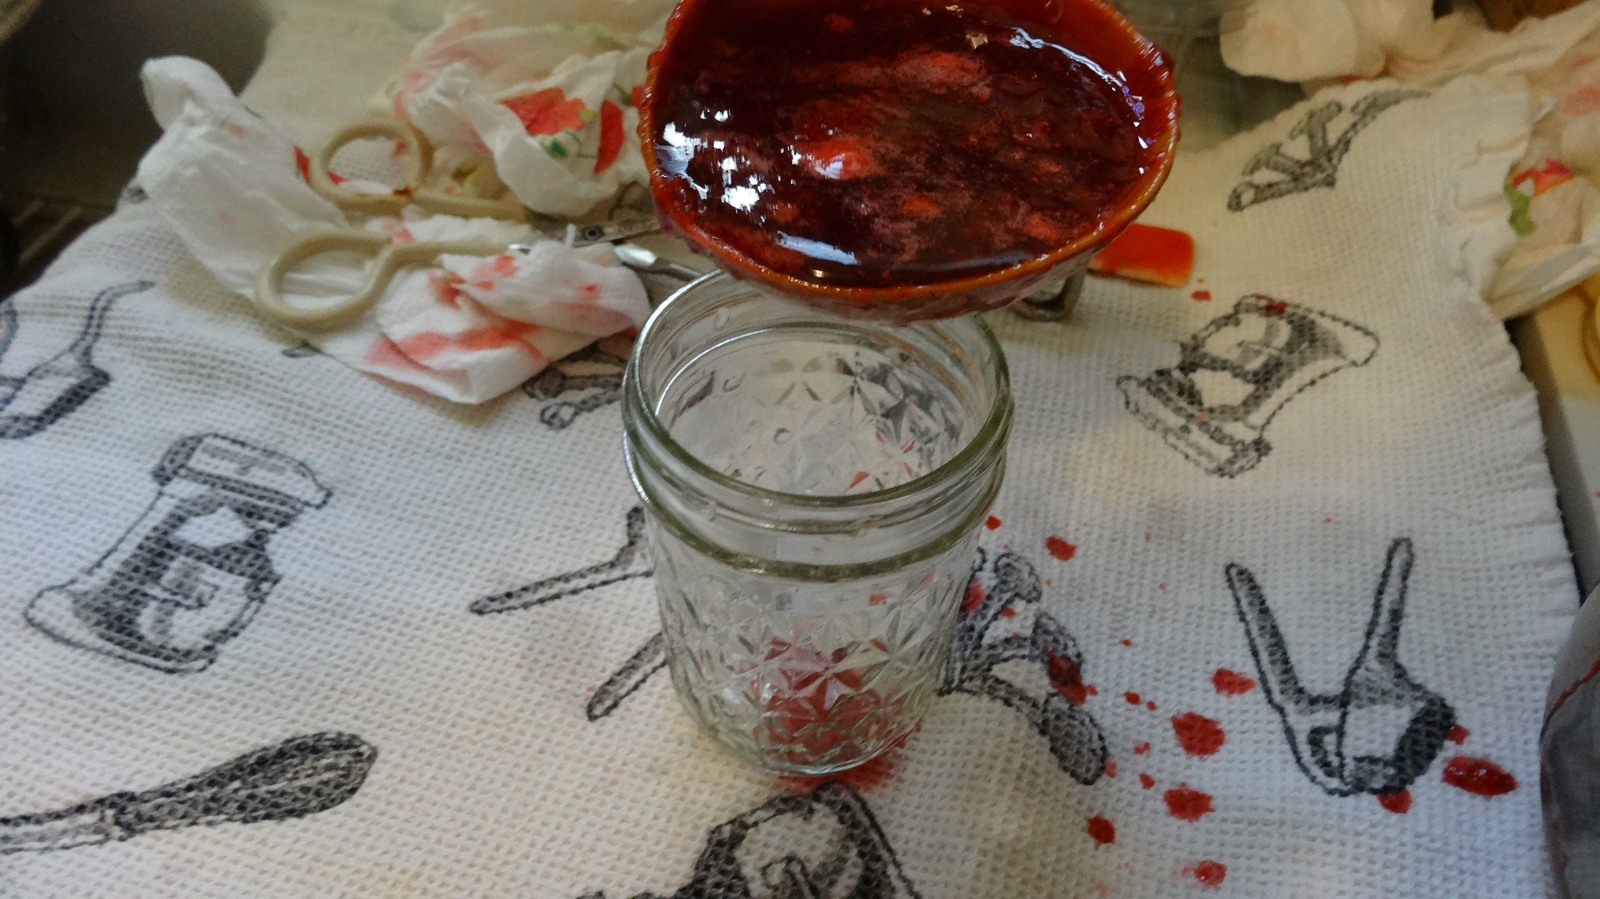
- Pull a single jar, lid, cap set from their warming baths and fill it with the hot jam. Leave 1cm of room below the cap (to help generate vacuum) and slide a rubber spatula around the outside edge (between the jam and the glass jar wall) to remove any trapped air. Wipe down the rim to remove any spills or dribbles, then firmly centre the lid on the jar’s mouth and finger tighten the bands. Return the jar to the rack and repeat the process until you’ve either run out of jam or jars.
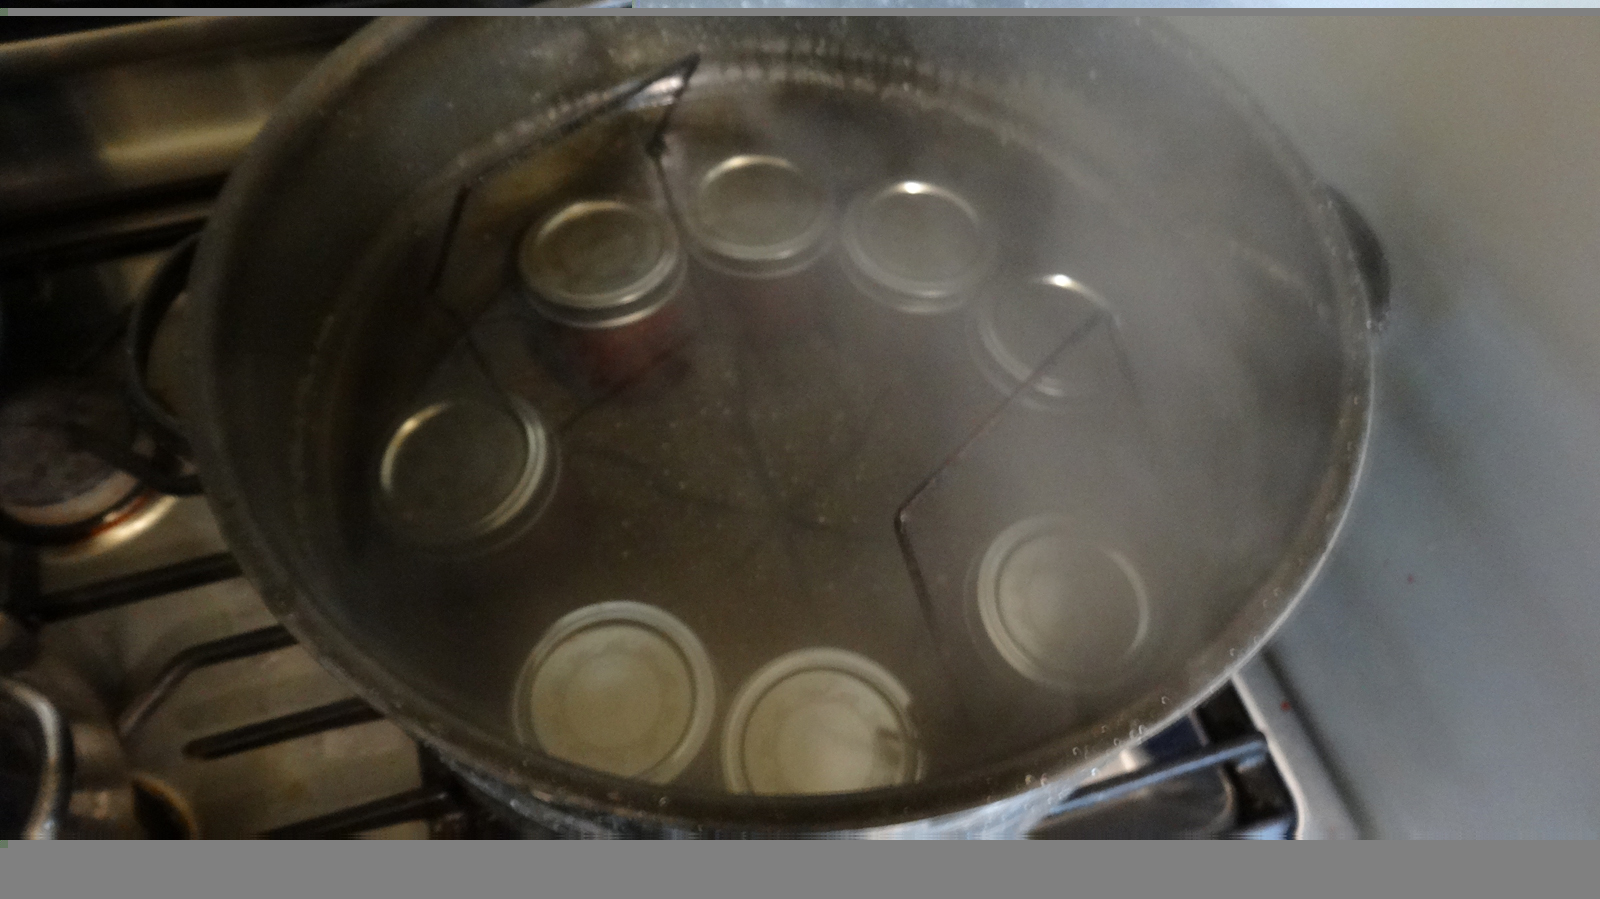
- Now comes the processing. Lower the jam-filled jars on their canning rack back into the hot water. Turn the heat to high and bring the water to a full roll. Continue boiling the jars, covered, for a full 10 minutes (only start timing after the water hits full boil).
- Once time is up, let the jars cool down for five minutes before lifting the rack out of the water and placing the jars on a dish towel to rest for 24 hours. After a day, unscrew the bands and carefully press down in the centre of the cap to check the seal. If it doesn’t make any noise, congratulations, you’ve successfully canned some jam.
- Screw the band back on, wipe down the jar one more time, label it and store it in a cool, dry, dark place. If it does click, there is no seal and you’ll have to eat all that delicious jam right away.

The Pickling Process
The pickling process is very similar to that of strawberry jam except that you’re cold-packing the vegetables before covering them in boiling hot brine. Mind you, cucumbers aren’t the only things that are more delicious when you pickle them; green beans, carrots, cauliflower all work well too.
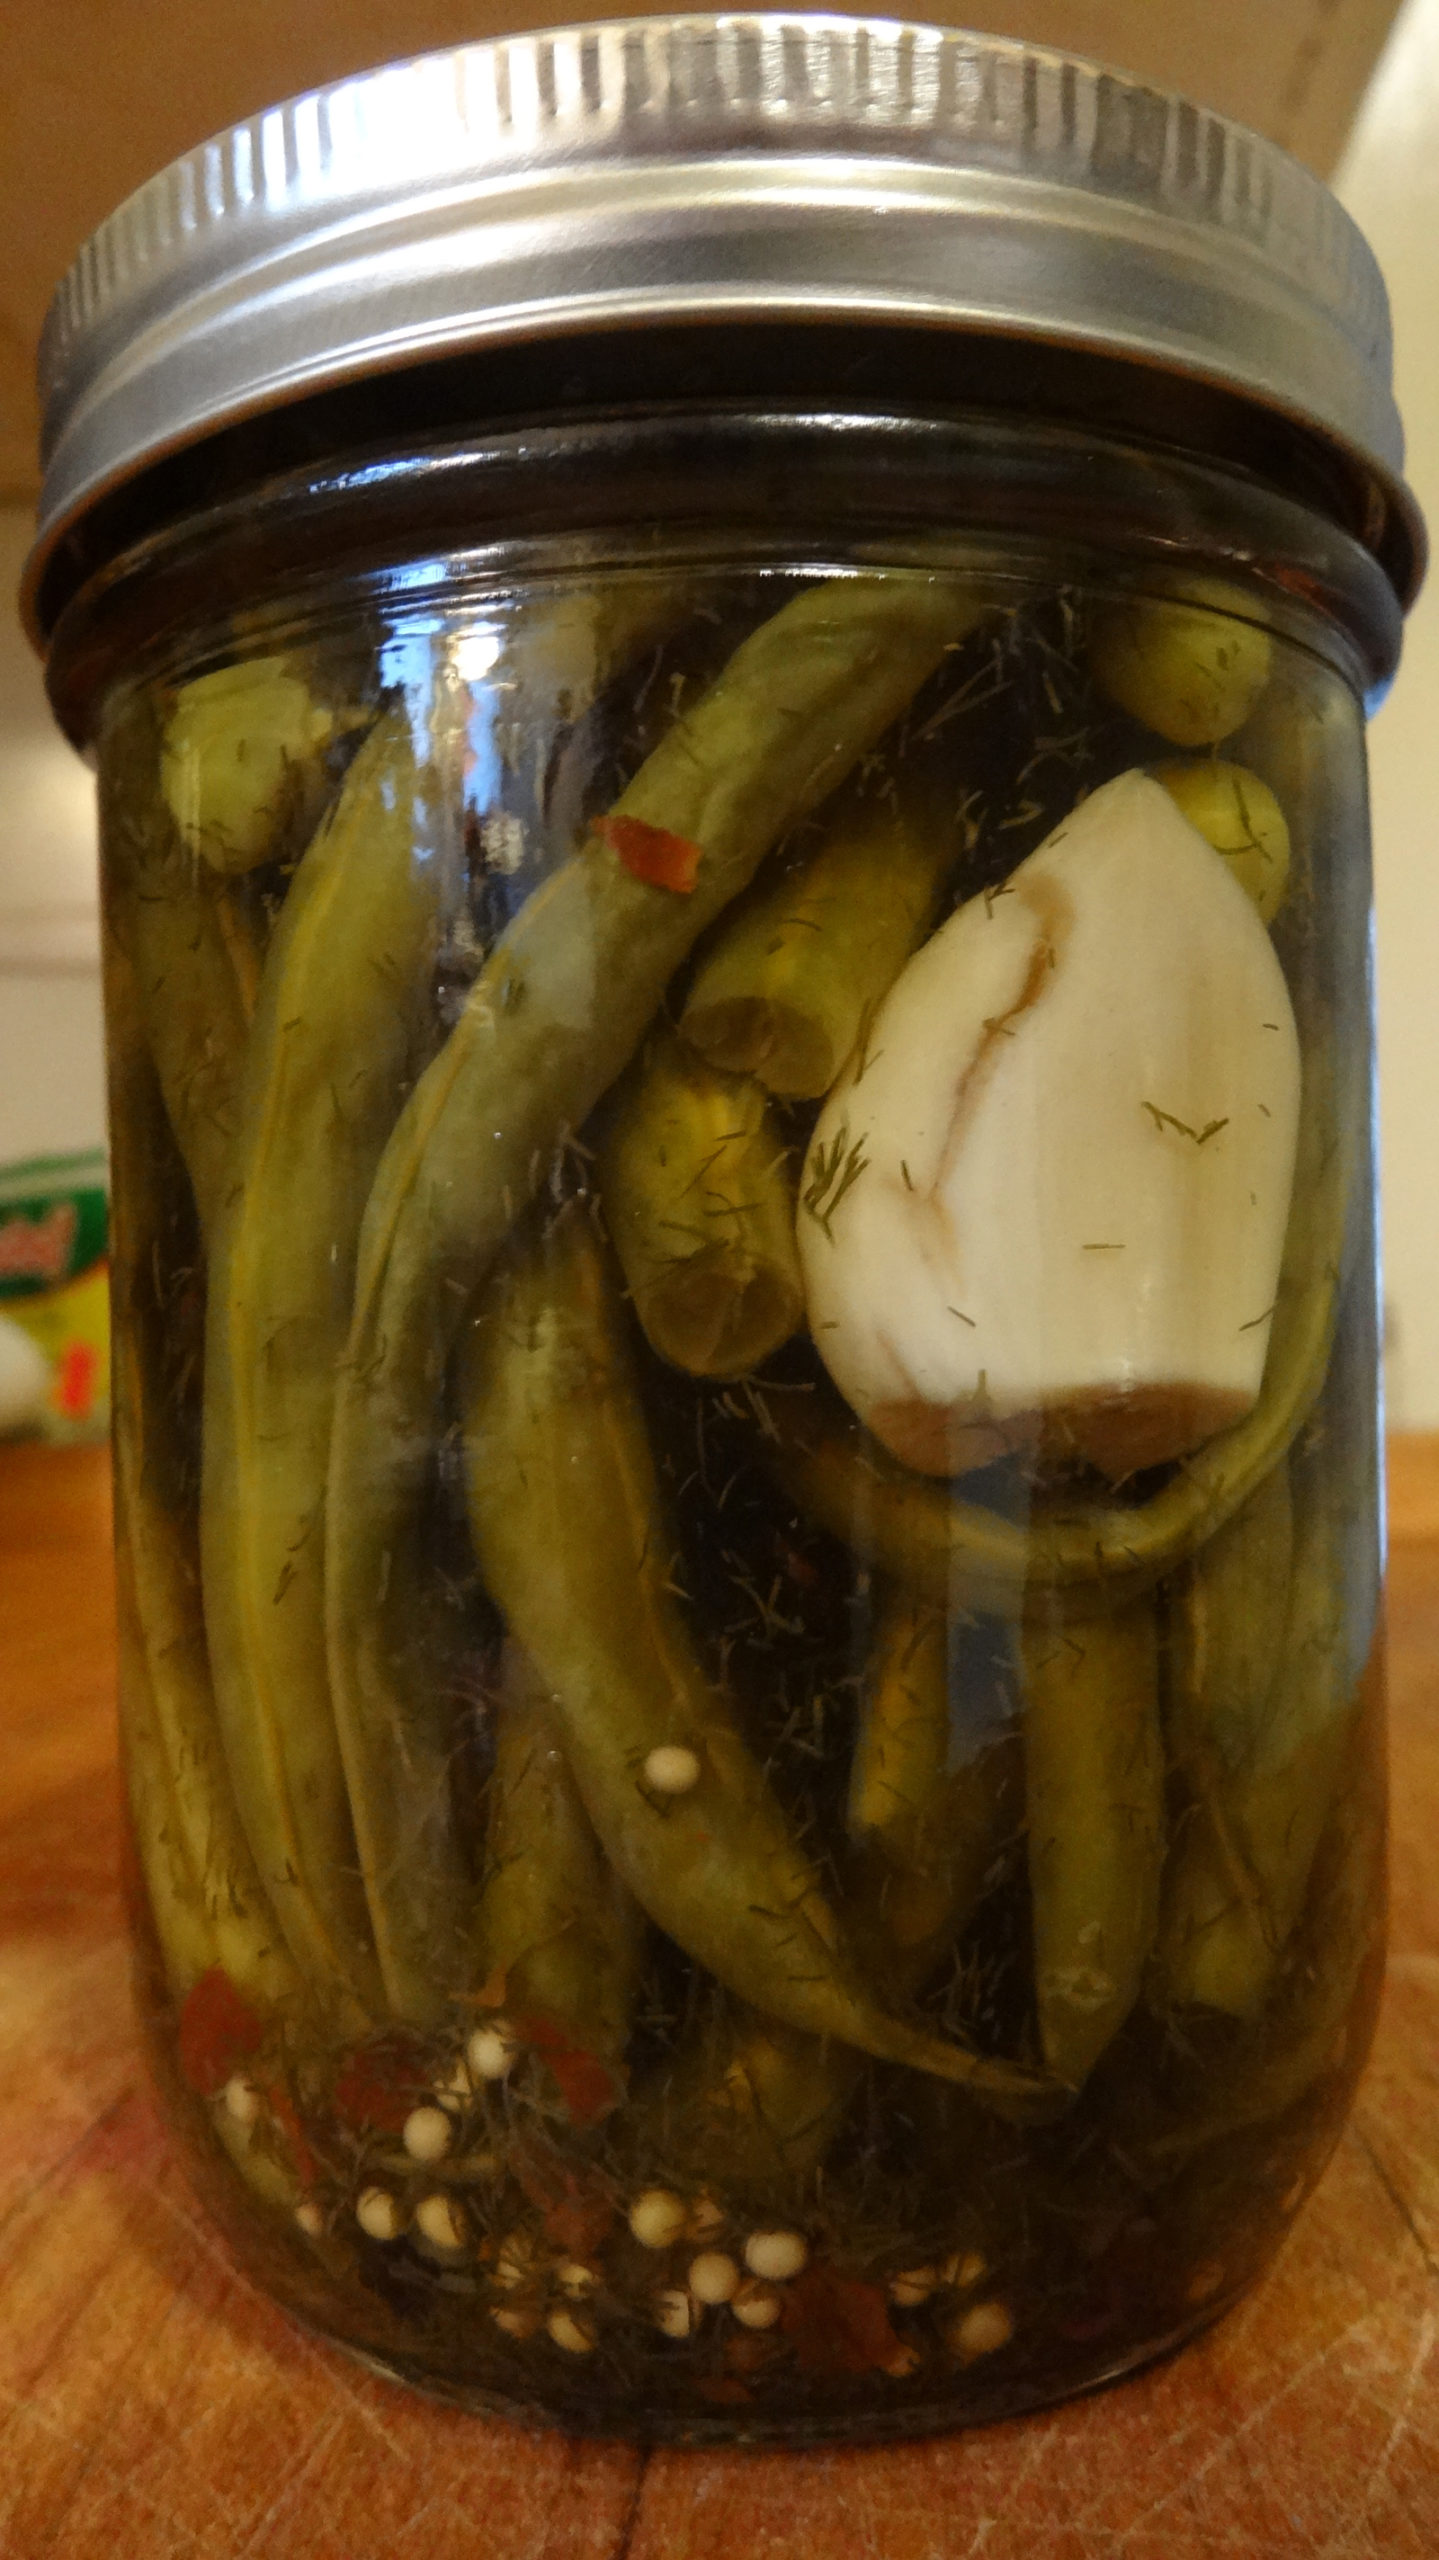
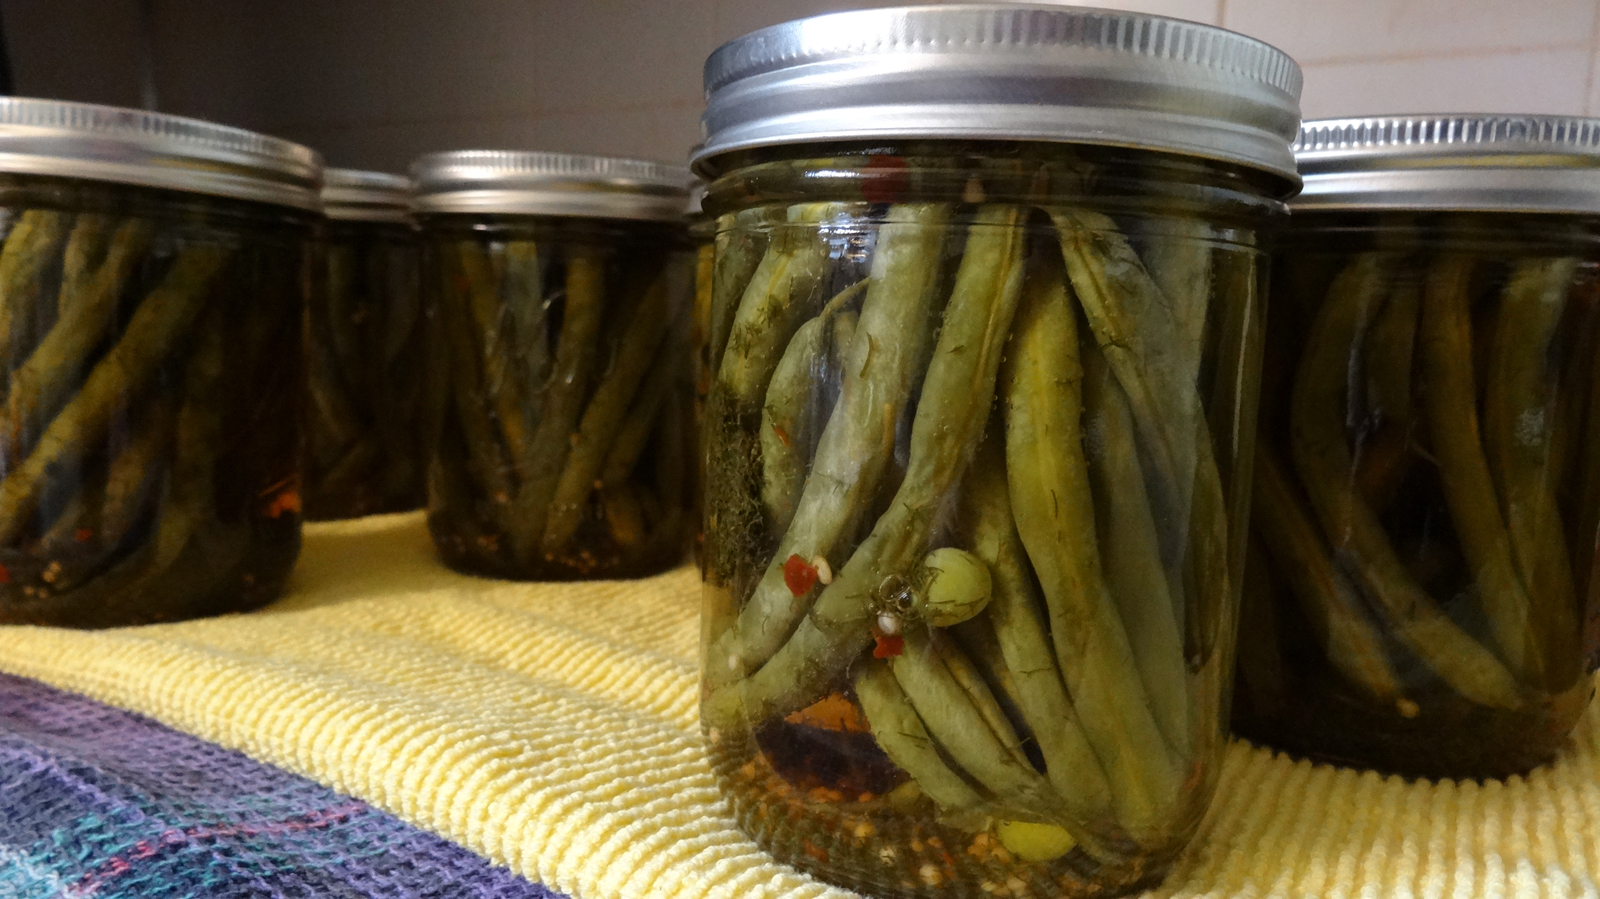
Dilly Beans
With a tang of dill and just a little bit of heat, Dilly Beans are an old family favourite. This recipe is a modification of one found in Ortho Books'(a Chevron subsidiary) All About Pickling.
Things You’ll Need
- 1.8kg green beans
- 3 cups of white vinegar (5% acid)
- 6 tbsp salt
- 3 cups water
- 1.5 tsp dried red pepper (flakes work too)
- garlic (peeled)
- 1 tbsp each dill seed and mustard seed
- 18 whole Black peppercorns
- 8 500mL mason jars
What to Do
- Wash the jars, lids and bands in hot, soapy water and rinse them all really well (you don’t want soapy beans). Place the bands and lids in a small saucepan, cover them with cool water and set them to simmering, covered, on the stove.
- Place the jars on the canning rack, place that in the canning pot, fill the whole thing with cool water so that it completely covers the jars and set them to simmering as well. Lift the sterilised jars from the pot, reserving the hot water. Set the jars on a dish towel and let them dry.
- Combine the vinegar, salt and water into a medium saucepan and bring to a boil.
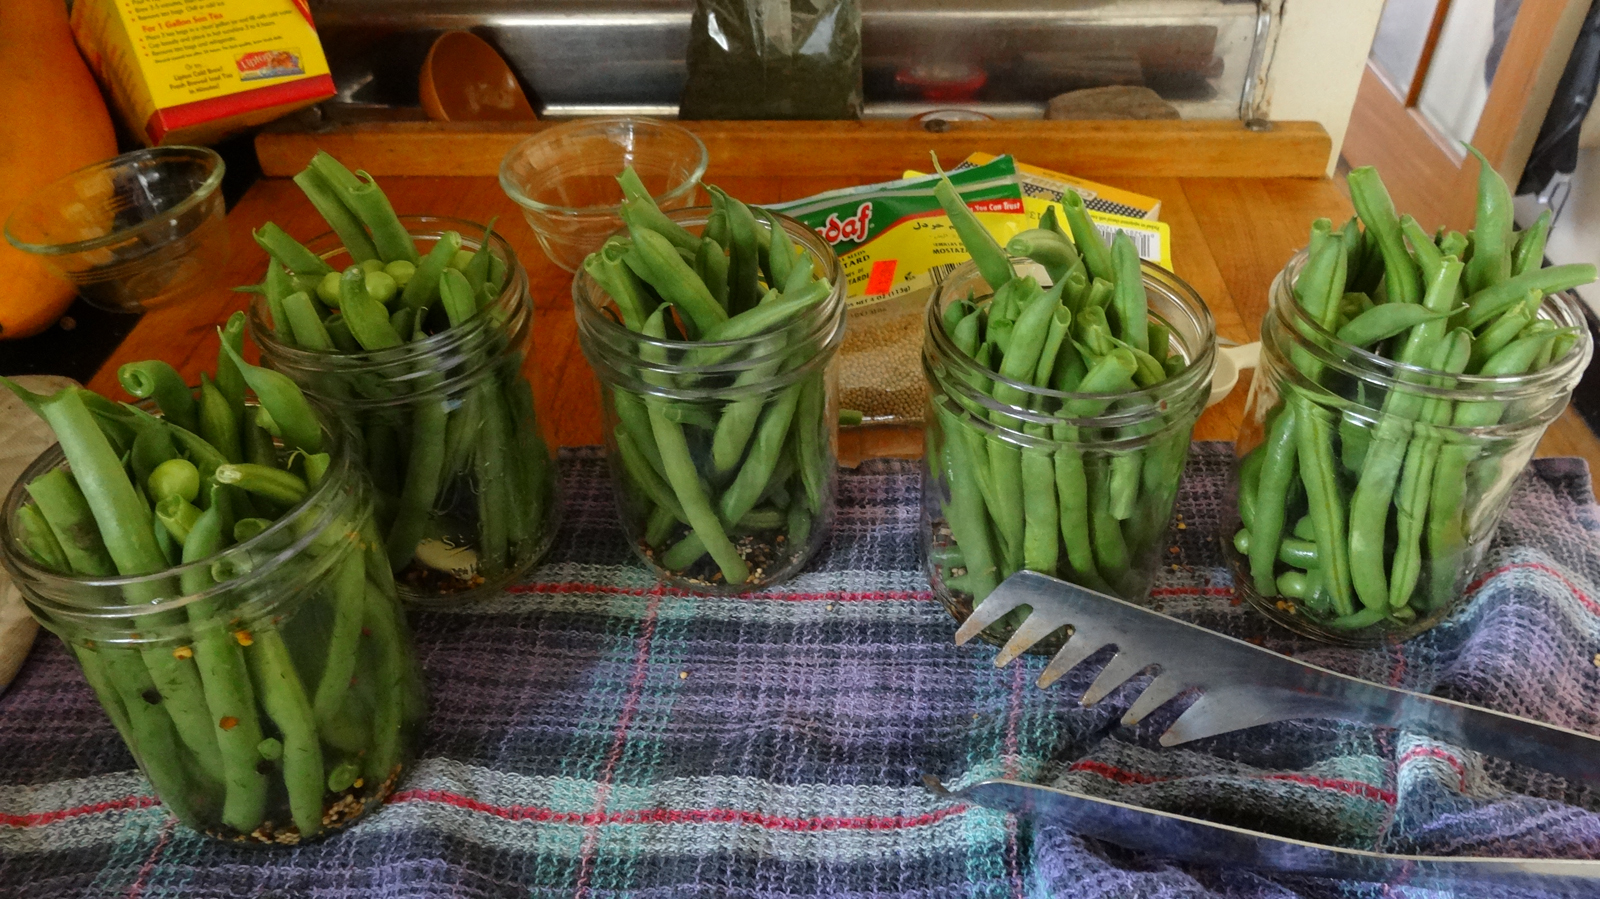
- While the liquids are heating, wash and snap off the stem tips of the beans. Drop a clove of garlic in each jar, distribute the dill, mustard, red and black pepper evenly among them. Pack the beans into their jars firmly.
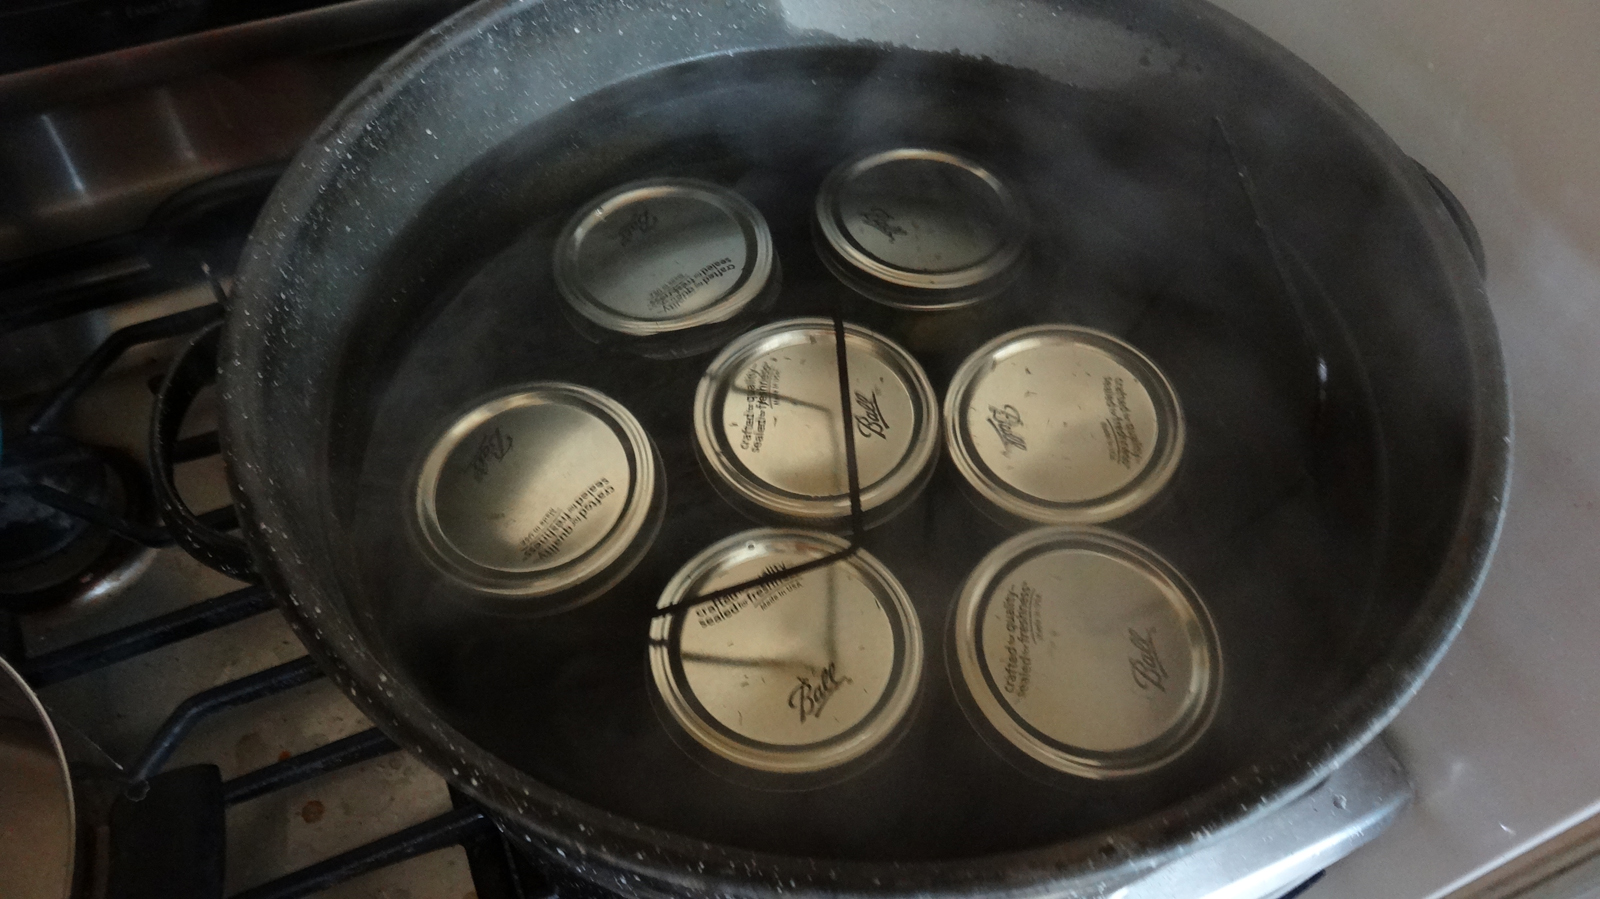
- Once the brine boils, cover the beans in each jar with it. Put a lid on it and finger tighten the band. Place the filled jars back on the rack, submerge them in the canning pot with water (which you should have saved from earlier) and process them for 20 minutes. Remember, only start timing once the whole pot of water is at a full rolling boil again.
- Once the jars cool, let them cure for two weeks, which lets the flavours mellow and meld, before eating them.
And while home canning and pickling may seem intimidating at first, with a little practice, you’ll be able to feed your family fairly fresh fruits and vegetables through the dark months without paying through the nose at the organic grocer. [The Kitchn, Apartment Therapy, Fresh Preserving, MNN]