Yes, the times are changing. Yes, we’ve cut back on purchasing CDs, DVDs and BDs lately. Yes, we still have plenty of discs lying around in jewel cases on dusty shelves or in enormous three-ring binders. And yes — most definitely yes — we want to be able to access all these movies and songs from our PC, television and our shiny new smartphone.
Is it legal to rip your own media? Mostly. In the US, the circumvention of copy protection and playback control systems is prohibited by the Digital Millennium Copyright Act (DMCA). However, recent “fair use” rulings have relaxed the circumvention rules in specific cases. Our take is that as long as you’re not pirating the content, you’re good, but for a fairly complete rundown of the most current interpretation of the DMCA, point your browser to http://bit.ly/fDiOit.
Rip All of Your Media
The first step is to transform your collection of CDs, DVDs and Blu-ray discs into files that can be played on the platform of your choice
Before we start blindly converting discs into files, take a moment to consider where and how the resulting files will be used. You may be interested in converting disc-based content for playback on a specific platform such as a PC, smartphone, portable player, HDTV or game console. Or, you may want to simply archive a disc so that there is no sacrifice in features or quality.
For either scenario, the choice of file format is crucial. An ISO image is perfect for storing a complete copy of a particular disc, and these image files are easily played on a PC or on some stand-alone players. However, that same file may be too large or simply incompatible with a device like a smartphone or game console. Likewise, container or “wrapper” file formats, such as MKV (Matroska) and AVI (Audio Video Interleaved), can comprise any number of encoded audio/video (AV) file formats that may or may not be compatible with a particular player. See the “AV Formats” sidebar on the facing page for our guidance, but as a general rule, if you are unsure of the target platform (or there are several) for your disc collection, you should losslessly archive your media so that you can convert it into whatever file format is desired at a later date.
How to Rip an Audio CD
Sure, you could use iTunes or Windows Media Player to create lossy or lossless encodes of your favourite CD audio tracks. However, if you want to ensure that your rips are 100 per cent error free, then you need an application that supports AccurateRip (www.accuraterip.com), which verifies each ripped track against an internet database that contains data on more than 1.7 million audio discs. AccurateRip is supported by our favourite free and paid ripping applications — Exact Audio Copy (free, www.exactaudiocopy.de) and dBpoweramp Reference ($US38, www.dbpoweramp.com). These programs also support hardware error detection (C2), which helps ensure precise positioning of the drive’s read head in relationship to the CD data track.
One of our favourite ripping applications, dBpoweramp is a multithreaded app that uses AccurateRip technology to ensure perfect rips of your audio CDs.
We’re partial to dBpoweramp Reference for its inclusion of a batch ripper and batch audio-conversion tool, which includes extensive and easily updated audio codec support. The batch audio converter is ideal for tasks such as converting a collection of losslessly encoded FLAC tracks into the Apple Lossless format for your iPhone and into Ogg Vorbis for use with other media players. It’s also superb at finding and filling in metadata, such as artist name, song title and album art information.
Finally, dBpoweramp’s Codec Central website (http://bit.ly/hdKdtd) is the place to go for one-click installations of the most popular audio codecs. To preserve your folder structure when batch-converting an audio archive into other formats, set the output folder to the desired destination (your work folder), and then select Dynamic Naming and change it to: [origpath] [origfilename] .
How to Rip DVD Video
Nowadays, decrypting DVD-Video is a painless task and the antiripping technology that some discs employ is easily circumvented. Tools such as the free DVDFab HD Decrypter (www.dvdfab.com/hd-decrypter.htm) and AnyDVD HD ($US110 for a two-year subscription, www.slysoft.com/en/anydvdhd.html) offer one-click options for dumping the contents of a DVD-Video disc to a folder on a hard drive. This folder structure can then be written back to a recordable DVD or to an ISO image file using a free tool like ImgBurn (www.imgburn.com).
You can also convert ripped DVDs to various file formats using freely available encoding tools such as HandBrake (http://handbrake.fr/) or RipBot264 (http://bit.ly/h3j6h8). HandBrake’s native support of DVD file folders makes it slightly easier to use, but RipBot264 can get the job done by pointing the program at the main movie’s first VOB file (they are approximately 1GB) located in the VIDEO_TS folder — it will find and assimilate any related VOB files automagically.
One particularly handy feature of AnyDVD is its ability to bypass DVD encryption without actually ripping the disc. With AnyDVD running in the background, the contents of the inserted DVD can be accessed directly by any of the aforementioned tools. AnyDVD also offers the option to rip a DVD directly to an ISO image file that can be mounted in a virtual DVD drive such as SlySoft’s free Virtual CloneDrive program (http://bit.ly/fe4deK). When used in combination with the My Movies for WMC program (www.mymovies.dk), you’ll be able to pull down your entire movie archive in a stream. Some multimedia player programs such as VLC (www.videolan.org) and even some stand-alone players support the playback of DVD ISO files.
When backing up a DVD movie to a single-layer DVD-R (DVD5), you can improve picture quality by ripping only the main movie, deselecting unneeded audio tracks (stereo instead of 5.1-channel audio helps, too), and deselecting captioning information (also known as “Subpicture”). Finally, there is no reason to transcode DVD video into a resolution greater than 720×480 (the format’s native resolution).
How to Rip Blu-ray Video
Blu-ray’s constantly updated protection schemes require ripping software that’s regularly updated. Once again, we’ll use DVDFab and AnyDVD HD. One thing we particularly like about AnyDVD is that it allows for the playback of Blu-ray movies on PCs that lack a protected video path. One convenience here is that the main movie on a BD often consists of a single .m2ts file located in the …/BDMV/STREAM/ subdirectory. Sort by file size and it’s usually the largest one. Once decrypted, this .m2ts file can be transcoded with free tools like HandBrake or RipBot264.
The largest file in a Blu-ray’s STREAM folder is the main movie title.
Ripping a 3D Blu-ray movie is a little trickier. A complete ISO image of a 3D Blu-ray movie will play just fine on a PC running 3D-compatible player software, such as ArcSoft’s TotalMedia theatre 5, Corel’s WinDVD 2010, or CyberLink’s PowerDVD 10. If you are interested in transcoding 3D Blu-ray video, DVDFab offers paid options for one-click conversions into a variety of popular file formats. (The feature is available to try free for 30 days, but it will watermark the output.)
Don’t spend extra for Blu-ray movies that include a “digital copy” for use with compatible mobile devices. You can often achieve better picture quality, a smaller-size file, and wider compatibility by transcoding the movie’s .m2ts file yourself. HandBrake has a convenient selection of encoder presets that are particularly great at this task. The program’s picture tab allows you to adjust the output resolution of your encodes, and the video tab provides quality controls that can be used to target a specific bitrate or file size.
If you plan to transcode Blu-ray video into a highly compressed format to save storage space, plan on reducing the video resolution as well-a 35GB Blu-ray rip at 1080p converts quite nicely into a much smaller 720p file. Make sure to set the width to 1280 under the picture-size setting.
Choosing the Right File Format
Not surprisingly, choosing the right AV file formats to convert to largely depends on the devices you own. Here’s some general guidance based on common usage.
Mobile Devices
Video: The MPEG-4/H.264 AV formats are ideal for most mobile devices, including the iPhone and Android-based products. When possible, encode using H.264 (MPEG-4 AVC/Part 10) video and two-channel LC (Low Complexity) AAC audio, as this combination provides good quality and compression and wide support. Common H.264 container file extensions include .mp4, .m4v and .mov.
Audio: Android-based phones lack native support for most popular lossless audio formats (WAV is not a useful option). Android devices do, however, support the free Ogg Vorbis format, which produces superior musical reproduction vs other lossy formats using similar bitrates-particularly when encoding with lossless channel coupling (Ogg quality-level “-q 6” or greater). For iPhone/iPad audio, Apple Lossless sounds the best, but you can save storage space by going with high-bitrate LC AAC.
DLNA
The only required formats in the spec are JPG pictures, two-channel LPCM audio, and MPEG-2 video. Several optional media formats are also available, and MPEG-4 with AAC audio is becoming increasingly popular. DLNA for mobile devices requires the support of MPEG-4 AVC (aka H.264) video with LC AAC audio-a format easily created with free tools like HandBrake.
Xbox 360
We recommend AVI and DivX-these containers are the only formats that support Dolby Digital audio (2.0 and 5.1 channel). Using H.264, the encoding resolution can go as high as 1080p30 at up to 10Mb/s, but audio must be two-channel LC AAC.
PlayStation 3
The PS3’s lack of support for DTS audio (in files) makes playback of some ripped content problematic. Transcoding DTS audio into two-channel LC AAC ensures excellent compatibility, but surround sound (5.1 channel) is no longer an option. Files with AC3 audio (Dolby Digital) are playable on the PS3, but the video must be transcoded into MPEG-2 if not already in that format. Another workaround for these types of files is to use a real-time transcoder application such as PS3 Media Server.
Store Your Media Library
How to choose the right storage method and make the most of the hardware you already have on hand
As hardware prices continue to fall, cost is no longer the barrier between you and obscene amounts of storage. The real puzzle is choosing a storage method that makes your library accessible to other devices on your network. Let’s take a look at different options for both storing your media and sharing it throughout your network.
Share Files on Your PC
Right or wrong, the classic method of sharing your media across multiple devices is the good old-fashioned file share. Windows 7 does a better job of making this user friendly with HomeGroups. Using a HomeGroup, you can create a relationship between multiple Windows 7 PCs using a single password. This allows you to share your music, pictures, and videos among multiple computers with ease. In conjunction with Windows Media Player, a HomeGroup also allows you to turn your PC into a DLNA (Digital Living Network Alliance) digital media server (DMS), making your content available to a wide range of playback devices, such as your gaming system or TV.
Windows 7 can be easily configured to share your media library to other DLNA-capable devices on your network.
HomeGroups can be managed in the Network and Sharing centre control panel. In addition to allowing access to your digital media, HomeGroups also handle your Document and Printer sharing. In the Media Streaming options you can choose what types of media you share and what devices on your network are allowed to access your media library.
If you’re serious about streaming your PC-based media, be sure to familiarize yourself with the Stream menu in Windows Media Player 12. You can use it to allow devices to play media from your local hard drive, and you can easily allow remote control of Windows Media Player itself. (For Windows XP or Vista users, the same functionality can be achieved using Windows Media Player 11 or 12, though the configuration process isn’t as intuitive.)
Using your PC as your media server will also allow you to use advanced features that may not be possible using other solutions. For example, one of the optional fields for music and video is the Parental Rating field. Assuming these fields are populated, you can control which playback devices on your network can access which ratings. For example, you could specify that the kids’ computer could only see media with a maximum rating of PG-13, while the home theatre system could play any rating. Media that doesn’t fit your prescribed rating simply doesn’t appear in the library.
If you have children and/or sensitive content, use the advanced settings to specify media types and potential ratings.
Network Attached Storage (NAS)
A NAS appliance is one of the most cost-effective methods for centralising your media. For a few hundred dollars you can purchase a solution that will provide you with multiple terabytes of storage. If you’re really serious about streaming your media to your TV or home theatre, you should focus on NAS options that are certified DLNA digital media servers.
A NAS that is a certified digital media server will perform all of the heavy lifting in terms of indexing your media and creating a library structure that is accessible from other DLNA devices on your network. Promise Technology’s SmartStor Zero ($US290, www.promise.com) offers two drive bays and effortless setup and installation. Performance is snappy-the included Gigabit Ethernet coupled with multiple RAID options (assuming you’re using multiple drives) make it a solid choice in our book. Other NAS devices we’ve reviewed favourably over the last year include Seagate’s BlackArmor NAS 220 (http://bit.ly/baeM6j) and Qnap’s TS-239 Pro Turbo NAS (http://bit.ly/fX3WUD).
One other feature we like about NAS is that many manufacturers have partnered with established cloud services or have created their own means of allowing you to access your media from anywhere via laptops, phones and tablets.
Windows Home Server
Our only real concern regarding WHS 2011, beyond the removal of the Drive Extender feature, is support. In light of HP’s decision to cancel its WHS product line, will Microsoft continue to support the OS? Assuming that it does, and assuming that you live in a Windows-centric world, this remains the premium choice for creating and managing a centralised media library.
Users on the network can browse music and video in shared media libraries without leaving Windows Media Player.
Native support for DLNA comes in Windows Home Server 2011, but there are a plethora of software tools for folks using previous versions. Additionally, Windows Home Server allows you to configure access from outside your network, giving you the ability to download and even stream content located on your server.
Most off-the-shelf Windows Home Servers come with a preinstalled DLNA stack, making configuration a breeze. If you already have or are rolling your own custom-built server, there are several options for making your library accessible to DLNA devices; Twonky Server ($US20, www.twonky.com) and TVersity (free, www.tversity.com) are our recommendations for turning your Home Server into a DMS.
Windows Home Server 2011 features a built-in DLNA digital media server. Options pertaining to video quality and shared file types are configurable.
The biggest upside to using Windows Home Server as your centralised storage solution is how well it integrates with the Windows 7 computers that you already have in place. Windows Home Server will actually integrate into the Libraries feature of Windows 7, making it easy for anyone to add music or pictures to your library without having to learn a new UI. An added bonus is that if you’re using Windows Media Center, all of your recorded TV can also be automatically dropped onto your home server, making storage and sharing of new TV episodes an automated process.
For detailed instructions on building out a home server, point your browser to http://bit.ly/fyoHmG.
How Do You Organise 4TB of Data? Diligently!
Regardless of your storage method, you’ll initially want to spend some time making sure you have an optimised file hierarchy for your library. When accessing your content through DLNA, your media will be structured automatically using metadata such as ID3 tags, but you’ll want to perform some fine-tuning in order to make sure everything is easy to locate. There may also be situations where you simply want to move the files and folders around, in which case you will want to have everything organised in a uniform manner.
How you use file names and folder structure is up to your personal preferences, but planning ahead and keeping it consistent is a must. For any sufficiently large collection of files, well-crafted folder hierarchies help keep things organized and accessible. Some examples of optimum folder structures for AV file collections include:
/…/Media/Video/Movies/DVD
/…/Media/Video/Movies/HD
/…/Media/Video/TV
/…/Media/Audio/Music/[File Format] /Artist/Album/Track
It’s also a good idea to create a work folder for your ripped AV output that is separate from your carefully organised archive collection. Things can get messy quickly if a ripper/encoder application hiccups and scatters tracks/files across numerous folders. It’s much easier to contain and clean up such a mess if it is limited to a noncritical work folder.
Stream Your Media
How to share and access your media library from a variety of devices across your network-and beyond!
Here’s where all your hard work, organisation and emphasis on fidelity pays off. TVs, Blu-ray players, PCs, mobile phones and tablets are just a few of the devices that can easily gain access to a DLNA-certified digital media server. The good news is that finding a DLNA device to play your media is a really simple process. These days, most consumer electronic devices support DLNA out of the box, making this a fairly painless process.
DLNA and Why You Should Use It
The primary function of the Digital Living Network Alliance (DLNA), strictly speaking, is to provide a standard method of streaming music, video and pictures to various devices around your home. The DLNA standards specify profiles that fulfil different roles in the streaming process. As an organisation, DLNA members include industry heavyweights such as Microsoft, Sony, Samsung and Panasonic.
Windows Media Player will allow you to play music or video to a DLNA-certified digital media renderer, such as an Xbox 360.
DLNA was spawned from Universal Plug n Play Audio Visual (UPnP AV) and uses web standards such as HTTP, XML and SOAP to move data between devices. The real benefit of the standard is that the technology is open, which means that devices from competing manufacturers will be compatible. Currently, there are more than 9000 DLNA-certified devices with more being added every day. Since DLNA is recognised as an international standard and is backed by the biggest manufacturers of consumer electronic devices in the industry, it’s a safe bet that DLNA will be around for a while.
Optimise Your DLNA Setup
The networking aspect of DLNA may be your biggest technological hurdle in getting everything working effectively. DLNA-certified products are going to have to be networked in order to communicate, and extending your network to your home theatre system can be… trying.
Wireless networking offers convenience, but the trade-off in most cases is reduced performance and stability when compared to a wired network connection. In addition, many DLNA-certified products don’t support wireless networking, so an Ethernet converter or gaming adaptor may be required. Performance on your network can be a key issue with DLNA, especially if you want to stream a video in HD with six channels of audio. To give you an idea of the data involved, the bitrate for DVD quality video is around 9.8Mb/s, while a Blu-ray comes in at around 40Mb/s.
On paper, a 54Mb/s 802.11g network should be enough to handle anything you throw at it, but with interference or distance that number usually drops dramatically.
DLNA Alternatives
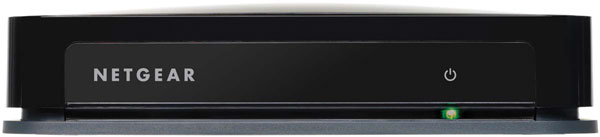
DLNA isn’t a great solution for streaming video from subscription services, and it’s not a technology for mirroring your computer’s display on your HDTV. A better solution for mirroring your display is Intel’s Wireless Display (WiDi) technology. WiDi uses an integrated chip in a compatible laptop to talk wirelessly to an adaptor that is connected to your TV. The requirements for WiDi are strict; the hardware has to be preinstalled in a laptop, and only Netgear and D-Link currently offer adapters.
Testing WiDi with a Sony VIAO EA Series laptop and a Netgear PTV1000 WiDi adaptor revealed the major upside of WiDi-it’s a completely seamless experience. Running the client application on a compatible laptop will scan for available adapters and show you previous connections. Once the adaptor is selected you are only a couple clicks away from displaying your laptop screen on your TV.
Another more affordable option that works surprisingly well is Warpia’s StreamHD product, which uses USB Ultra-Wideband (UWB) to transmit up to a 1080p signal (and digital audio) over line-of-sight distances up to 30 feet. We’ll have a full review next month, but so far we’re impressed with the quality of the wireless signal.
Core Components of DLNA
Once you have your digital media server built and populated with your media library, there are a couple methods for browsing and playing back your media. The most popular role for playing back media from a DMS is that of a digital media player (DMP). With a DMP you can find your server, browse the content library, and select media for playback. Any number of devices can function as a DMP-from popular gaming consoles like Sony’s PS3 and Microsoft’s Xbox 360 to tablets like the iPad to TVs and Blu-ray players. When you use Windows Media Player to browse a media library other than your own, the PC you are browsing with is functioning as a DMP, while the device hosting the library is acting as the DMS.
TOP: A DLNA-certified digital media player is used to browse and play media stored on a digital media server.
BOTTOM: A digital media controller can browse a digital media server, and play music and videos to a digital media renderer.
The other popular scenario with DLNA utilises the digital media server as the source for media, but uses two separate means for selecting and playing the media. A digital media controller (DMC), which could be a PC or a mobile device, browses the server and selects the media. The DMC then sends the music or video to a digital media renderer (DMR) for playback. Classic examples of a DMR would be the Xbox 360 or a DMR-capable HDTV.
Here are some practical examples of DLNA at work:
• Playing Video in Windows Media Player: In Windows Media Player 12, you can quickly and easily browse your locally stored media. Additionally, WMP will recognise DLNA digital media servers located on your network. When using Windows Media Player in Library mode, you can view digital media servers on your network under Other Libraries. From there you can simply drill down in the tree view to select the video you wish to play.
• Playing music to a home theatre receiver: If your home theatre receiver supports DMR functionality, like the Onyko TX-NR807 ($US1000; www.us.onkyo.com) receiver we tested, it’s a cinch to queue a playlist to access within Windows Media Player. Clicking the Play tab at the top of the window will toggle the playlist pane, onto which you can drag music to build your playlist. If your DMR is on the network, the Play To menu at the top of the pane will be enabled. Choosing your receiver from the menu will send your playlist to the DMR. This scenario works equally well with other DMRs, like an Xbox 360.
• Using a mobile device to start a video on your TV: The scenario that will earn you the most geek cred is using a mobile device to play media stored on your digital media server to your DMR-capable TV. Using free DLNA software like Fusion Stream for iPhone/iPad (itunes.apple.com) or Skifta for Android (www.sifta.com), you can select and browse digital media servers on your network. After choosing a video, the software-based digital media controller then allows you to choose the digital media renderer on which to play the video.
• Displaying pictures from your phone to a TV: Many of us have experienced the situation where we have pictures located on our phone that we want to share with a group of people. With a DMR-capable TV, such as the Samsung Series 7 HDTV, you can simply share the pictures from your phone or tablet to the big screen, making it possible for the whole family to view your handiwork. One hurdle is the limited number of TVs that function as a digital media renderer, as opposed to those supporting the digital media player role. Skifta for Android allows you to get around this by serving as an intermediary DMS, so you can browse the mobile device itself using a TV that supports the DMP role. Watching video on your phone or tablet How often do you have a desire to watch a movie, only to find that someone else is using the TV? As an alternative, you can use a tablet to browse the digital media server that is hosting your videos, select a movie, and begin watching it on the tablet’s screen. Some DLNA software solutions will even allow you to download videos or music for later use offline.
DLNA-Certified Products
With upwards of 9000 DLNA-certified products, it can be a chore to find devices that fulfil the different roles you need. DLNA has a couple of tools to help with this process. First, DLNA-certified products all carry the DLNA logo. Many products will support DLNA without being officially certified, though in the case of computers and mobile devices, the certification is based on software capabilities and is generally only an indication that the device manufacturer pursued the certification.
In conjunction with an Intel Wireless Display–capable laptop, Netgear’s PTV1000 adaptor will allow you to mirror your PCs display to your HDTV.
DLNA also has a web-based tool allowing you to search for specific devices based on manufacturer, role, and model. This database lists every DLNA-certified product and what roles and media types the device supports.
You now only have one very important step left: Kick back and enjoy your media!
5 Ways to Access Your Media Library from the Internet
1. Windows Home Server
The introduction of a Windows Home Server onto your network introduces a plethora of additional functionality. One of the coolest features is the ability to download or stream all of the documents and media stored on your home server from the web. Beyond that, Windows Home Server will even facilitate a Remote Desktop session to any capable member PC on the network, all from a single web page.
$US100, http://bit.ly/fm9fKq
2. PogoPlug
It’s really hard to describe the PogoPlug in just a few sentences, but essentially it’s a cloud-centric NAS appliance. The PogoPlug hardware itself doesn’t contain storage, but that is easily remedied with the four USB ports. The free My PogoPlug service will provide you with a web-based method for accessing your files and also makes sharing those files with others a breeze. Free PogoPlug mobile applications are available for iOS, Android, Blackberry, and WebOS devices.
$US99, www.pogoplug.com
3. Orb Live
Orb Live is based on a software install on your PC called Orb Caster. In addition to indexing the media files on your PC and sharing them to your mobile device, Orb will allow you to watch live TV on your iPhone or Android device through a connected PC with a TV tuner card. Orb Live can also transcribe ESPN3 and other internet TV so that it’s watchable on your phone and provide you with live access to compatible webcams that are attached to the host PC. An Orb plugin is available for Netgear’s ReadyNAS Ultra line of products. Mobile apps come in both free versions with limited functionality and full versions for $US9.99. Yes, it’s awesome.
Free ($US10 for mobile apps), www.orb.com/orblive
4. Tonido
Blending the best of both worlds, Tonido offers both hardware and software solutions to take your media to your own personal cloud. Most of the applications are free, including the mobile clients. The hardware solution is a low-powered home server dubbed the TonidoPlug, which features a single USB port, and costs $US99.
Free, www.tonido.com
5. Skifta
If you use an Android device, Skifta is an absolute must-have. Not only does Skifta function as a DLNA-certified digital media controller, but in conjunction with a PC-based application, it will allow you to remotely connect and stream content from any DLNA digital media server on your home network. Netgear also shows Skifta some love with an add-on for ReadyNAS Ultra appliances. To top it all off, Skifta lets you push your remote stream to a digital media renderer wherever you are.
Free, www.skifta.com
Maximum PC brings you the latest in PC news, reviews and how-tos.